
This page explains how to integrate an OIDC-based Identity Provider (IdP) with TrustBuilder. Your external application will act as the IdP and TrustBuilder will act as the Service Provider (SP). The steps below will guide you through integrating the IdP to TrustBuilder so that users can authenticate through it.
To integrate an OIDC-based IdP:
-
Login to the Admin Portal.
-
Go to Integrations > Identity Providers.
-
Click on + Set up identity provider.
-
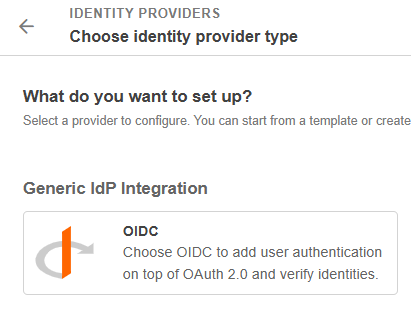
Select OIDC.
-
Enter a name and an optional description. You can also import a logo.
-
Optional - Define how user claims are retrieved from the identity provider.
-
Add Scopes if required. You can add standard OIDC scopes or define custom scopes according to your Identity Provider configuration.
-
Select the source where user claims are retrieved from:
-
ID token → Claims included in the ID token.
-
User info → Claims returned by the UserInfo endpoint.
-
All claim sources → Claims retrieved from both the ID token and UserInfo endpoint.
-
-
-
Select the subject which is the user attribute that uniquely identifies the user.
-
email: the user's email address will be used to authenticate the principal. -
user_id: the user’s unique identifier in Trustbuilder will be used to authenticate the principal. -
username: the user's username will be used to authenticate the principal. -
{custom_attribute}: you can select a custom user attribute, as long as it is unique and it is added in the User Profile Definition. See User Attributes
-
-
Optional - Enter a Custom subject claim. This is the name of the OIDC claim that contains the subject identifier. If left empty, the standard
subclaim is used.
Use this option only if the identity provider stores the user's unique identifier in a claim other thansub. The configured claim should contain a unique and stable value for each user. -
Optional - Enable Just-In-Time Provisioning.
When enabled, Just-In-Time Provisioning automatically creates a user account after their first successful authentication through this Identity Provider. The user account is then updated at each subsequent authentication if needed.-
To map attributes provided by the Identity Provider to TrustBuilder user attributes:
-
Click + Add mapping.
-
Select a TrustBuilder user attribute.
Each TrustBuilder user attribute can only be mapped once.
-
Enter the corresponding IdP claim name.
⚠️ Make sure that:
- the claim value matches the expected format and constraints of the TrustBuilder attribute, including its required and uniqueness constraints (if applicable)
- the claim is included in the requested scopes configured above (see step 6). -
Click Add.
-
-
-
The built-in Phone number attributes must be provided as a numeric string in E.164 format, without spaces. This also applies to custom attributes with the SMS type.
-
For multi-value attributes, indicate whether the IdP claim uses an array or a space-separated string format. For example:
-
Array:
["value1", "value2", "value3"] -
Space-separated string:
"value1 value2 value3"
-
-
JSON attributes are not supported.
-
Enter the issuer URI.
To find it, open your IdP’s discovery document athttps://<your-idp>/.well-known/openid-configurationand look for the value of the issuer field.
Example:https://<your-idp>/ -
Provide the Client ID and the Client Secret. They are used to authenticate an application during exchanges with an authorization server.
-
Choose how TrustBuilder sends its client credentials to the IdP:
-
Client Secret POST → credentials are sent in the body of the POST request (default).
-
Client Secret Basic → credentials are sent in the HTTP Authorization header.
-
PKCE is enabled by default to prevent interception of authorization codes. You can disable it in special cases (confidential back-end applications or legacy IdPs that do not support PKCE) but this is not recommended.
-
-
Click Create.
The Identity Provider integration is now configured.
Redirect URI
In Settings tab, you will find the Redirect URI which should be added in the Identity Provider configuration as an allowed redirect URI.