Wallix Access Manager - SAML integration
Prerequisite
You should have created an "Organisation" on your Wallix AM or use the default "global" organisation (the latter is not recommended).
This organisation will be used for your SAML configuration, it will be displayed in your HTTPS portal address "https://mywallix.address.com/wabam/***organisation**?"
Creating the inWebo SAML connector
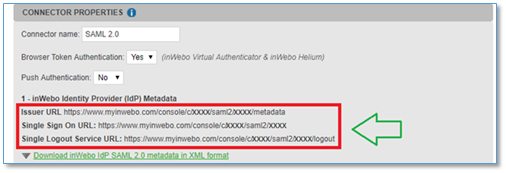
Downloading inWebo SAML 2.0 metadata needed for your Wallix AM configuration

Add a SAML 2.0 connector in your administration console for your service.
Ignore the “Service provider” configuration and click the ADD button to add the connector without any settings
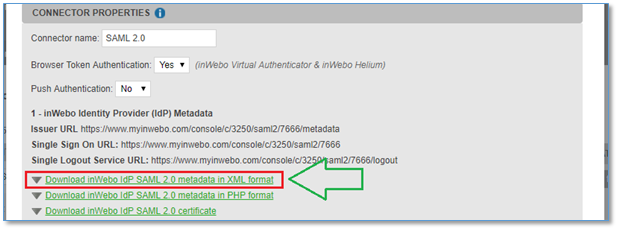
Download inWebo Idp SAML 2.0 metadata in XML format
Wallix Access Manager configuration
In the Wallix AM, select the SAML Identity Providers option available under the Configuration tab.
Click on the +Add button, located at the top-right hand corner of the page, to add a new identity provider.
Completing the "Service Provider" tab
Select the "service provider" tab
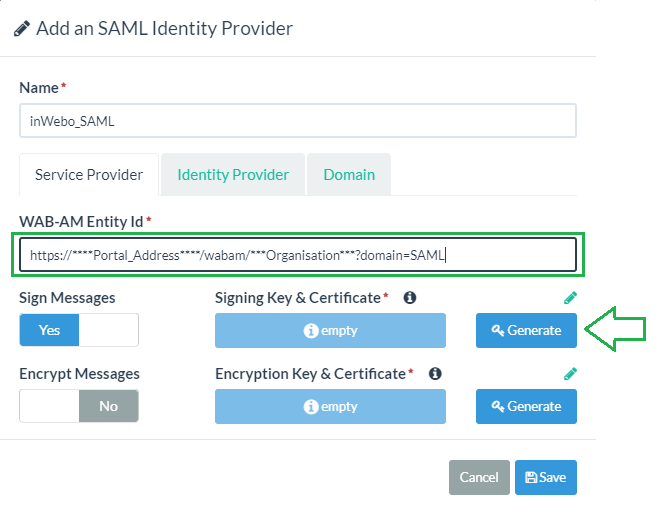
In the field "WAB-AM Entity Id", indicate your future WAB Access Manager portal Address :
ex: https://mywallix.address.com/wabam/***organisation**?domain=SAML
( ***organisation*** refers to a previously created "organisation" on your WAB Access Manager,
and domain "SAML" will be precised in the "Domain" Tab of this configuration.)Set the Sign Messages option to “YES” and generate the Signing Key & Certificate
Uploading the inWebo metadata file in the "Identity Provider" tab
Next, select the Identity Provider tab to configure inWebo identity provider settings.
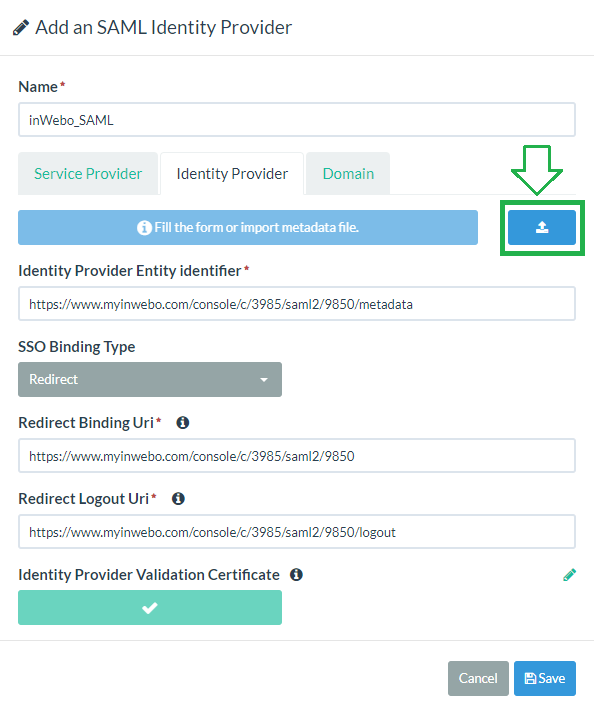
Upload IdP inWebo Metadata by clicking on the Upload icon as shown above
After importing inWebo metadata the following information should be imported from the inWebo Metadata and match the SAML 2.0 connector / information displayed in the inWebo administration console
Identity Provider Entity Identifier “https://www.myinwebo.com/console/c/XXXXXX/saml2/XXXXXX/metadata”
POST Binding Uri – https://www.myinwebo.com/console/c/XXXXXX/saml2/XXXXXX/”
POST Logout Uri – https://www.myinwebo.com/console/c/XXXXXX/saml2/XXXXXX/logout”
Select Redirect binding from "SSO Binding Type" option.
Completing the "Domain" tab
Select the domain tab to configure the SAML domain and provisioning attributes
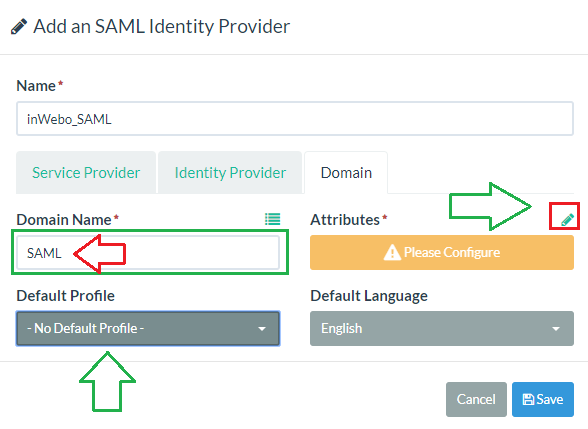
Fill the field Domain Name, this is the domain that will be indicated in the HTTPS address. It must match the domain provided in the "WAB-AM Entity Id" configuration
(in the above configuration example "WAB-AM Entity Id" the domain is set to SAML)In the Default Profile select the default profile the SAML user will have (Refers to the profiles configured on your WAB-AM Configuration/Profiles)
Attributes – Click on the Pencil icon to add provisioning attributes settings (see below)
SAML Attributes configuration
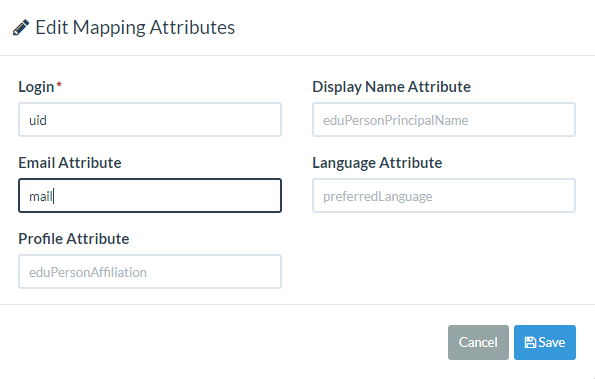
For Login Attribute select "uid" or "login"
For Email attribute select "mail"
You can configure a Profile Attribute to be provided by inWebo (ex : wabam_profile) otherwise all users will use the "Default Profile" configured in the previous step
These attributes must match the inWebo Administration console SAML connector configuration that will be done in the following steps.
Click the "Save" button twice when you have completed the configuration.
Downloading Service provider Metadata from your Wallix AM
The SP metadata file can be downloaded once the SAML Identity Provider entity has been saved. Edit the SAML Identity Provider you just created and click the Download button in the Service Provider tab.
Completing inWebo SAML connector configuration
Updating Wallix AM SP metadata
On the inWebo SAML 2.0 configuration connector,
Copy/paste the XML SP metadata you downloaded from your Wallix AM, in the section 2 of the inWebo SAML 2.0 connector configuration:
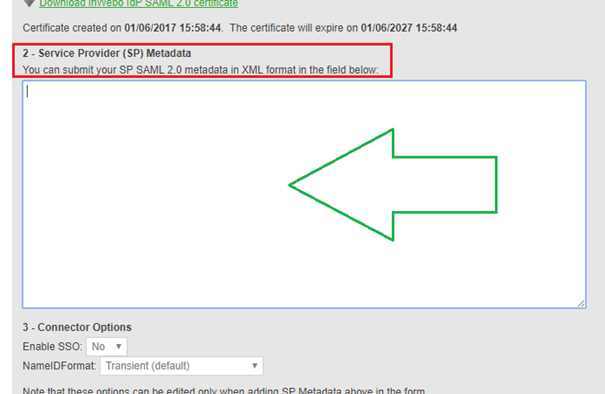
Click Update
InWebo Attributes configuration

Complete your SAML configuration with the same attributes entered in your Wallix AM Attributes configuration.
If you want inWebo to provide the user profile then add another attribute (ex: wabam_profile) to return the Attribute Value based on "User groups" or "User extrafield".
Click Update and close your inWebo connector configuration.
Create an inWebo Secure Site
On Secure Site tab click "Add a Secure Site of type ..." and choose from the list the SAML 2.0 connector you just created.
Choose a name and configure "Called URL" to be your "WAB-AM Entity ID" configured above.

Testing the SAML access
You service will be available at the address identified as shown above "Called URL":
https://**************/wabam/organisation?domain=SAML
You'll be directed to MyinWebo.com then
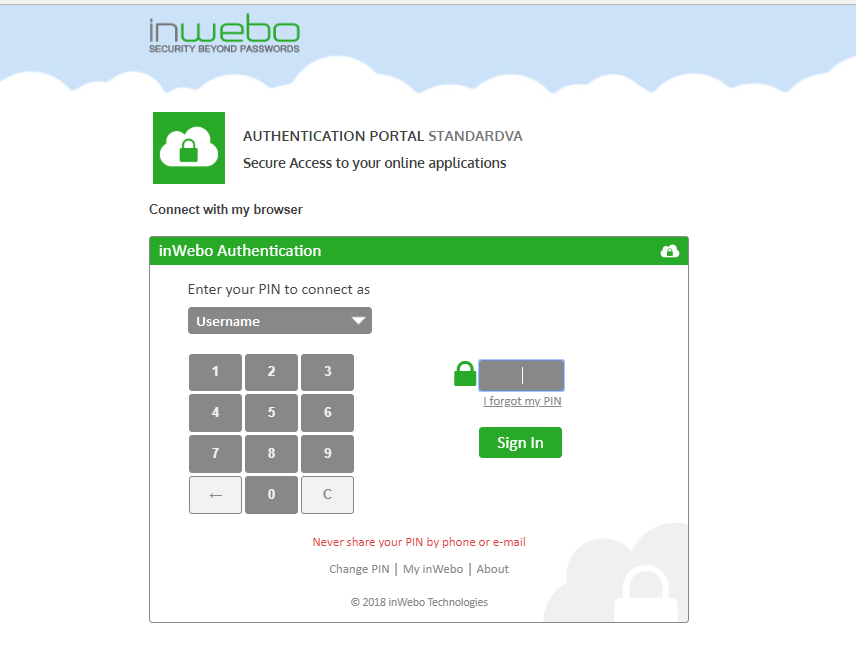
With a valid authentication you'll access the Wab Access manager
