Pulse Connect Secure SAML configuration
Prerequisite
Downloading inWebo SAML 2.0 metadata for your service
Connect to you inWebo Service Administration console

Add a SAML 2.O connector in your administration console for your service.
Ignore the “Service provider” configuration and ADD the connector without any settings

Edit the SAML 2.0 connector Settings, with the “Pencil” icon.
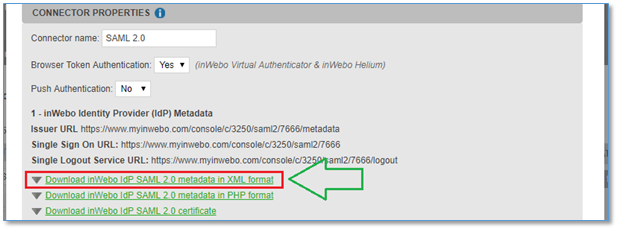
Download inWebo Idp SAML 2.0 metadata in XML format
Configuring the Connect Secure appliance
Pulse Secure system configuration
Open your Connect Secure administration console,
in the top menu, select SYSTEM > configuration > SAML
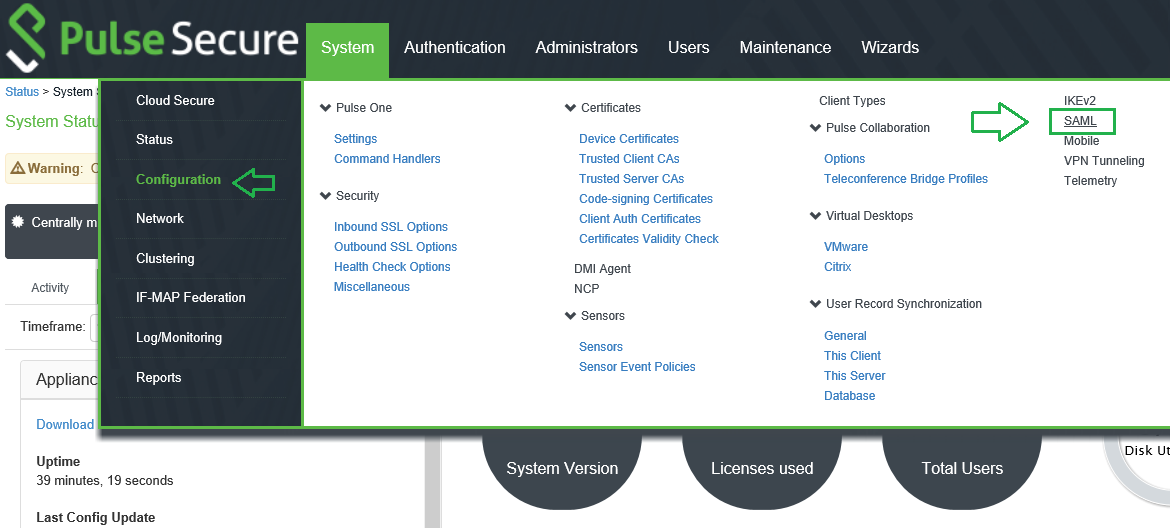
FQDN settings Pulse Secure settings
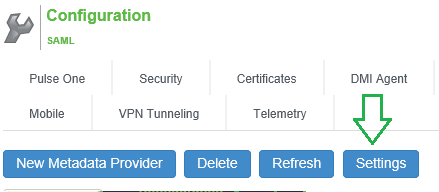
First select "Settings"
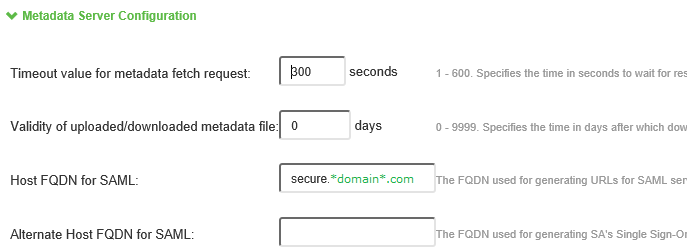
Provide your Host FQDN designation
Then click "Save Changes" and after click on "Update Entity Ids"

Creating a new Metadata provider
Return to the "SAML" configuration panel and select "New Metadata Provider"
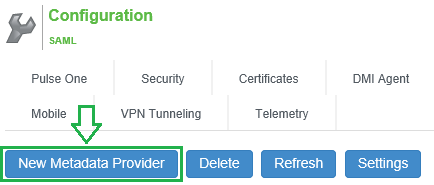
Fill the Metadata informations:
Select "Remote" and give your inWebo Metadata Address (or Local and provide the XML file you download from the inWebo administration console )
Check "Accept Unsigned Metadata"
Check "Identity Provider" as role

Then Click "Save Changes"
Creating a SAML Authentication Server
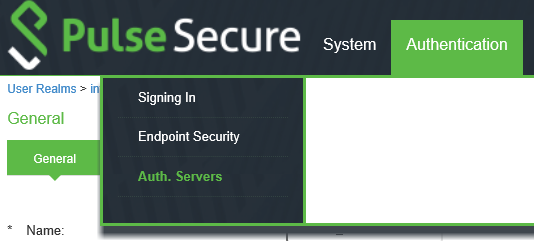
in the top menu, select Authentication > Auth. Servers >
On the Authentication servers page, at the top of the page select : "SAML Server" in the drop down list and click on "New Server..."
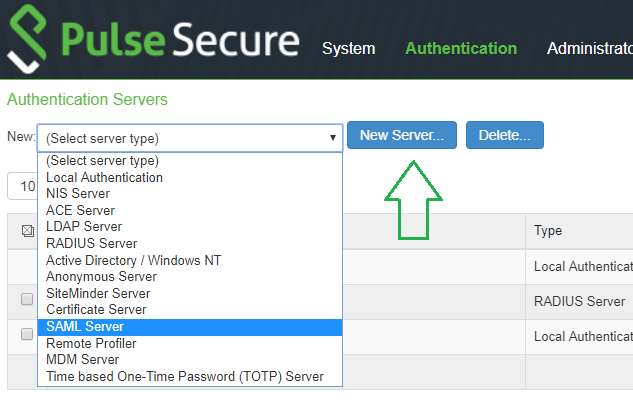
On the New SAML Server page:
Filling Authentication server information:
For the first part :
Fill the Server Name
Check "Metadata" as configuration mode
And select the preconfigured inWebo Metadata IDP
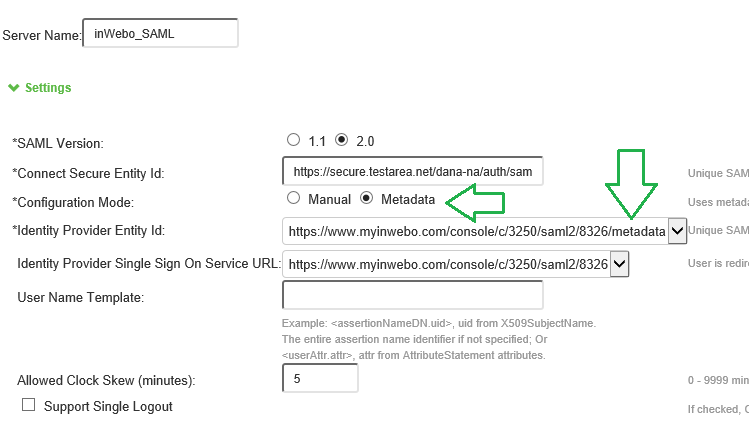
For the second part:
if not selected, select inWebo certificate "www.myinwebo.com"
Select the SP Metadata Validity time in days for your service (999)
Click on "Save Changes"
Open the new server you just have created, and go to the bottom of the page

Click on "Download Metadata" to download the metadata of your Secure access. (previously grayed out)
Creating your Secure Access / Private portal
Creating the User Realm for this portal
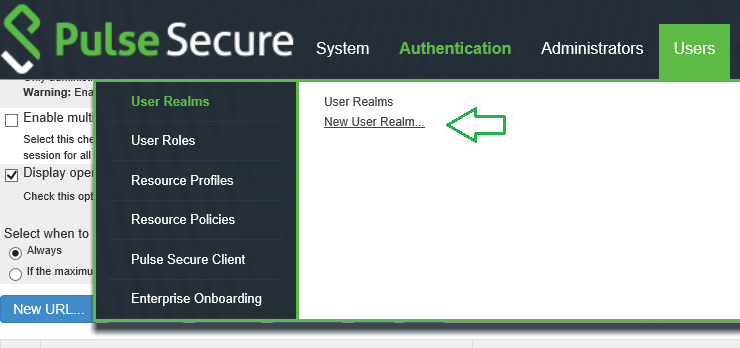
in the top menu, select Users > User Realms > New User Realm...
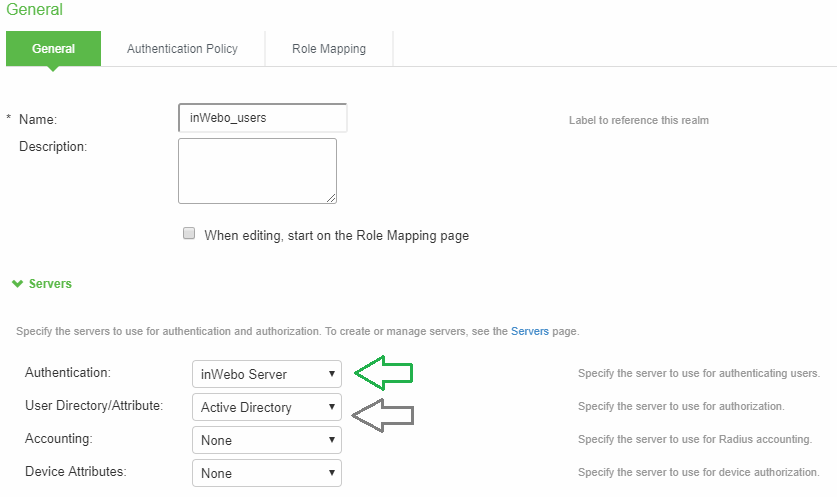
Select your user Realm or create a new one and fill his Name
And select the inWebo server you created as Authentication
If you use a User directory/Attribute select an LDAP (here Active Directory)
Click "Save Changes"
Warning
Please Do not forget complete the "Role mapping" of this inWebo "User Realm" to enable the access you want to your ressources.
Creating the Private portal
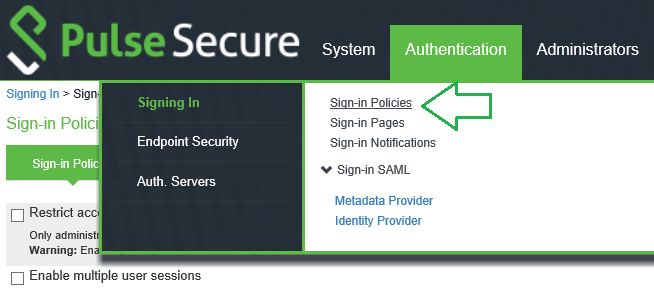
Creating a New URL for your private portal
Select "New URL..."

Fill the path of your authentication portal
Check "User picks from a list of authentication realms"
Select the Realm of your users
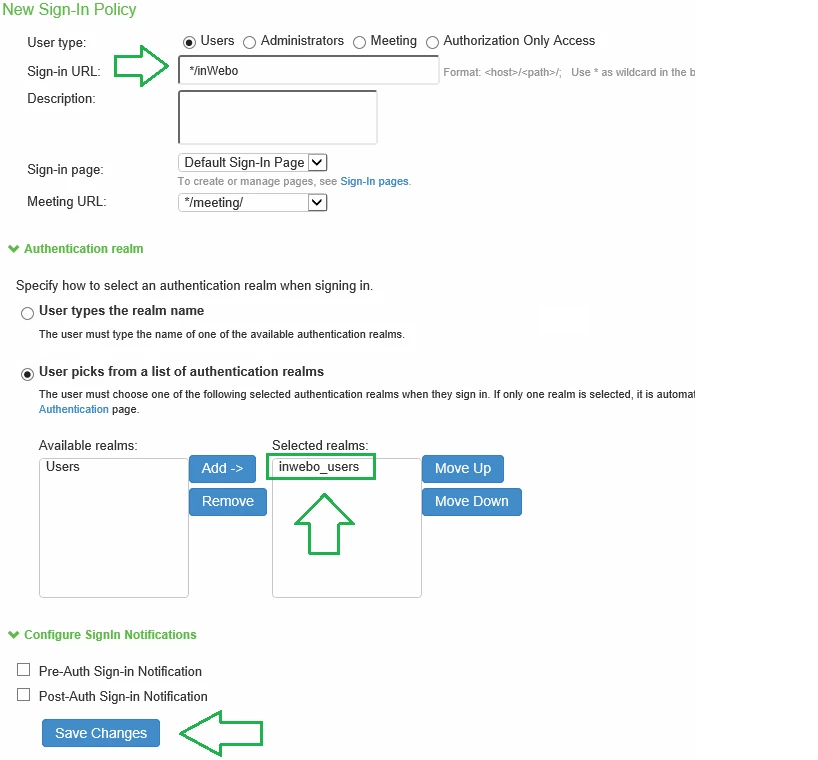
Click on "Save Changes"
Completing inWebo SAML connector configuration
Uploading Pulse SP metadata
On the inWebo SAML 2.0 configuration connector,
Copy/paste the XML SP metadata you downloaded from your Pulse Secure, when creating the SAML Authentication server:
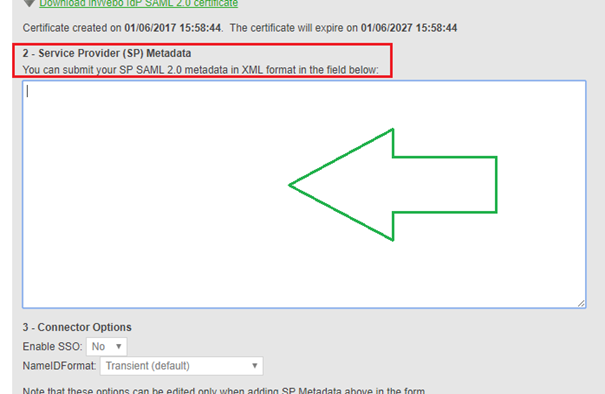
Click Update
In the connector Options section
Select :
Enable SSo : NO
NameIDFormat: Persistent
NameID value (NameIDAttribute):User login
Create an inWebo Secure Site
On Secure Site tab click "Add a Secure Site of type ..." and choose from the list the SAML 2.0 connector you just created.
Choose a name and configure "Called URL" to be your "Pulse inWebo URL" configured above.

Testing the SAML access
You service will be available at the address identified as shown above "Called URL":
https://****pulse_Address*******/inWebo_domain
You should be automatically forwarded to inWebo for Authentication before accessing your service.
