Microsoft Entra ID integration with EAM
Microsoft EAM (External Authentication Methods) is an upcoming feature in Microsoft Entra ID (formerly Azure AD). It allows organizations to integrate their preferred multifactor authentication (MFA) solutions directly with Entra ID. This feature aims at replacing Custom Controls, providing enhanced capabilities and easier management. External Authentication Methods enable seamless integration of third-party MFA providers, offering the same management experience as built-in methods and supporting various Entra ID use cases.
Recommendations
“Custom Controls” and “External Authentication Method“ can operate in parallel to allow migration.
Microsoft recommendations
Admins are recommended to create parallel set of Conditional Access policies during this migration period. The new policy can be tested first with a subset of users. The test group would be excluded from the policy that requires the custom controls and included in the policy that requires multifactor authentication. Once the admin is comfortable with the policy requiring multifactor authentication via the external authentication method, the policy configured for custom controls can be moved to “off”.
More information from Microsoft can be found here Using Custom Control and EAM in parallelTrustBuilder recommendations
We recommend that you create a new connector for the EAM configuration.
Prerequisites
Integrating TrustBuilder with Microsoft Entra ID EAM feature requires:
at least a Microsoft Entra ID P1 license
a TrustBuilder MFA admin account
Configuration
The configuration steps are the following:
Configure a connector in TrustBuilder
Register an application in Entra ID
Add TrustBuilder as a External Authentication Method (EAM) in Entra ID
Configure a conditional access policy in Entra ID
Step 1 - Configure a connector in TrustBuilder
The EAM compatibility is included in OIDC Azure AD connectors created after June 20, 2024.
Create and configure a connector in TrustBuilder:
Log in to TrustBuilder MFA Admin console.
Go to Secure Sites tab.
Choose to create a connector of type “OIDC Azure AD”.
Note that the connector is still named Azure AD, but refers to Entra ID.Fill in the fields:
Connector name: enter a connector name.
Client ID: enter a value.
This is used to link the connector to EAM in Entra ID.Login type: select the login type that will be used during user authentication process.
 Entra ID uses the UPN (UserPrincipalName) attribute as a login for the authentication process. To communicate with TrustBuilder, this requires the TrustBuilder MFA user logins to be in UPN format (e.g. name.firstname@domain.com). The login type value must match the Entra ID UPN value.
Authentication URL: Select the default authentication method to use on the authentication page served by TrustBuilder:
https://ult-inwebo.com/authentication-oidc/va → The first authentication option presented to users will be a page embedding Virtual Authenticator (VA).
https://ult-inwebo.com/authentication-oidc/helium → The first authentication option presented to users will be a page embedding Helium.
https://ult-inwebo.com/authentication-oidc/neon → The first authentication option presented to users will be a page embedding mAccess Web.
https://ult-inwebo.com/authentication-oidc/authenticator → Push notifications with Authenticator app will be presented to users as an authentication method.
https://ult-inwebo.com/authentication-oidc/authenticator-with-qrcode → QR code authentication with Authenticator app will be presented to users as an authentication method
More information about QR code authentication methodOther page… → You can use a custom page
Click on Add to create the Azure AD connector.
A discovery URL has been automatically generated and is displayed at the top of the connector properties. You will need this information in Entra ID to connect the application to TrustBuilder.
Step 2 - Register an application in Entra ID
Register an application in Entra ID and connect it to TrustBuilder:
Log in to Microsoft Entra admin center.
Go to App registration > + New registration.

Define a name and set the supported account types to "Accounts in any organizational directory (Any Entra ID directory - Multitenant)".
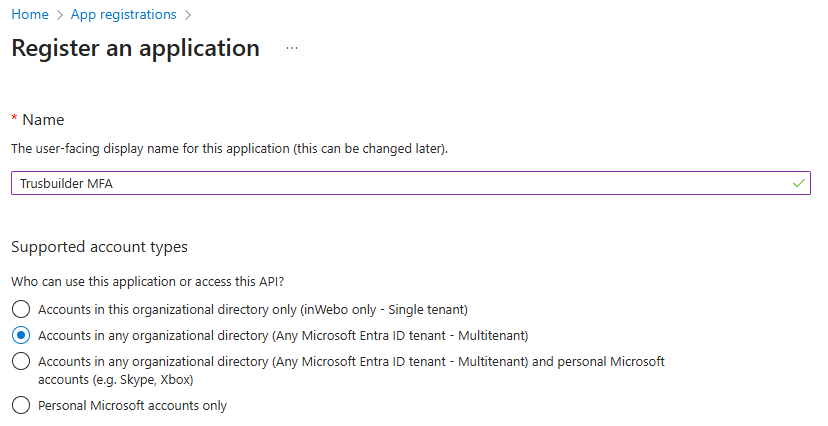
In the Redirect URI section:
Select Web platform,
Paste the redirect URI.
You can retrieve the redirect URI value from TrustBuilder MFA admin console, in the connector:Copy the Discovery URL (see Step 1.6) and paste it in your browser.
Search for the authorization endpoint. It ends with
/authorize.
E.g:https://connect.myinwebo.com/[YOUR-CONNECTOR-ALIAS]/authorizeCopy and paste the authorization endpoint.
Click on Register.
Once the app is created in Entra ID, you will find information in the Essentials section.
Keep the Application ID handy, as you'll need it later to configure your EAM.
Configure “upn” as an optional claim:
Go to Token configuration tab > + Add optional claim.
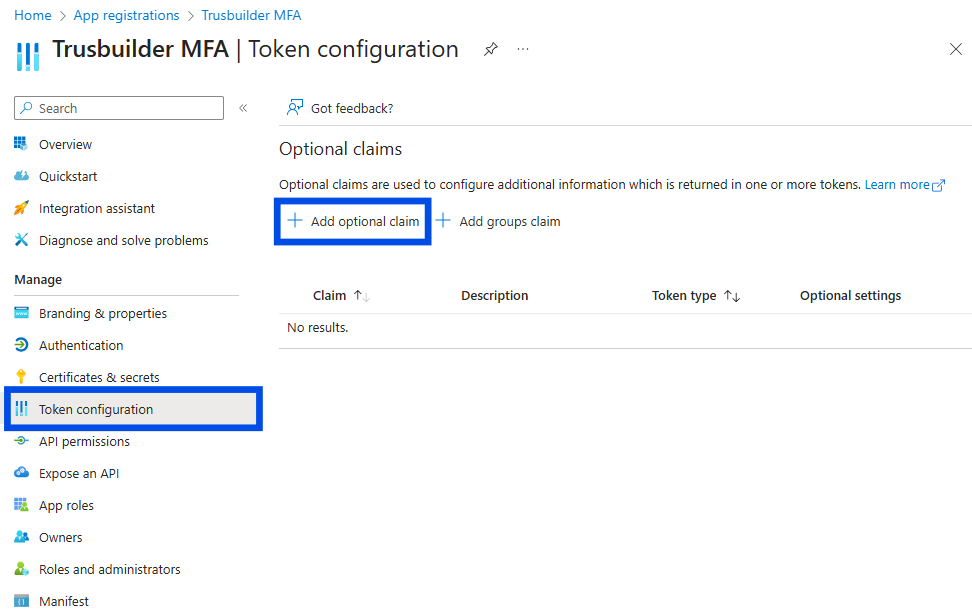
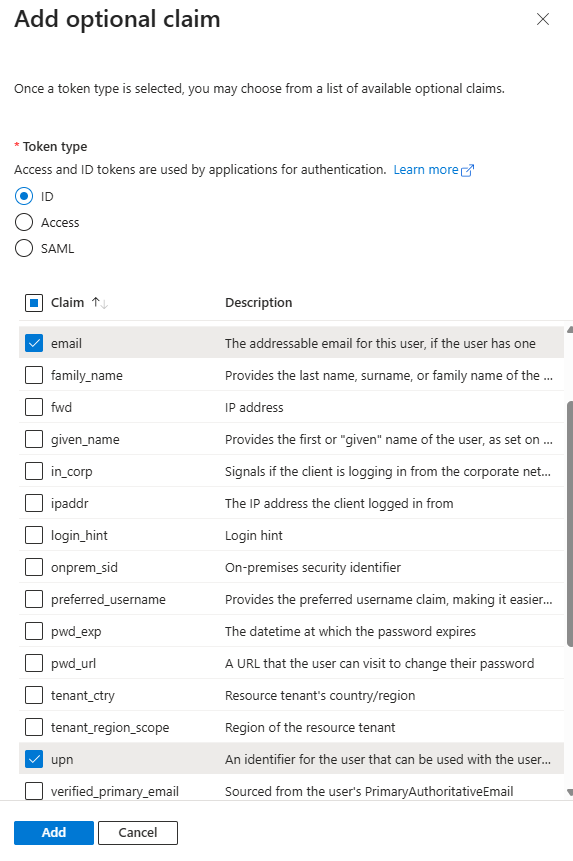
Select ID for an ID Token.
Select “upn” and “email”.
Click on Add.
If prompted, we recommend granting permission to the api now. Otherwise, you will have to do it later and it will be less simple.

Verify the following elements:
Verify there is no scope published.
Check no scope is defined
Step 3 - Add TrustBuilder as an External Authentication Method (EAM) in Entra ID
The number of external authentication methods is currently limited to 6 in Entra ID.
In Microsoft Entra admin center:
Go to Authentication methods > Policies.
Click on + Add external method.
Set parameters for TrustBuilder authentication method:
Name: Enter a name for TrustBuilder authentication method.
⚠️ Users will see this name when they select their authentication method during Entra ID login. Choose a name that is clear and recognizable to them. It cannot be changed.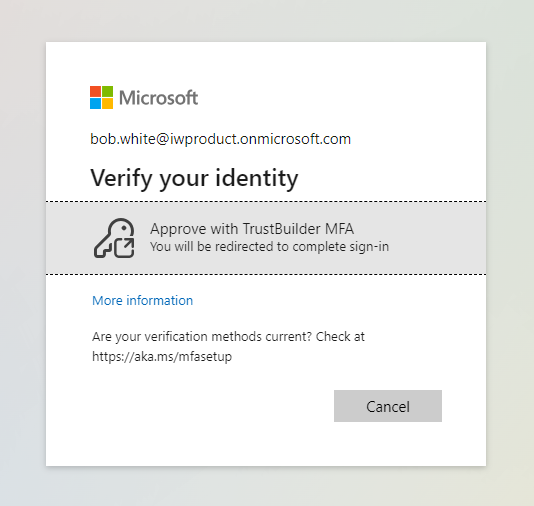
Client ID: Paste the "Client ID" of your TrustBuilder connector.
Discovery Endpoint: Paste the "Discovery URL" of your TrustBuilder connector.
App ID: Paste the Application ID value of your app in Entra ID.
(App registrations > All applications > Application (client) ID column)Request admin consent: Click on “Request permission” to request for admin consent to be granted to the application so that it can read the required info from the user to authenticate correctly.
You are prompted to sign in with an account with admin permissions and grant the provider’s application with the required permissions. After you grant admin consent and the change replicates, the page refreshes to show that admin consent was granted.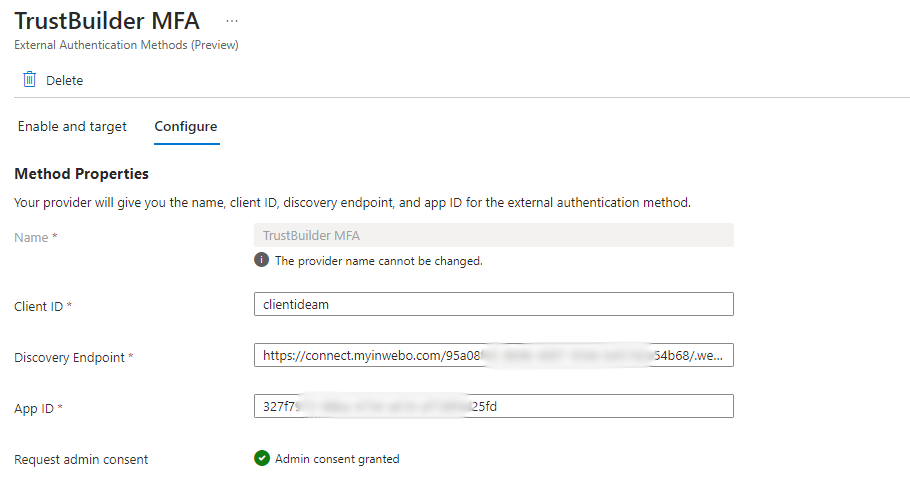
Check the included and excluded targets. All users are included by default.
Save the configuration.
Enable the TrustBuilder EAM.
If you want to enable only the newly created authentication methods, make sure the 'built-in' methods are disabled (in Authentication Methods > Policies).
Step 4 - Configure a conditional access policy in Entra ID
In Microsoft Entra admin center:
Go to Conditional Access > Policies.
Click on + New Policy (or edit an existing one).
Specify the users that will be covered by this policy.
Specify the target applications.
Specify the access that should be granted.
In our case, check Require multifactor authentication. Thus, our EAM will be used as a MFA step.
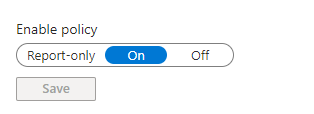
Enable the policy.
Click on Create.
When selecting "✅ Require multifactor authentication" you don't specify which EAM will be used. If multiple EAMs are defined for the same app and available to all users, the process might not use the intended EAM.
Make sure that both, the EAM and Conditional Access policy, include and exclude the relevant users to guarantee the correct EAM is applied.
Troubleshooting
AADSTS5001258: Failed to validate external id_token: 'acr' claim has unexpected value.
There two possible cases:
This error happens when the connector has been modified or when the external authentication method has been modified. Solution: wait some time and retry. The error should disappear.
Check the Connector type. It it is OIDC, create a OIDC Azure AD connector and use it instead.
