mAccess SDK: Upgrade to Firebase API V1
Context: mAccess notifications
Trustbuilder / Inwebo's mAccess SDK uses Google's Firebase API to send notifications to Android / iOS / Desktop devices. The API currently in use is known as "LEGACY", and will be decommissioned by Google at the end of June 2024.
To avoid a break in notification continuity, it is advisable to migrate as soon as possible to the "V1" API, which is already available. The TrustBuilder MFA administration console lets you set the API V1 mode and switch from one mode to the other.
Check FCM API V1 status in your project
First, you have to check that the Firebase Cloud Messaging (FCM) API V1 is active in your Google Cloud project. Connect to your Firebase console https://console.firebase.google.com
It is enabled by default for all new FCM projects.
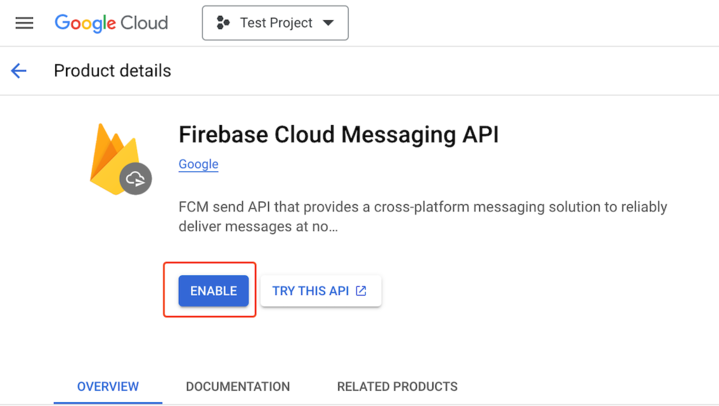
If you are using an older project and FCM V1 is disabled, you can enable it by clicking on the three dots icon and selecting Manage API in Google Cloud Console. This will bring you to a new page where you can enable the Firebase Cloud Messaging API by clicking on the Enable button.
Generate serviceaccount JSON
To update the parameters in the TrustBuilder admin console, you will need what is called the “serviceaccount” private key JSON. This paragraph explains how to get it from the Firebase console.
1. From an existing serviceaccount
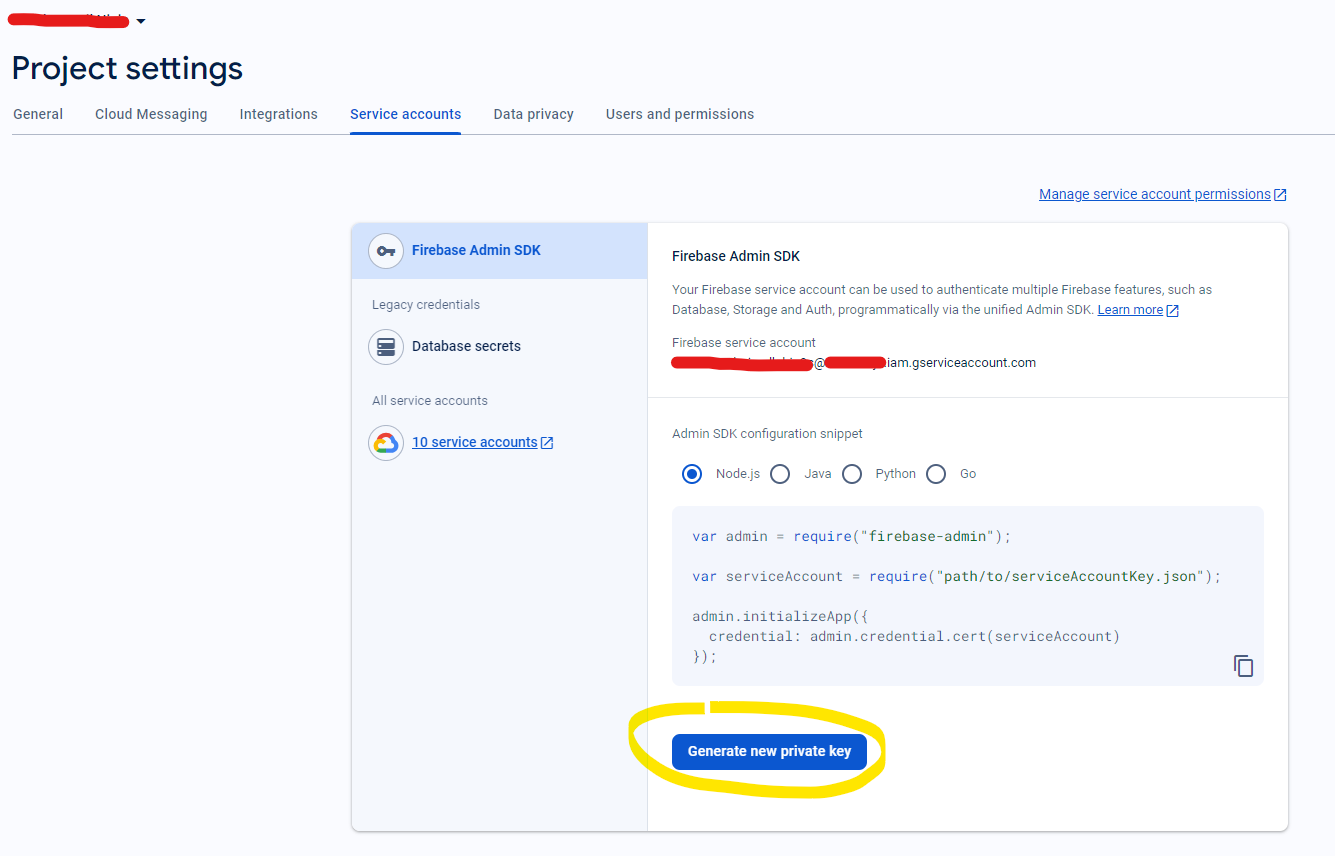
In the Firebase console (https://console.firebase.google.com), select your project, then “Project Settings”.
Select “Service Accounts”. Then select “Generate new private key”.
Its structure is as follows:
{
  "type": "service_account",
  "project_id": [PROJECT_ID],
  "private_key_id": "XXX",
  "private_key": "-----BEGIN PRIVATE KEY-----[CERT]-----END PRIVATE KEY-----",
  "client_email": [CLIENT_EMAIL],
  "client_id": "YYY",
  "auth_uri": "https://accounts.google.com/o/oauth2/auth",
  "token_uri": "https://oauth2.googleapis.com/token",
  "auth_provider_x509_cert_url": "https://www.googleapis.com/oauth2/v1/certs",
  "client_x509_cert_url": "https://www.googleapis.com/robot/v1/metadata/x509/[CLIENT_EMAIL]",
  "universe_domain": "googleapis.com"
}
Where you can find:
the corresponding project_id
the id of the service account (client_email)
its private key (private_key_id and private_key)
various endpoints
2. With a new serviceaccount
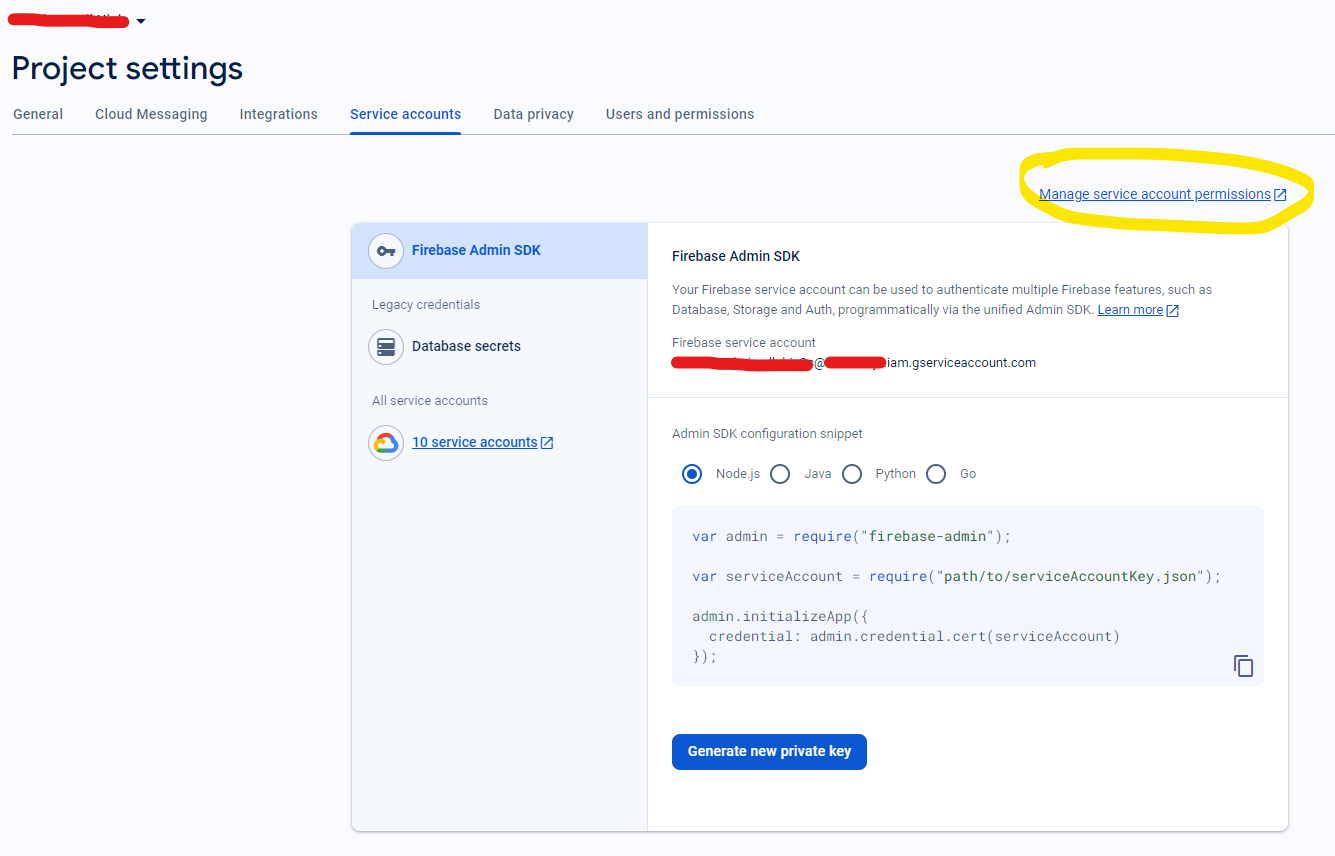
Instead of directly generating a key, go to “Manage service accounts permissions”
Then you can “Create a service account”…

…and fill-in the fields.
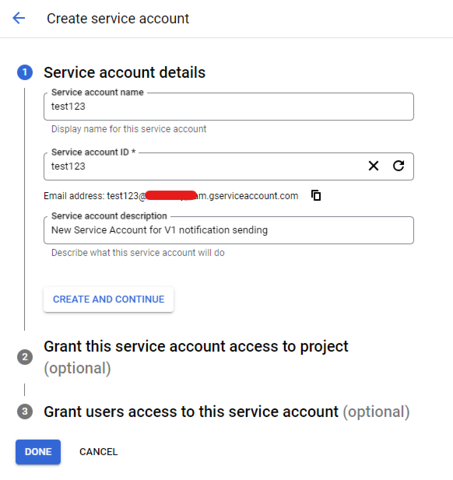
Then you see the service acount in the list. On the line of this service account, on the right, select “Actions” then “Manage keys”.
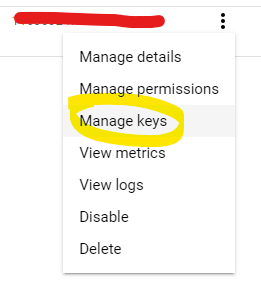
Then in the next screen select “Add a key” then “Create a key”

Select “JSON” and create.
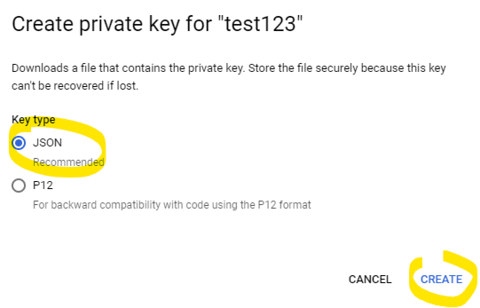
The key is created and the JSON file is automatically downloaded. Keep it in a safe place.

The rest is similar to #1 above.
3. Set the rights
Your service account requires some permissions.
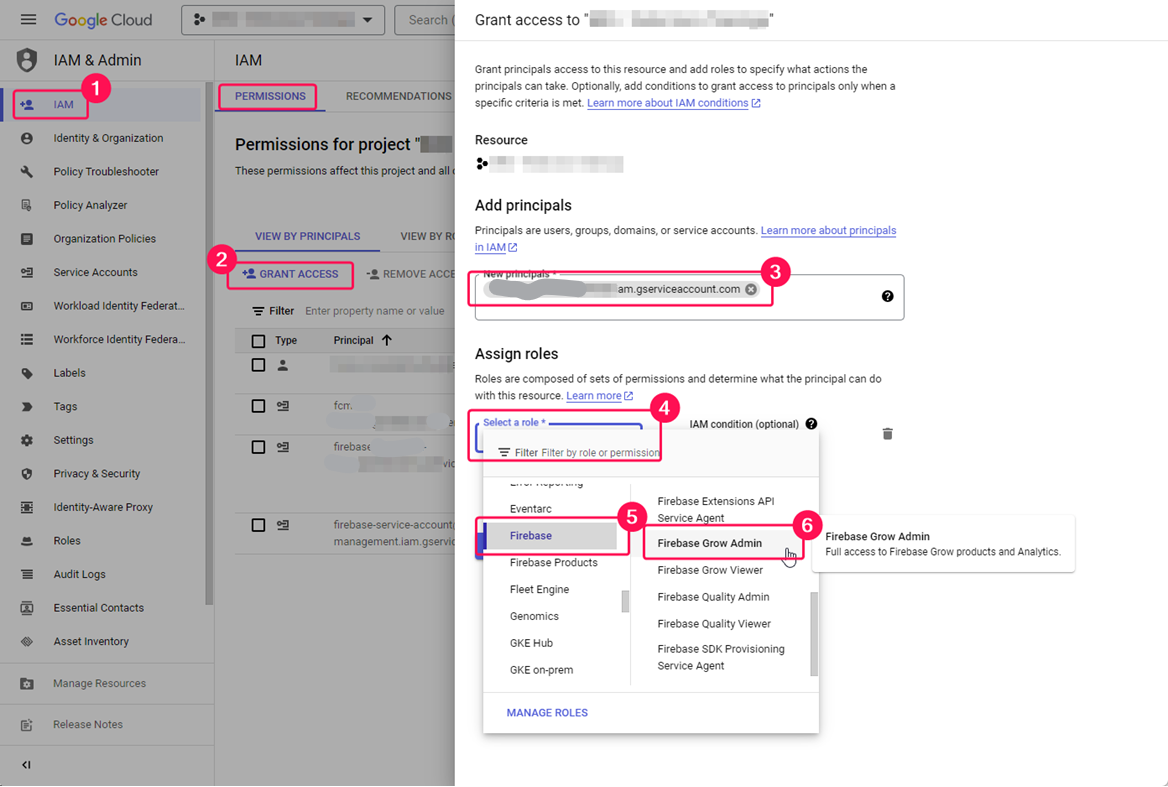
Go to “IAM” (1), Grant access (2), select your principal (3), then grant a role (4 to 6) that contain the permission cloudmessaging.messages.create
You may create a specific role such as “FCM Push Notification Role” containing cloudmessaging.messages.create . Or you may use one of the following roles, but verify the included permissions: Firebase Admin, Firebase Grow Admin, Firebase Admin SDK Administrator Service Agent, Firebase SDK Provisioning Service Agent.
Source: Firebase Cloud messaging - permissions error for cloud build deployed app
Insert Settings in TrustBuilder admin console
Go to your TrustBuilder admin console, Service Parameters, and find the paragraph about mAccess push notifications:
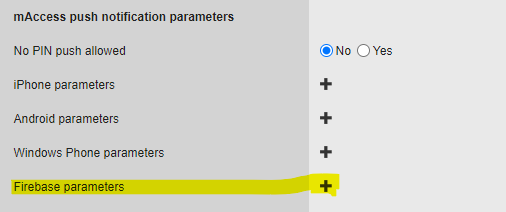
The Firebase parameters edit window lets you enter both Legacy parameters (they should be filled in) and API V1 parameters.
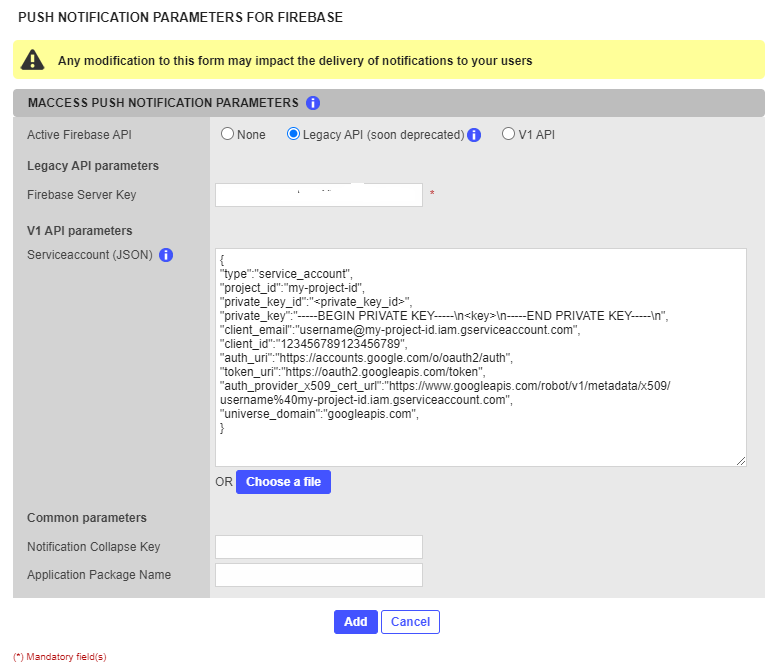
Import the previously generated ServiceAccount JSON file into the Trustbuilder administration console.
The server Key remains unchanged. The Collapse Key and Package name fields are optional and remain unchanged.
Validate and trigger the upgrade to V1
A radio button lets you toggle between the two modes. By default, and without any action on your part, the behavior will remain in Legacy mode. We recommend that you test your new settings at an off-peak time. You can return to Legacy mode if the new settings were incorrect.
Of course if you have a preproduction service it is recommended to try the switch to the API V1 on your preproduction first.
Note: the "None" button lets you completely block the sending of notifications, while allowing the user to manually fetch the notification from the TrustBuilder platform using CheckPendingPush. This is documented in the integration guides for the Android SDK and for the iOS SDK.
Q&A
Do I need to modify my mobile application?
Answer: The switch to API V1 does not significantly change the processing of the notification content. Howver there are small changes in the format. Should you discover a different behavior when upgrading, please contact TrustBuilder.
Can I have both Legacy and API V1 systems work at the same time?
Answer: no, the two notification systems cannot be operating simultaneously in the MFA service. However, you can set the parameters for both modes and you have to use the toggle to choose which mode is in use.
What is the impact on the users?
Answer: there is no impact on the users if the API V1 parameters are correct. The notifications will be sent and will be received by your app.
What is the behavior if I choose “None”?
Answer: the authentication request will be sent to the inWebo/TrustBuilder server, but the app will not receive a notification. Note:
Documentation
You can find more information about mAccess SDKs in the TrustBuilder documentation:
Integration guide for Android SDK - notifications
Integration guide for iOS SDK - notifications
For further information about Firebase Cloud Messaging see https://firebase.google.com/docs/cloud-messaging
