FIDO2 is a modern authentication standard that enables secure login experiences. This feature integrates with the TrustBuilder platform.
Prerequisites
TrustBuilder platform version: 2024.9.0 and higher.
Starting from 2024.9.0 release, the tenants will include:
-
a system TrustBuilder FIDO2 IDP linked to the TrustBuilder FIDO2 server (OIDC-based).
-
new OAuth scopes to manage FIDO2-related operations:
|
Component |
OAuth scope(s) |
Description |
|---|---|---|
|
TrustBuilder Admin Portal |
|
Allows read operations on FIDO2 keys |
|
|
Allows read and write operations on FIDO2 keys |
|
|
|
Allows read operations on FIDO2 policies |
|
|
|
Allows read and write operations on FIDO2 policies |
|
|
TrustBuilder Self-Service Portal |
|
Allows registration of FIDO2 key |
|
|
Allows management of owned FIDO2 keys |
Enable FIDO2 authentication method
To enable FIDO2 authentication method for users, you should create a new access flow (or configure an existing one).
-
In TrustBuilder Admin portal, navigate to Access Management > Access Flows.
-
Click on + Add Access Flow.
-
Click on Add Authentication Scheme:
-
Name: define a name (e.g. FIDO Authentication Scheme).
-
Scheme Type: Select Authentication level.
-
Click Save.
-
-
Click on Add Authentication Method:
-
Display Name: define a name (e.g. FIDO Method).
-
OpenID Context: specify the ACR you want (e.g. phr).
-
Link Identity Providers: select TrustBuilder FIDO2 IDP.
-
Click Save.
-
-
Once the access flow appears, click on Link Service Providers:
-
Select a Service Provider (application) to be linked to this access flow.
-
Click Next.
-
Configure the following for this service provider:
-
Default Method Comparison: set to MINIMUM.
-
Default method: Select the authentication method.
-
-
Click Save.
-
-
Repeat step 5 for each application (service provider) to be added.
The new access flow is successfully created.
To ensure access to the Admin portal, manipulate the default schema and methods with care. If you edit an existing access flow, we recommend adding a TrustBuilder IDP to an existing configuration without making any other changes.
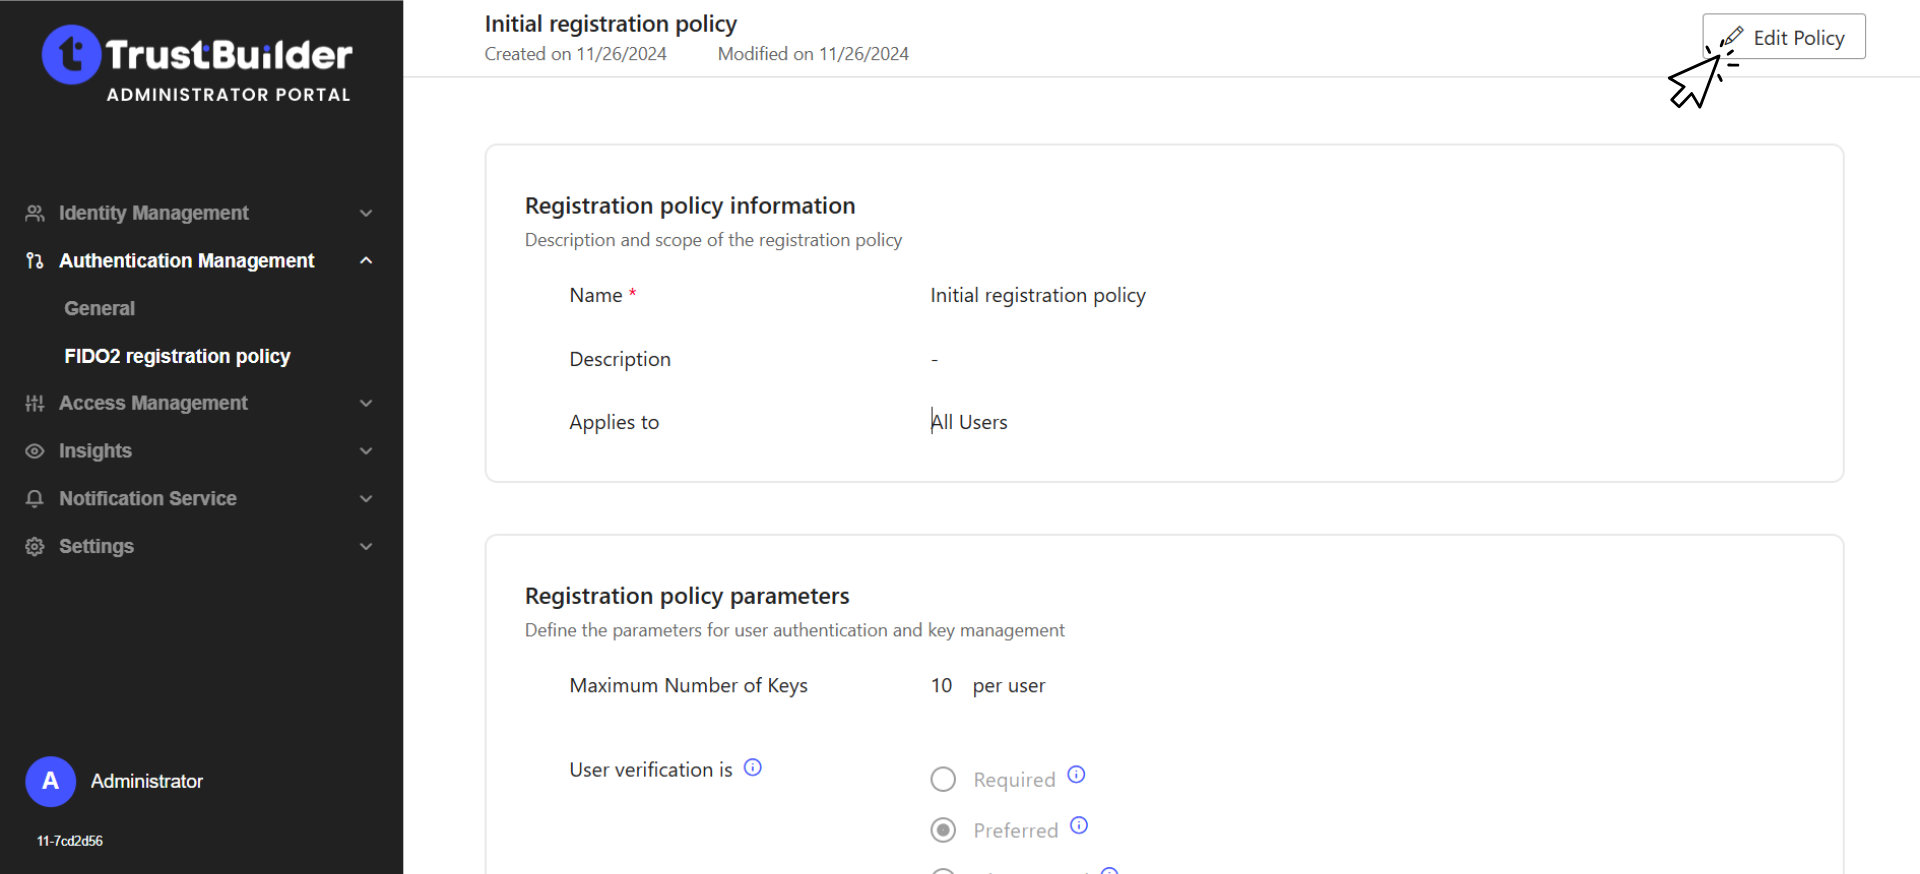
Edit FIDO2 Registration policy
The FIDO2 Registration policy defines which type of FIDO2 Authenticators users can register. It is mainly based on security restrictions.
Available from platform version 2025.2.0
To edit the FIDO2 Registration Policy:
-
Go to Authentication Management > FIDO2 registration policy.
-
On the top right corner, click on Edit Policy.
-
Edit the parameters as needed:
|
Parameter |
Description |
Default value |
|---|---|---|
Registration Policy Information
|
|
|
|
Name |
The name of the FIDO2 registration policy (mandatory - cannot be edited) |
Initial registration policy |
|
Description |
A description of the FIDO2 registration policy (optional- cannot be edited) |
- |
|
Applies to |
Defines the scope of users to whom the policy applies (cannot be edited) |
All users |
Registration Policy Parameters
|
|
|
|
Maximum Number of Keys |
Defines how many FIDO2 security keys a user can register.
|
10 keys per user |
|
User Verification |
Specifies how user verification (e.g., PIN, fingerprint, facial recognition) is handled during authentication.
|
Preferred |
Authentication Settings
|
|
|
|
Support of |
Determines which types of authenticators can be used.
|
All |
|
Attestation Requirement |
Specifies whether an authenticator must be validated against an official metadata list before registration.
|
No |
|
List Enforcement |
Defines whether only specific authenticators are allowed or blocked.
The list can be setup before Enabling List Enforcement option. |
Disabled |
-
Click on Save to update the registration policy.
Testing FIDO2 authentication method
As an admin, you can test FIDO2 authentication methods with a test user.
To know more about key management by users, see TrustBuilder Self-Service Portal documentation.
Prerequisites
-
Compatible browsers:
Step 1 - Configuration in the Admin Portal:
-
Create a test user
-
Configure an access flow with:
-
TrustBuilder FIDO2 as an IDP,
-
TrustBuilder Self Service Portal as a Service Provider.
-
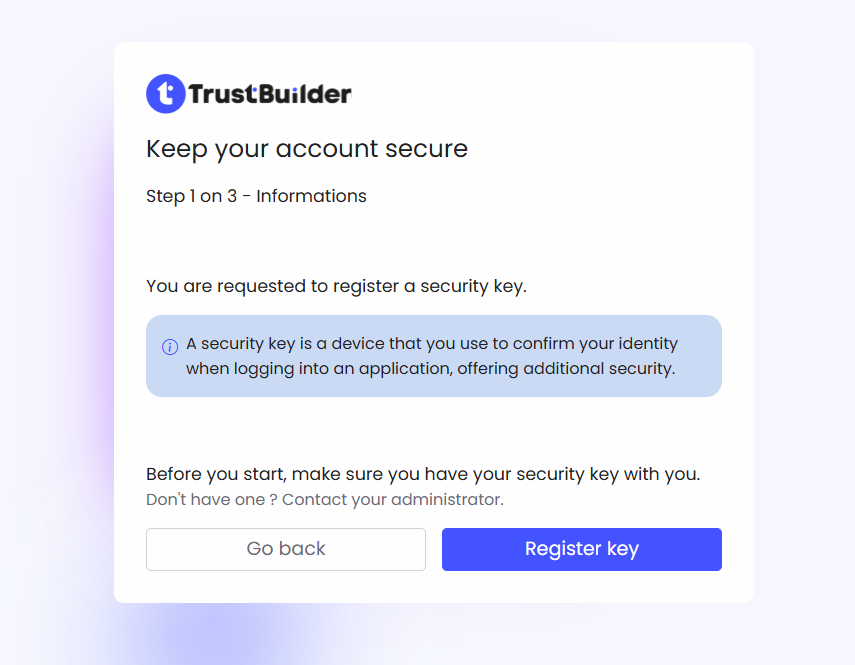
Step 2 - Register a Security key
-
Open a new window in a different web browser.
-
Access the Self-Service Portal
https://portal.[TENANT_ID].trustbuilder.io/ -
If requested, select TrustBuilder Repository.
Enter the test user’s username and password. -
Go to Security > Security keys > + Add a security key
-
On the registration screen, follow the steps:
-
Click on Register a key.
-
Enter a name for the new security key.
It should be unique within the same keyring (reusable by other users with separate keyrings), cannot contain only spaces. It is limited to 32 characters and supports any characters, including emojis or non-Latin characters.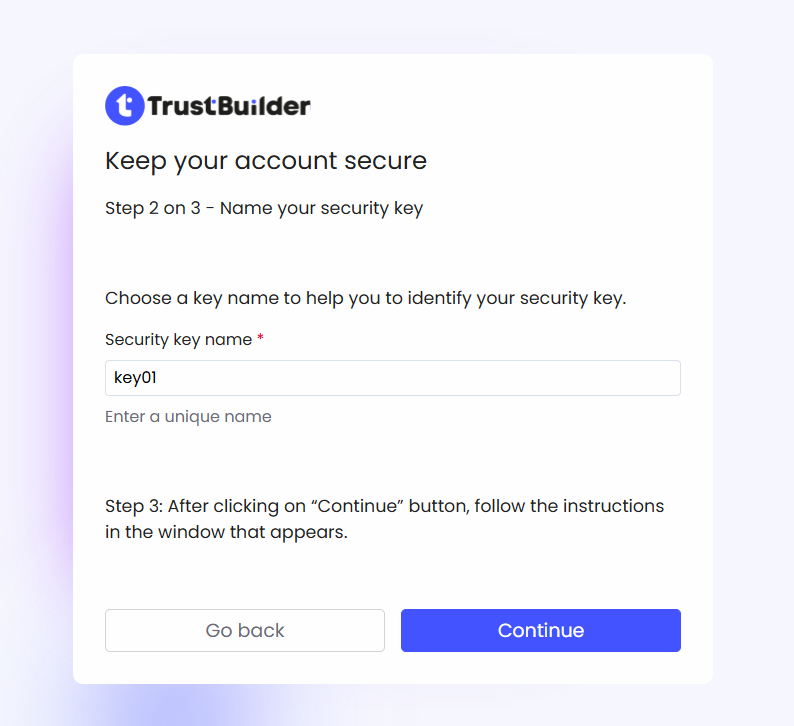
-
Follow the instructions in the pop-up window.
The manipulation differs depending on the type of security key used and the operating system. -
Once redirected to the Self-Service portal, check that the security key now appears in the security keys list.
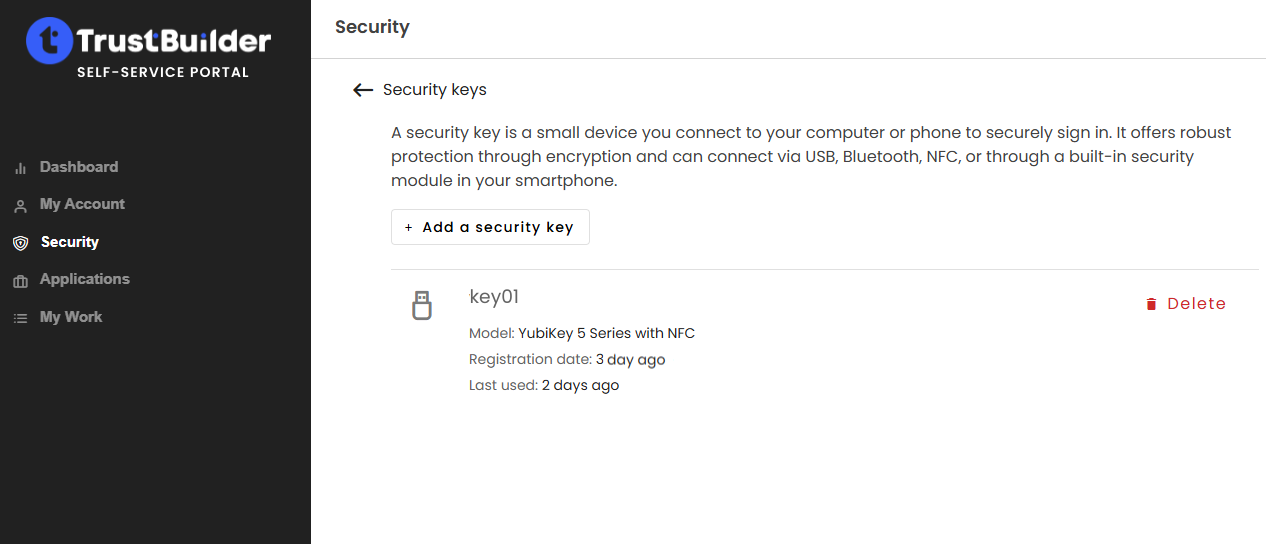
The security key is successfully registered. It can be used to securely sign-in to protected applications.
-
Log out from the Self-Service Portal for the next step.
-
Step 3 - Sign-in with the registered Security key
-
Access the Self-Service Portal
https://portal.[TENANT_ID].trustbuilder.io/. -
If requested, select TrustBuilder FIDO2.
-
Click on Sign-in.
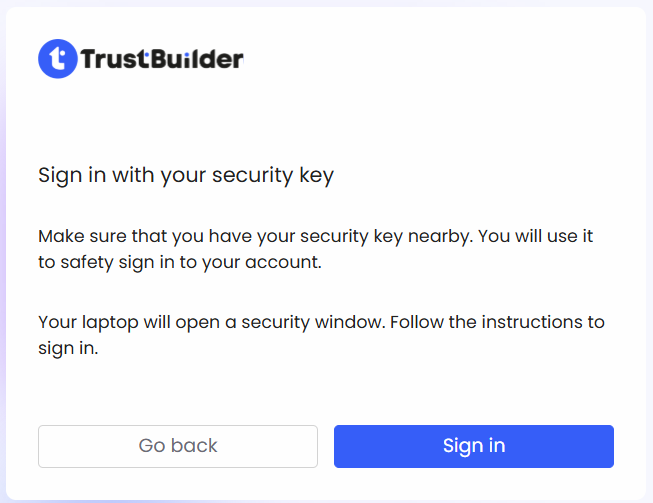
-
Follow the instructions in the pop-up window.
The manipulation differs depending on the type of security key used and the operating system.
Once successfully authenticated with the security key, you should be redirected to the Self-Service Portal home page.
To know more about key management by users, see TrustBuilder Self-Service Portal documentation.