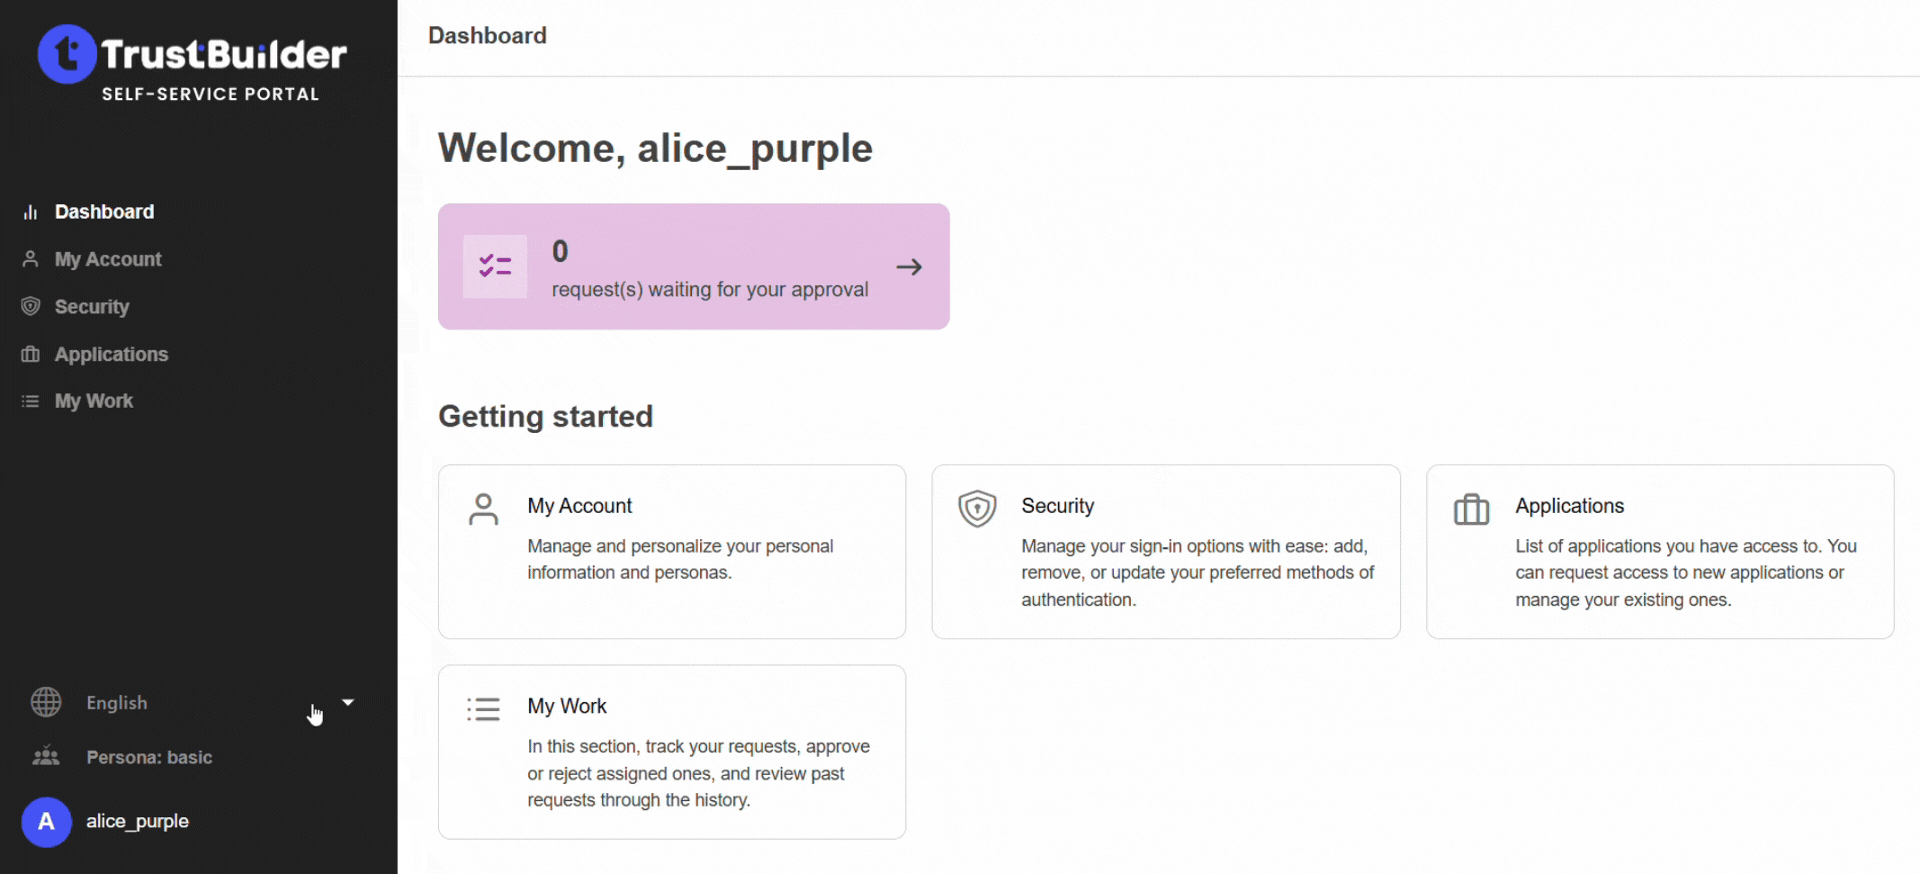
Self-Service Portal
The Self Service Portal is a web-based application allowing users to manage their accounts and perform various tasks independently. This page provides Self-Service Portal's usage guidelines.
To access Self-Service Portal, you log in to:https://portal.[MY_COMPANY_TENANT_ID].trustbuilder.io/
Change the Self-Service portal language
By default, the self-service portal will be displayed in your browser language if the language is supported by TrustBuilder.
To change the language in the Self-Service Portal, use the language switcher button located at the bottom left of the screen.
The available languages are English, French, and Dutch.
Update my account information
You can update your account general information:
In the Self-Service Portal, go to My Account > General tab.
Update your account general information.
Click on Save.
Successfully edited your general information.
See my protected applications
You can see your applications protected by TrustBuilder. In the Self-Service Portal, go to Applications. You will see your applications.
Manage my personas
You can see and manage personas assigned to your account.
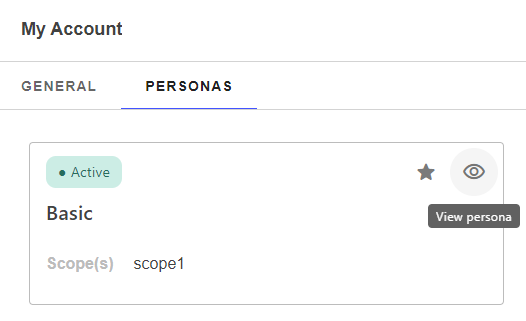
Set my persona as preferred
In the Self-Service Portal, go to My Account > Personas tab.
Hover the top right of the persona tile to display a star icon.
Click on the star icon to set the persona as preferred.
Your persona is successfully set as preferred. This means that this persona will be used by default at login.
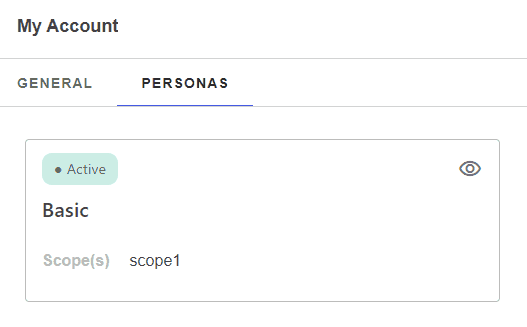
See my persona assignment details
In the Self-Service Portal, go to My Account > Personas tab.
Click on the eye icon.
You can see your persona information related to your assignment.
Delegate my persona
If the "Delegate a persona" feature is not available, this means that it has not been activated at tenant level.
You can delegate your persona to another user for a given period.
Go to My Account > Personas tab.
Click on the eye icon.
Click on Delegate persona at the top right.

Fill the form:
To whom? → Enter the e-mail address of the user to whom you are delegating your persona.
An e-mail will be sent to confirm the persona delegation.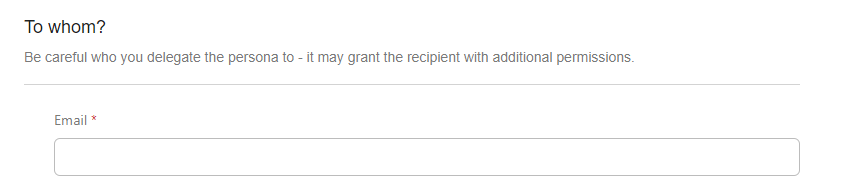
How Long? → Define the validity period of your persona delegation.
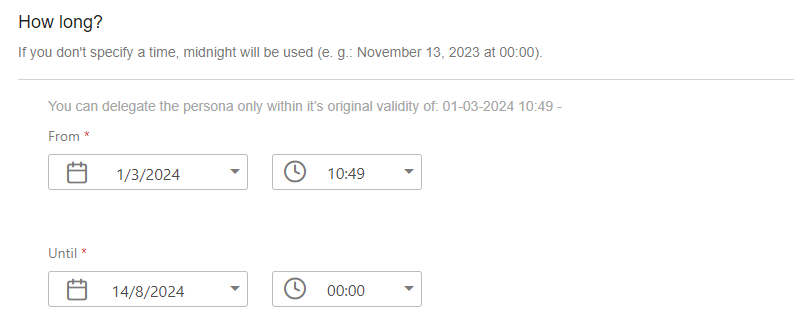
Click on Save.
The user should now be able to use your persona during the defined period.
Manage security keys
Register a Security key
Prerequisites
Compatible browsers:
 Chrome, Edge, Firefox (latest versions recommended).
 Temporary limitation on Safari: security key registration and authentication are not working.
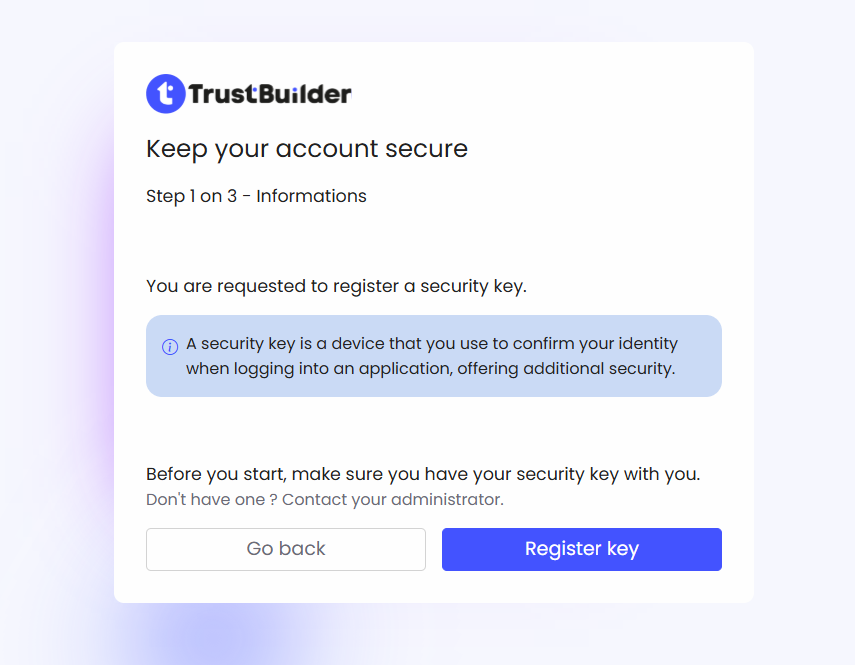
In the Self-Service portal, go to Security > Security keys > + Add a security key.
On the registration screen, follow the steps:
Click on Register a key.
Enter a name for the new security key.
It should be unique and cannot contain only spaces. It is limited to 32 characters and supports any characters, including emojis or non-Latin characters.
Follow the instructions in the pop-up window.
The manipulation differs depending on the type of security key used and the operating system.
Once redirected to the Self-Service portal, check that the security key now appears in the security keys list.
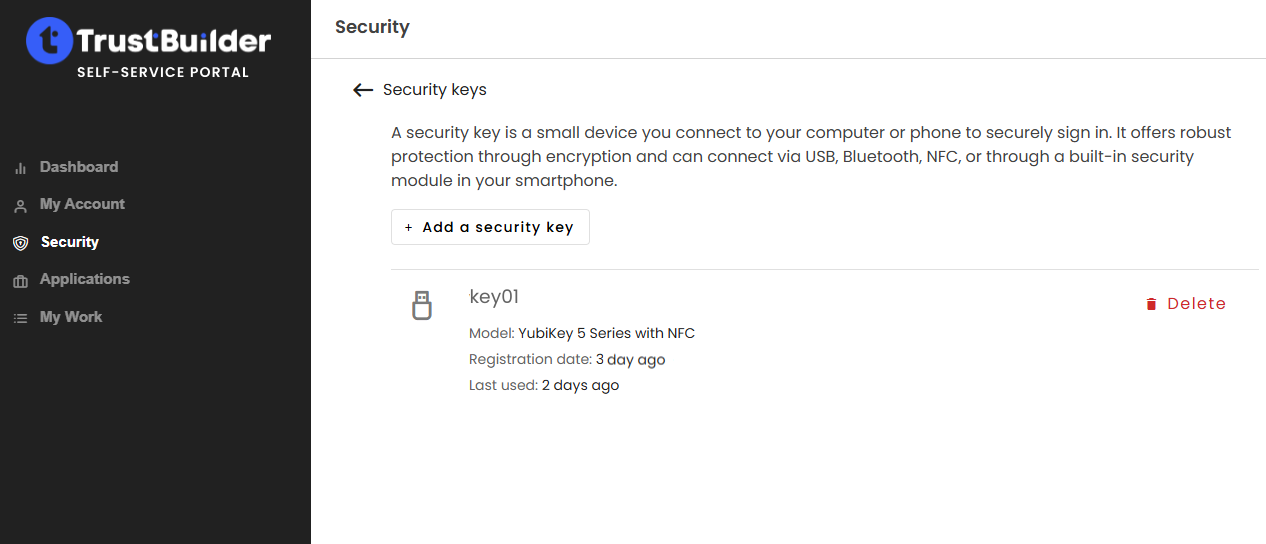
The security key is successfully registered. It can be used to securely sign-in to protected applications.
Rename a Security key
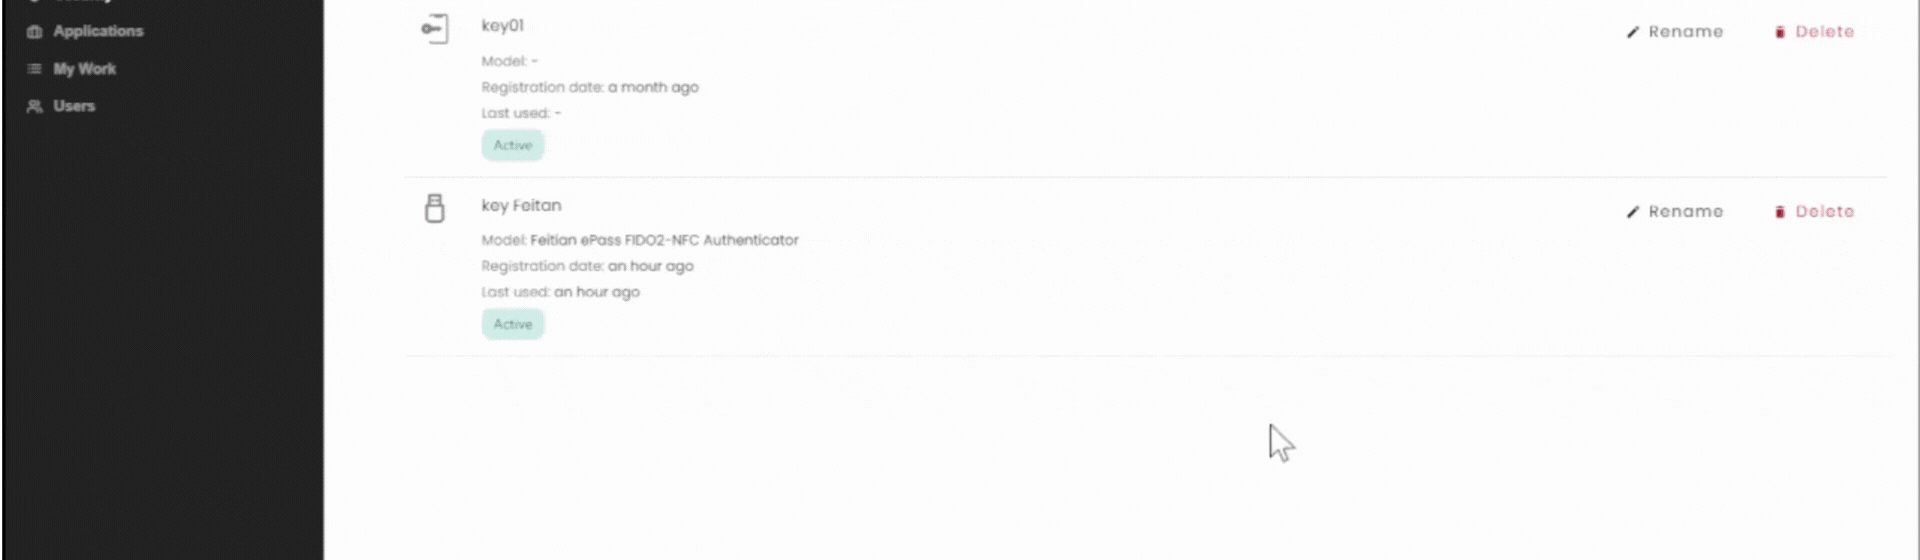
In the Self-Service portal, go to Security > Security keys.
Click on Rename next to the security key.
Edit the name of the security key.
It should be unique and cannot contain only spaces. It is limited to 32 characters and supports any characters, including emojis or non-Latin characters.Click Save to update the name.
The security key is successfully renamed.
Delete a Security key
In the Self-Service portal, go to Security > Security keys.
Click on Delete next to the security key.
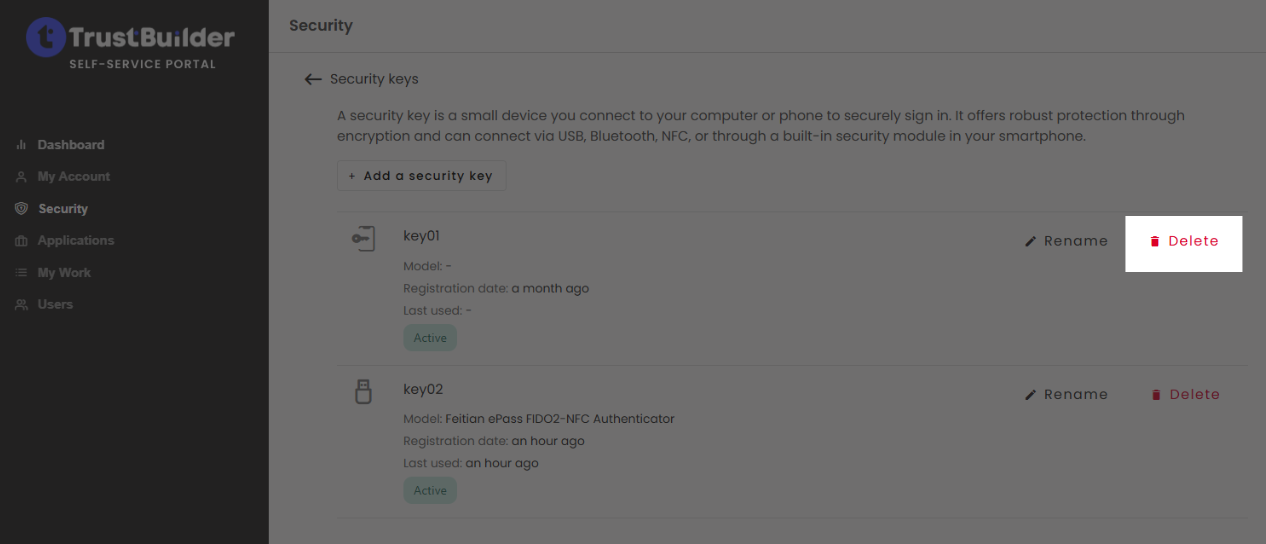
Confirm the deletion.
The security key is successfully deleted and can no longer be used for login.
Manage my requests
The Self Service Portal includes a "My Work" section that allows you to manage and track requests you have submitted and received. It consists of three tabs: Requests Approval, Requests Follow Up, and Requests History.
Approve or Reject a request
The Requests Approval tab lists all the requests that are awaiting your approval.
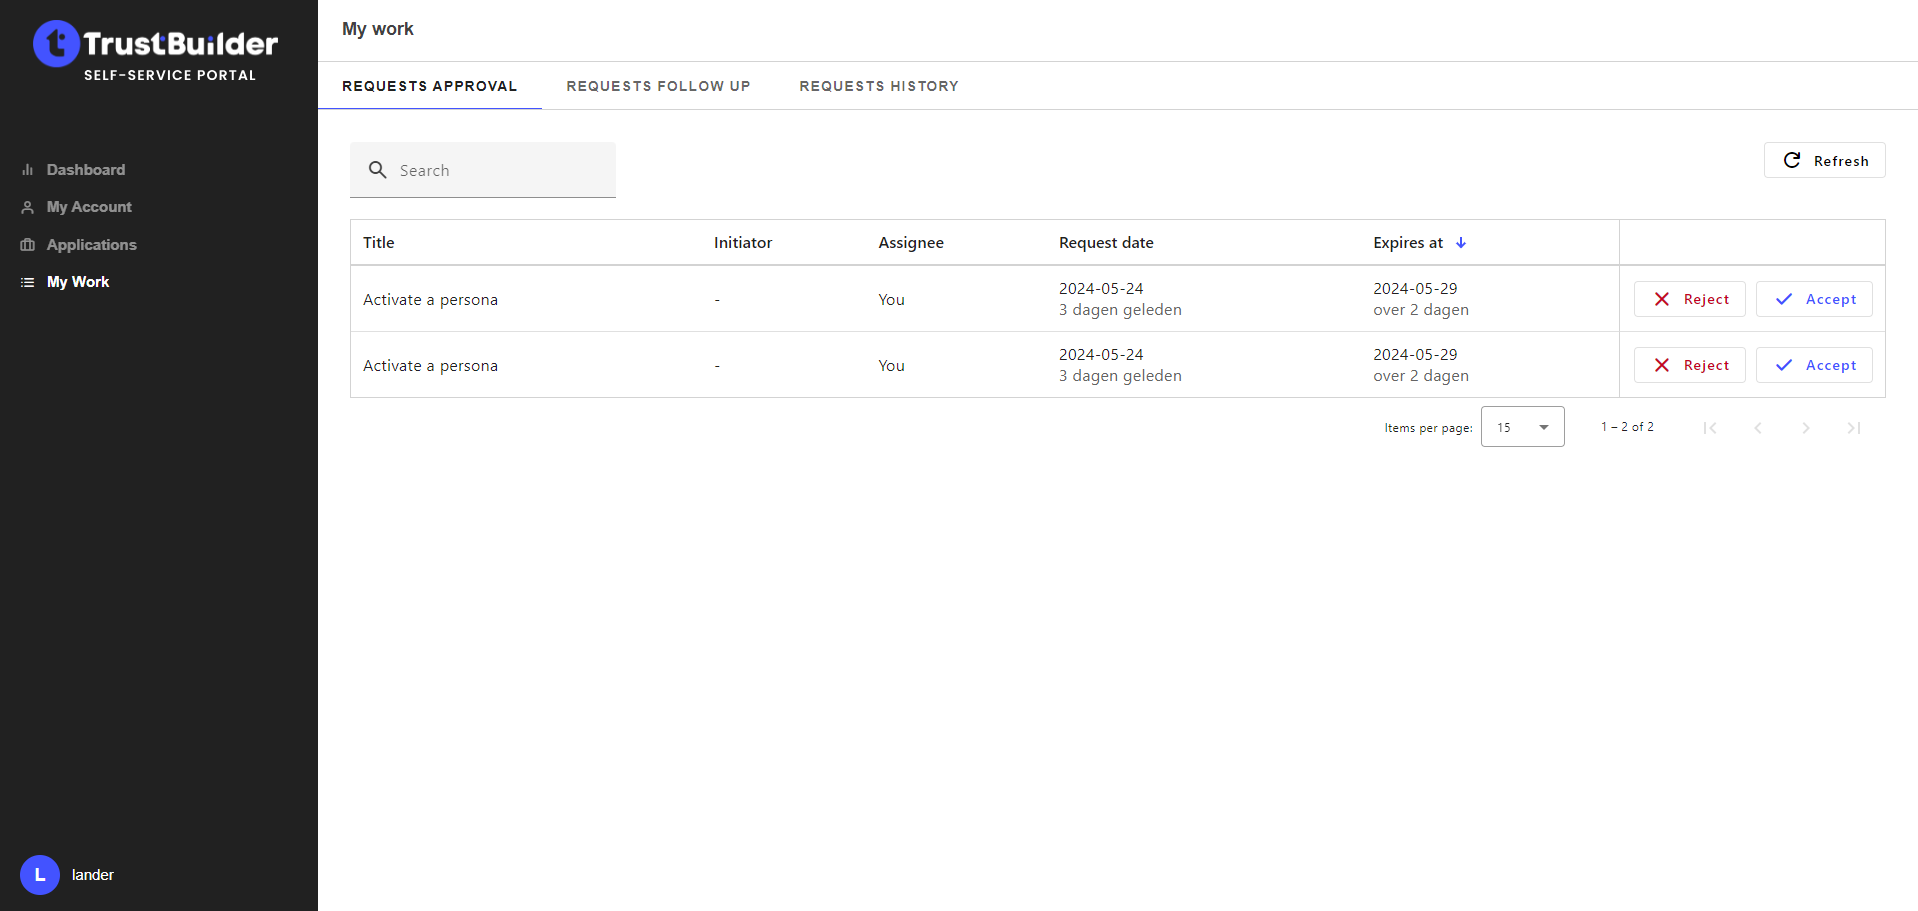
Here is how to navigate this tab:
Search: Enter keywords in the search bar to find requests by their title. This is useful when you have multiple requests and need to locate a specific one quickly.
Reject: Reject a request.
Accept: Approve a request. On clicking, a confirmation pop-up window appears with more details about the request.
Follow my requests
The Requests Follow Up tab shows all the requests you have submitted with their current status.
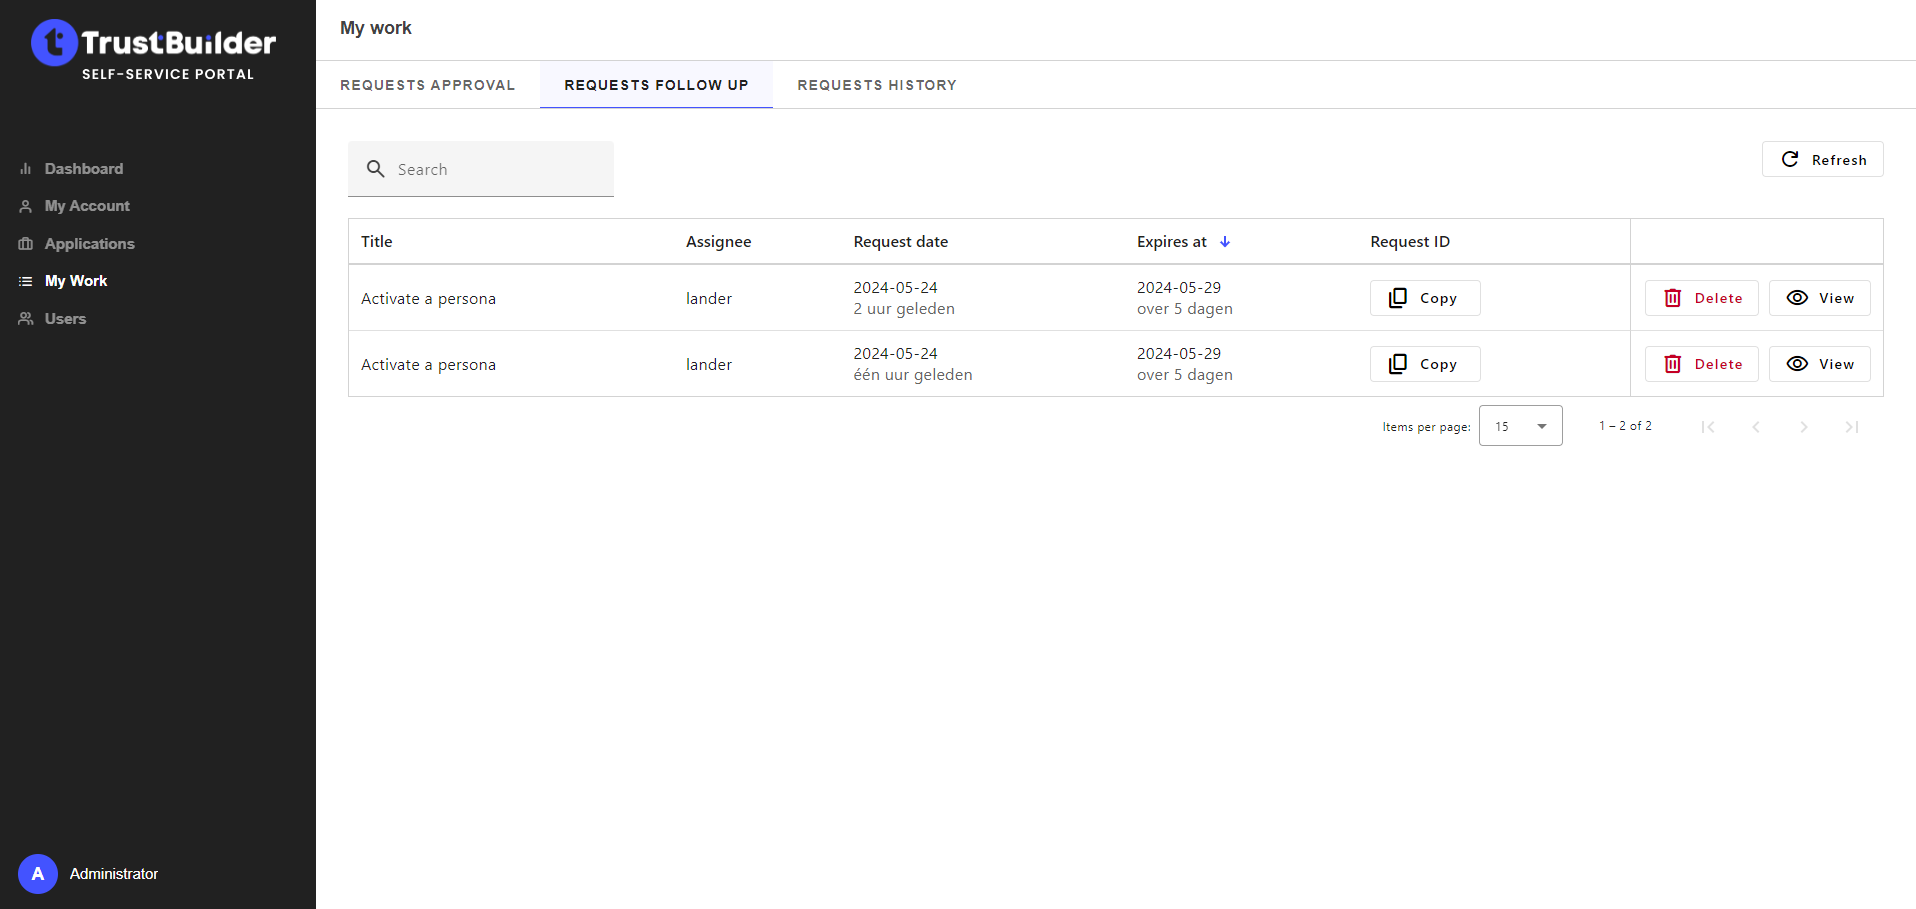
Here is how to navigate this tab:
Search: Enter keywords in the search bar to find requests by their title. This is useful when you have multiple requests and need to locate a specific one quickly.
Copy Request ID: Click on the "Copy" button, to copy the request ID. This is useful for referencing the request in communications or for tracking purposes.
Delete: Click on the “Delete“ button to delete the request. C’est utile en cas d’erreur
View: Click on the “View” button next to a request to see its full details. This includes information such as the request status, creation date, expiration date, and any additional details.
See my requests history
The Requests history tab provides a history of requests over the last month.
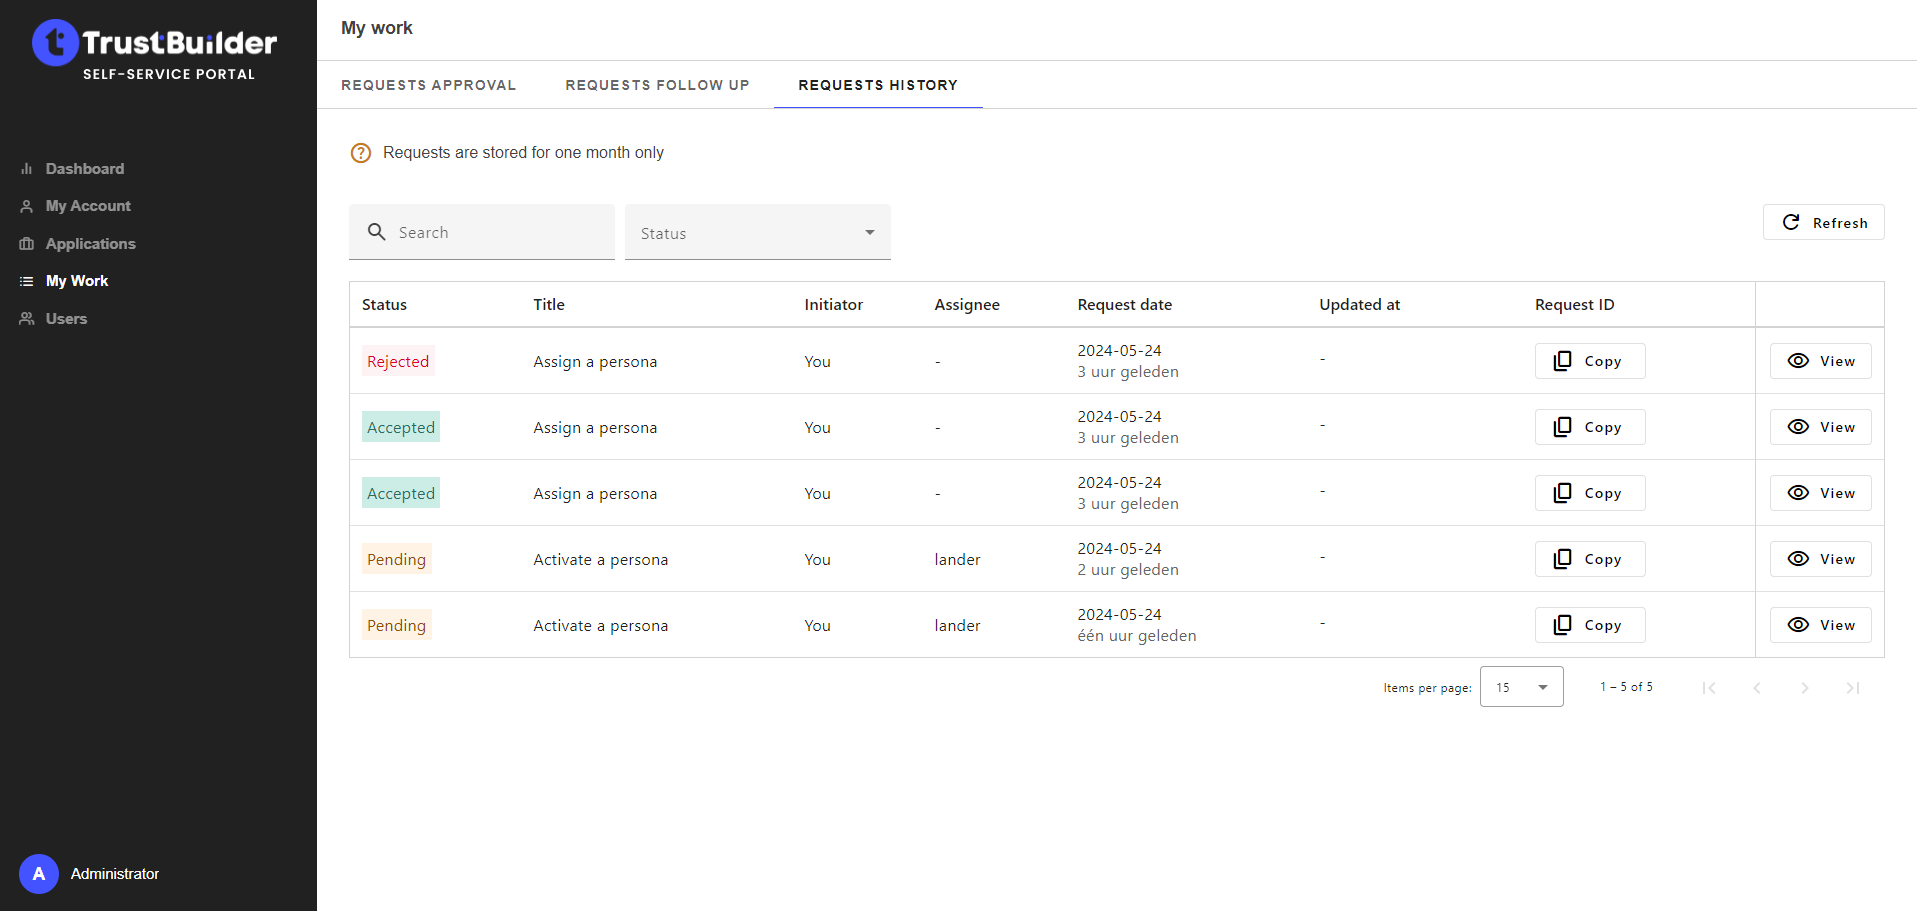
Here is how to navigate this tab:
Search: Enter keywords in the search bar to find requests by their title. This is useful when you have multiple requests and need to locate a specific one quickly.
Status: Use the filter option to sort requests based on their current status (e.g., pending, approved, rejected).
Copy Request ID: Click on the "Copy" button, to copy the request ID. This is useful for referencing the request in communications or for tracking purposes.
View: Click on the “View” button next to a request to see its full details. This includes information such as the request status, creation date, expiration date, and any additional details, initiator, assignee.
Requests list
When a request is created, it gets a pending status.
Request title | Description |
|---|---|
Assign a persona | This request is automatically generated when a user, who is assigned to a delegated admin persona or a persona with delegation enabled, assigns a persona to a user.
|
Activate a persona | This request is automatically created when a user accepts an “Assign a persona” request.
|
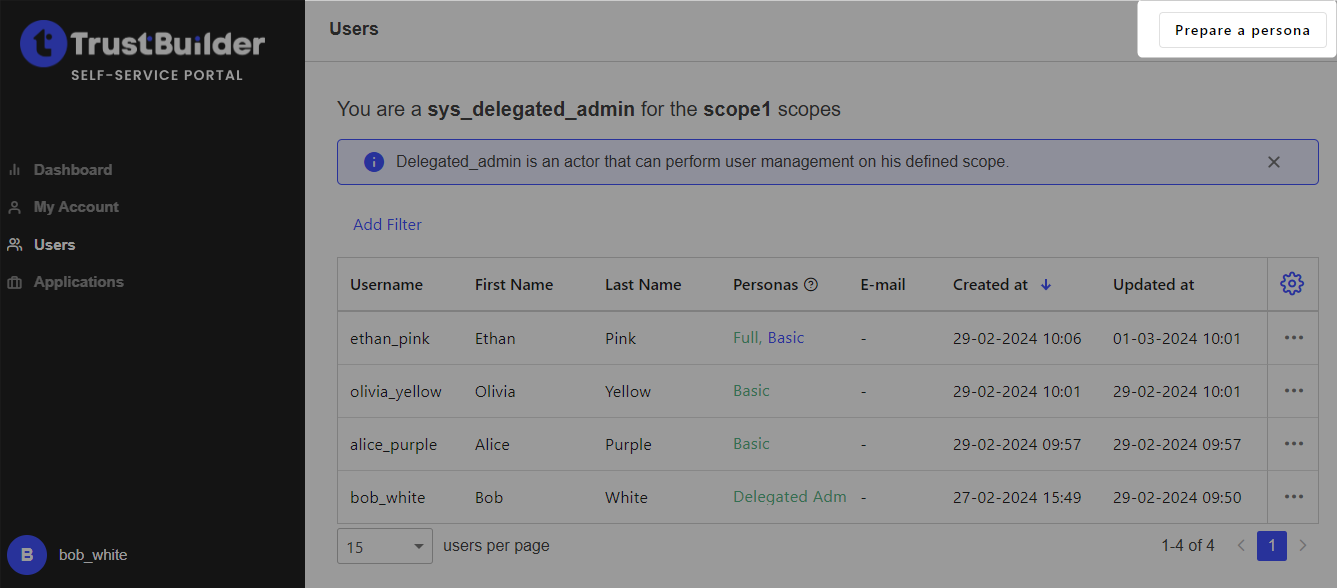
Manage users
You can manage users from your Self-service-portal only if an administrator has assigned to you a persona with delegation enable or a delegated admin persona.
Users overview
In the Self-Service Portal, go to Users. You can see the list of users within your scope.
For each user you can consult user information and manage their personas.
Manage users personas
As a Delegated Admin, you can manage personas for the users in your scope.
Go to Users.
Click the 3 dots of the user to be edited.
Click on View.
Go to Personas tab.
From there you can either:
Edit the parameters of the current assigned persona.
Add a new persona for this user with the available scopes.
Make sure to enter valid scopes meaning specified scopes in your delegated admin persona.
Click on Save.
Add a user to your users list
As a Delegated Admin, you can add users in your users list by assigning a persona with your scope to user. This action is subject to approval by the user.
How does it work?
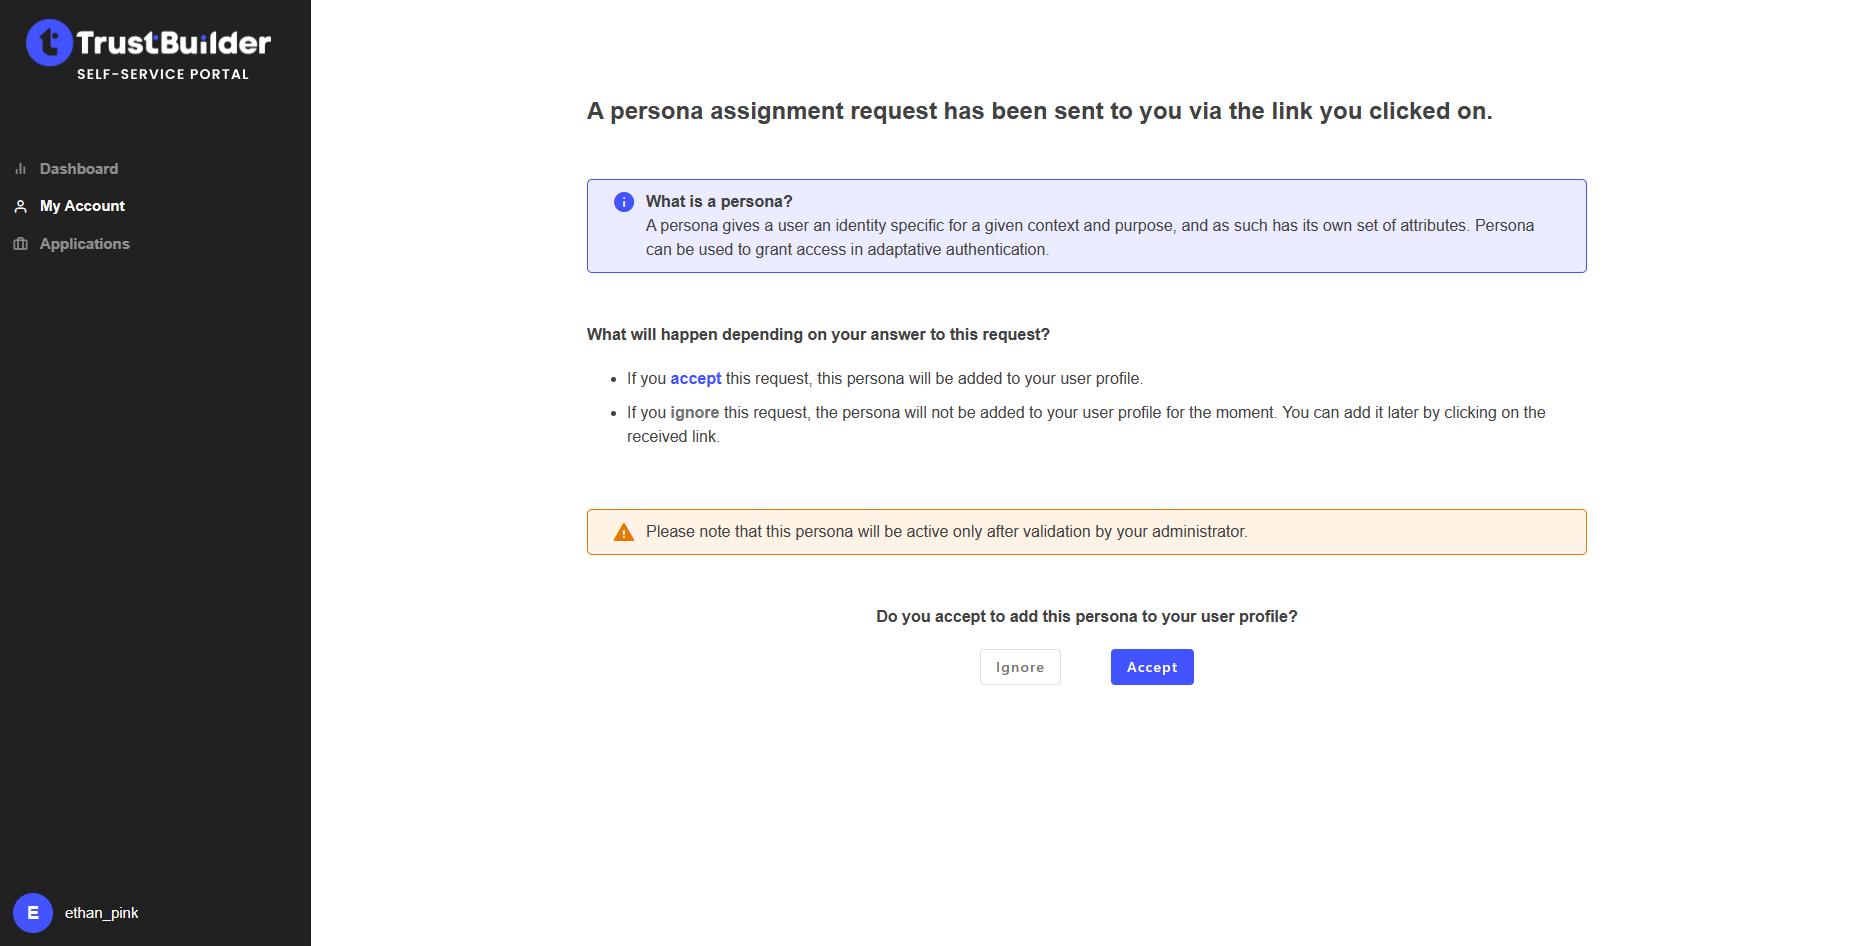
You're going to configure an instance of an existing persona. This persona instance will not be assigned to any user at first. To assign it, you will provide a magic link to a user.
When the user clicks on the magic link, if authenticated by TrustBuilder, he will be able to accept or reject the assignment request. If the user approves, you will have to approve a request to activate the persona.
And that's it, the user will be assigned to the persona and thus appear in your user list.
Go to Users.
Click on Prepare a persona at the top right.
Select a persona among the available personas in the tenant.
Click on Next.
Fill in the persona details. Select the scope values among the available values.
Click on Save.
Copy the magic link and provide it to the user in the secure way of your choice.
The user can also manage the request from its Self-Service Portal (My work menu > Requests Approval).
Note that the user must already exist in the TrustBuilder tenant for this to work.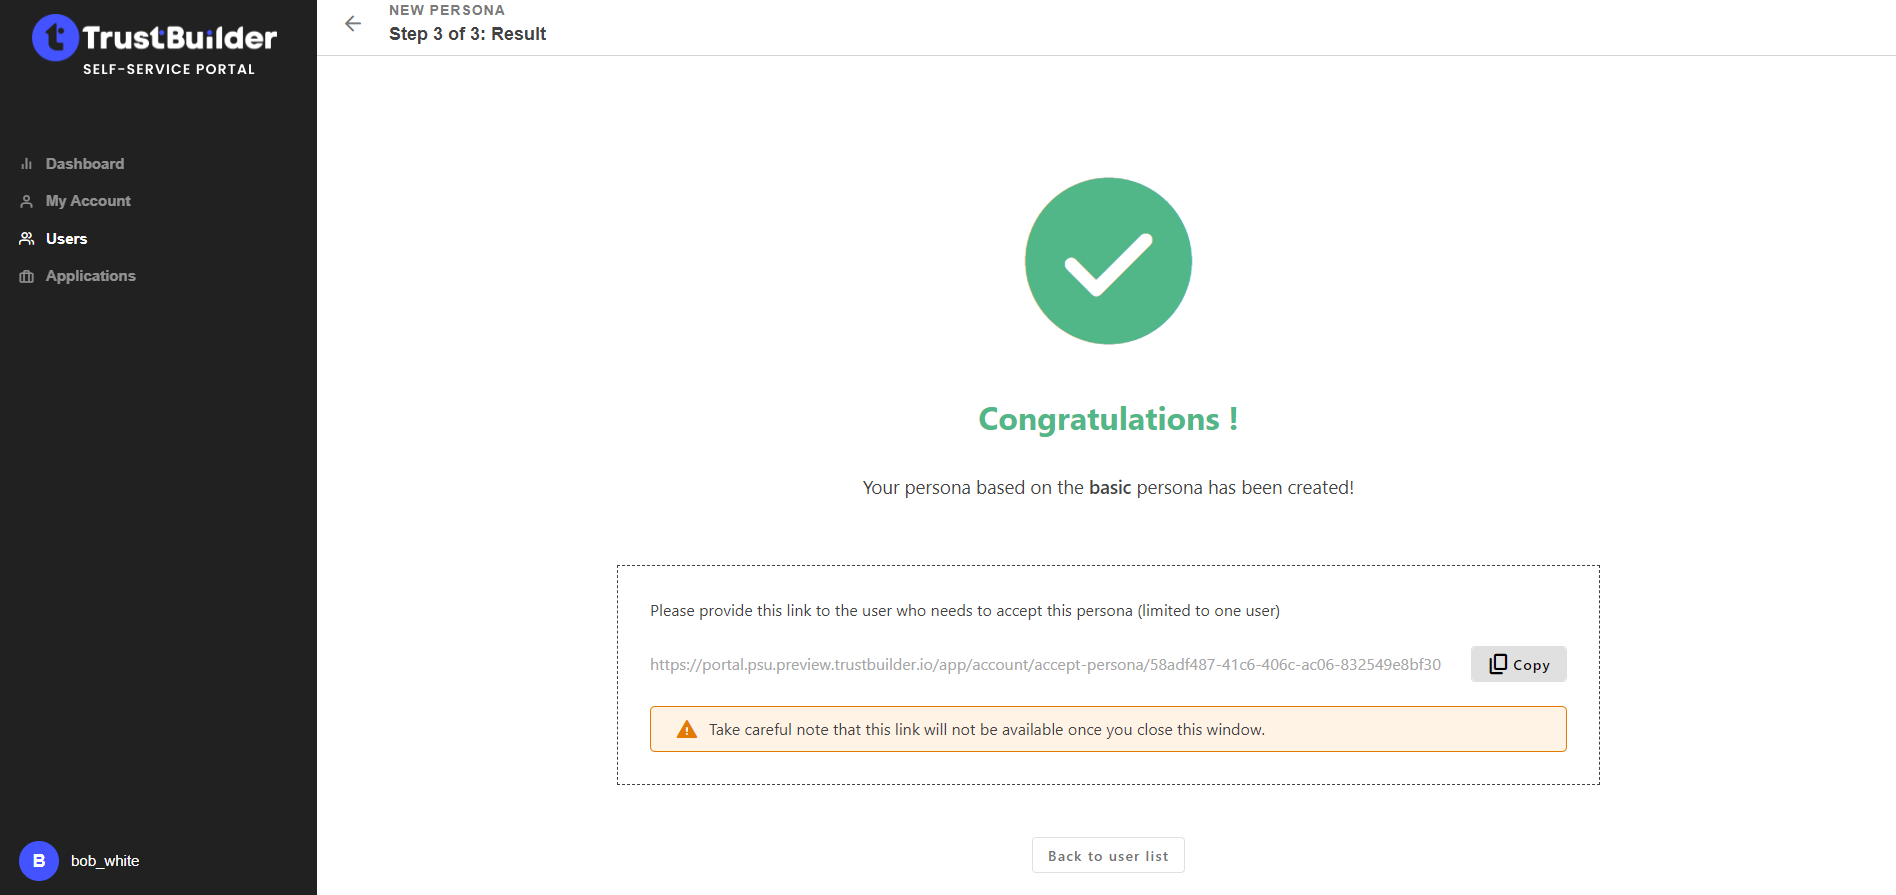
The user should log in to the Self-Service Portal and accept to approve the request.
Go to My work menu > Requests Approval tab.
You should see an “Activate persona” request waiting for your approval. Approve the request.
If you don’t see it, check the other tabs and search for the relevant “Assign a persona” request:the request is in “Requests follow-up” tab → the user has not yet approved the request.
the request is in “Requests history” tab → the request has been rejected by the user or has failed.
You now can manage the user persona. The user should now be able to use this persona.
For the user adding process to work correctly:
The user you intend to add must exist in the TrustBuilder tenant,
The user must approve the request using the magic link you provided.