Microsoft Entra ID (EAM) - OIDC
Microsoft EAM (External Authentication Methods) is an upcoming feature in Microsoft Entra ID (formerly Azure AD). It allows organizations to integrate their preferred authentication solutions directly with Entra ID. External Authentication Methods enable integration of third-party authentication methods, offering the same management experience as built-in methods and supporting various Entra ID use cases.
Prerequisites
Integrating TrustBuilder as an External Authentication Methods in EntraID requires the following:
Microsoft Licensing: at least a Microsoft Entra ID P1 license
Trustbuilder:
TrustBuilder user with administrator persona
Configure a custom attribute with the following properties: Category: SCIM | Attribute name: oid | Data type: string | Properties: Unique, case-sensitive | Visibility: Hidden on Self-Service portal
Copy the attribute URN. You will need it to map the attribute in Entra ID.
Add this attribute to the user profile definition - more information.
ABOUT THE OID
The Object ID (OID) is a unique identifier for each user in Microsoft Entra ID.
TrustBuilder uses this OID to identify users and populate the sub claim in the ID Token. Without it, authentication would fail because Entra requires a valid sub.
Step 1 - Configure an application in TrustBuilder
Create and configure an application in TrustBuilder:
Log in to TrustBuilder administrator portal.
Go to Applications > Applications > + Set up app integration.
Select OIDC.
In General section, enter a name and optionally a description and a logo.
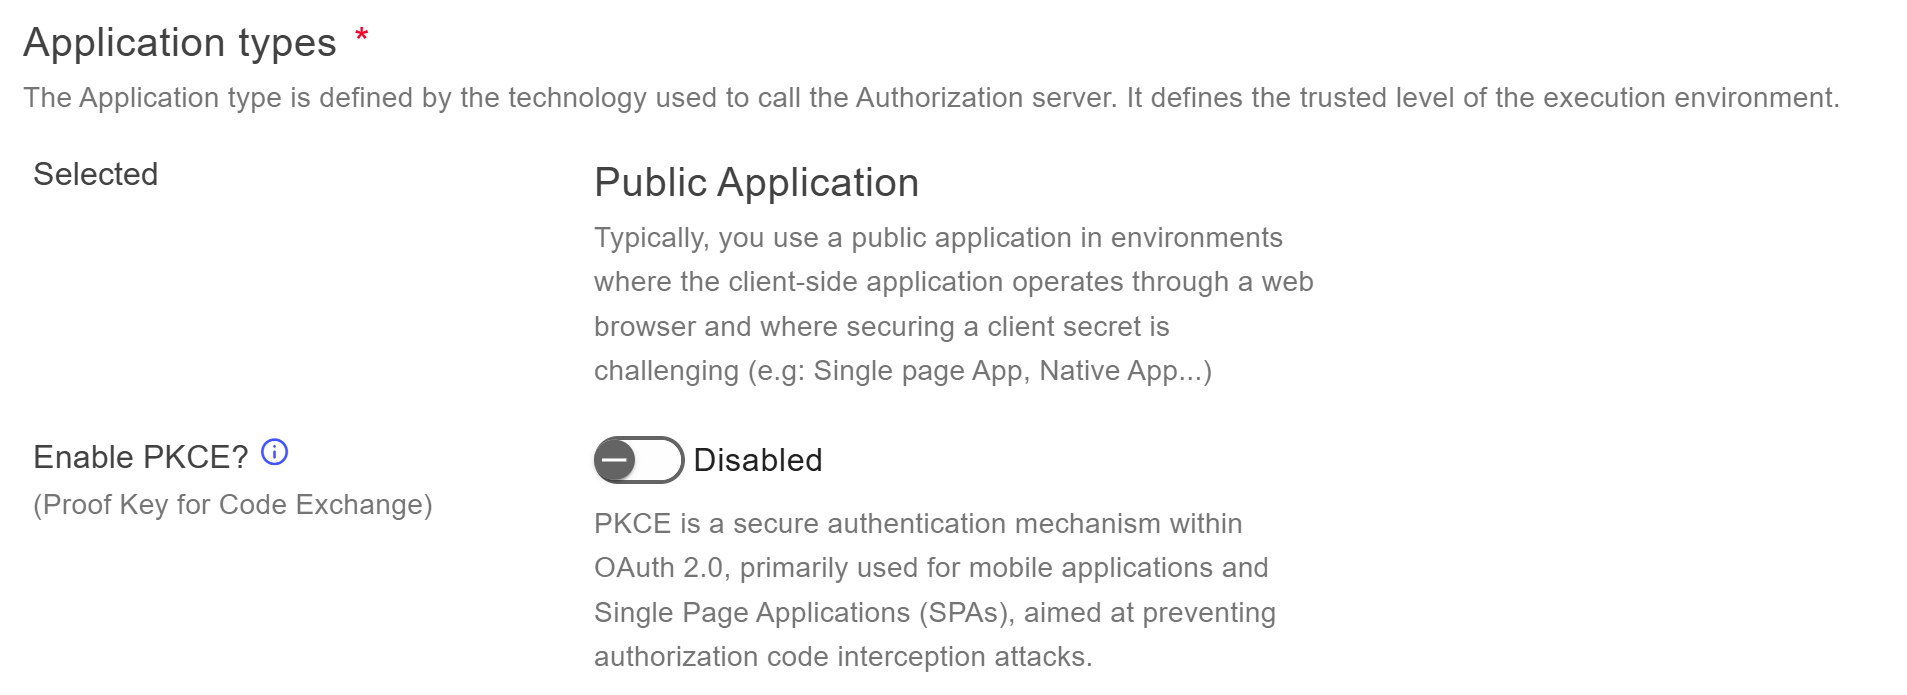
Choose the application type Public Application.
Click on Next.
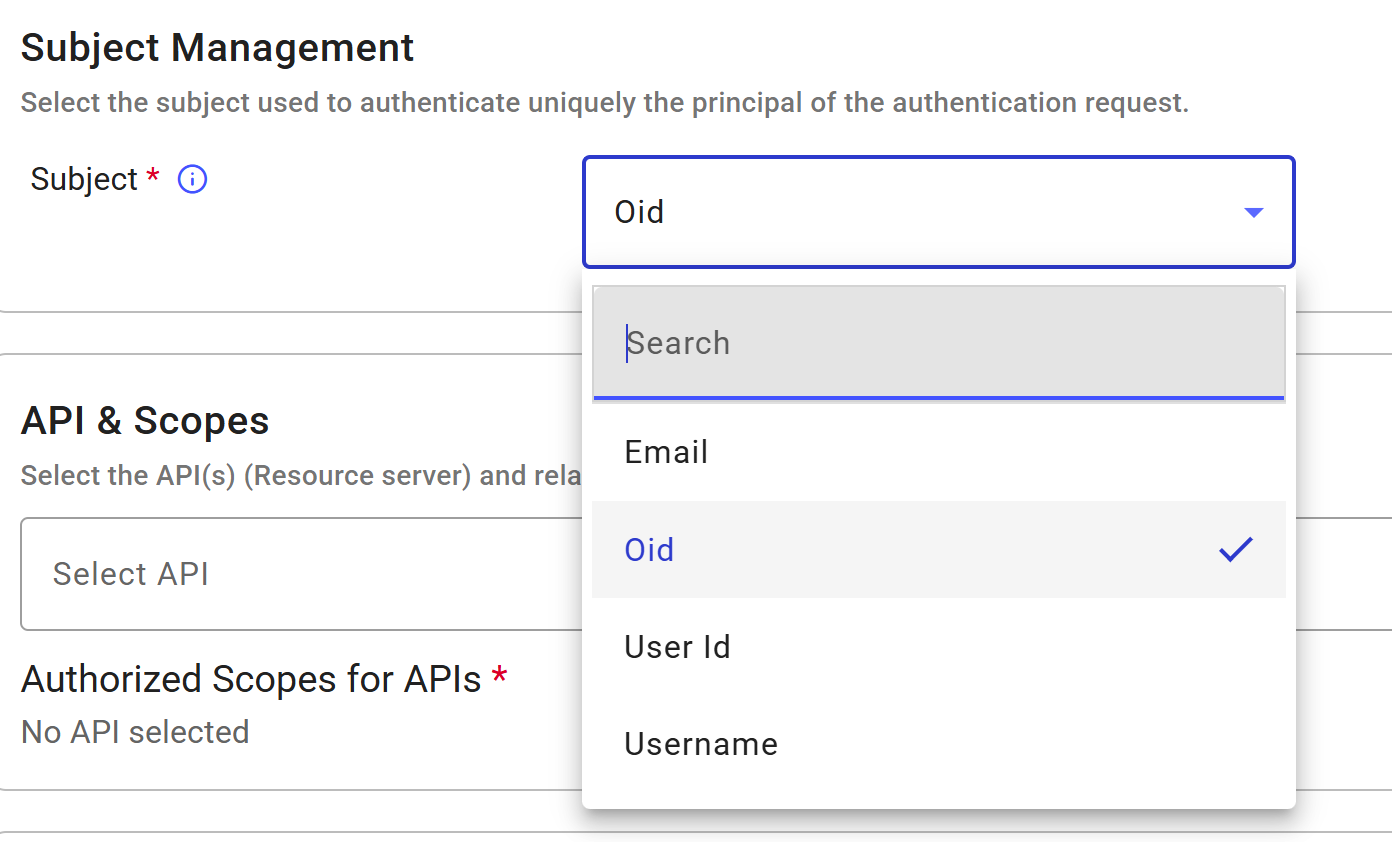
For the subject, select oid (see Prerequisites). TrustBuilder will use the oid to check if the user exists.
Select the API scope. You can select Internal API. No additional scopes are needed for this integration: the default
openidscope is sufficient.Enter the following redirect URI:
https://login.microsoftonline.com/common/federation/externalauthproviderSelect:
the authorization policy → you can choose the default built-in policy. This policy requires users to be authenticated with an authentication method meeting AAL3 level.
the JWT Signature Algorithm → Microsoft wants a certificate SHA256 or EC256.
Click on Submit.
Click on Done.
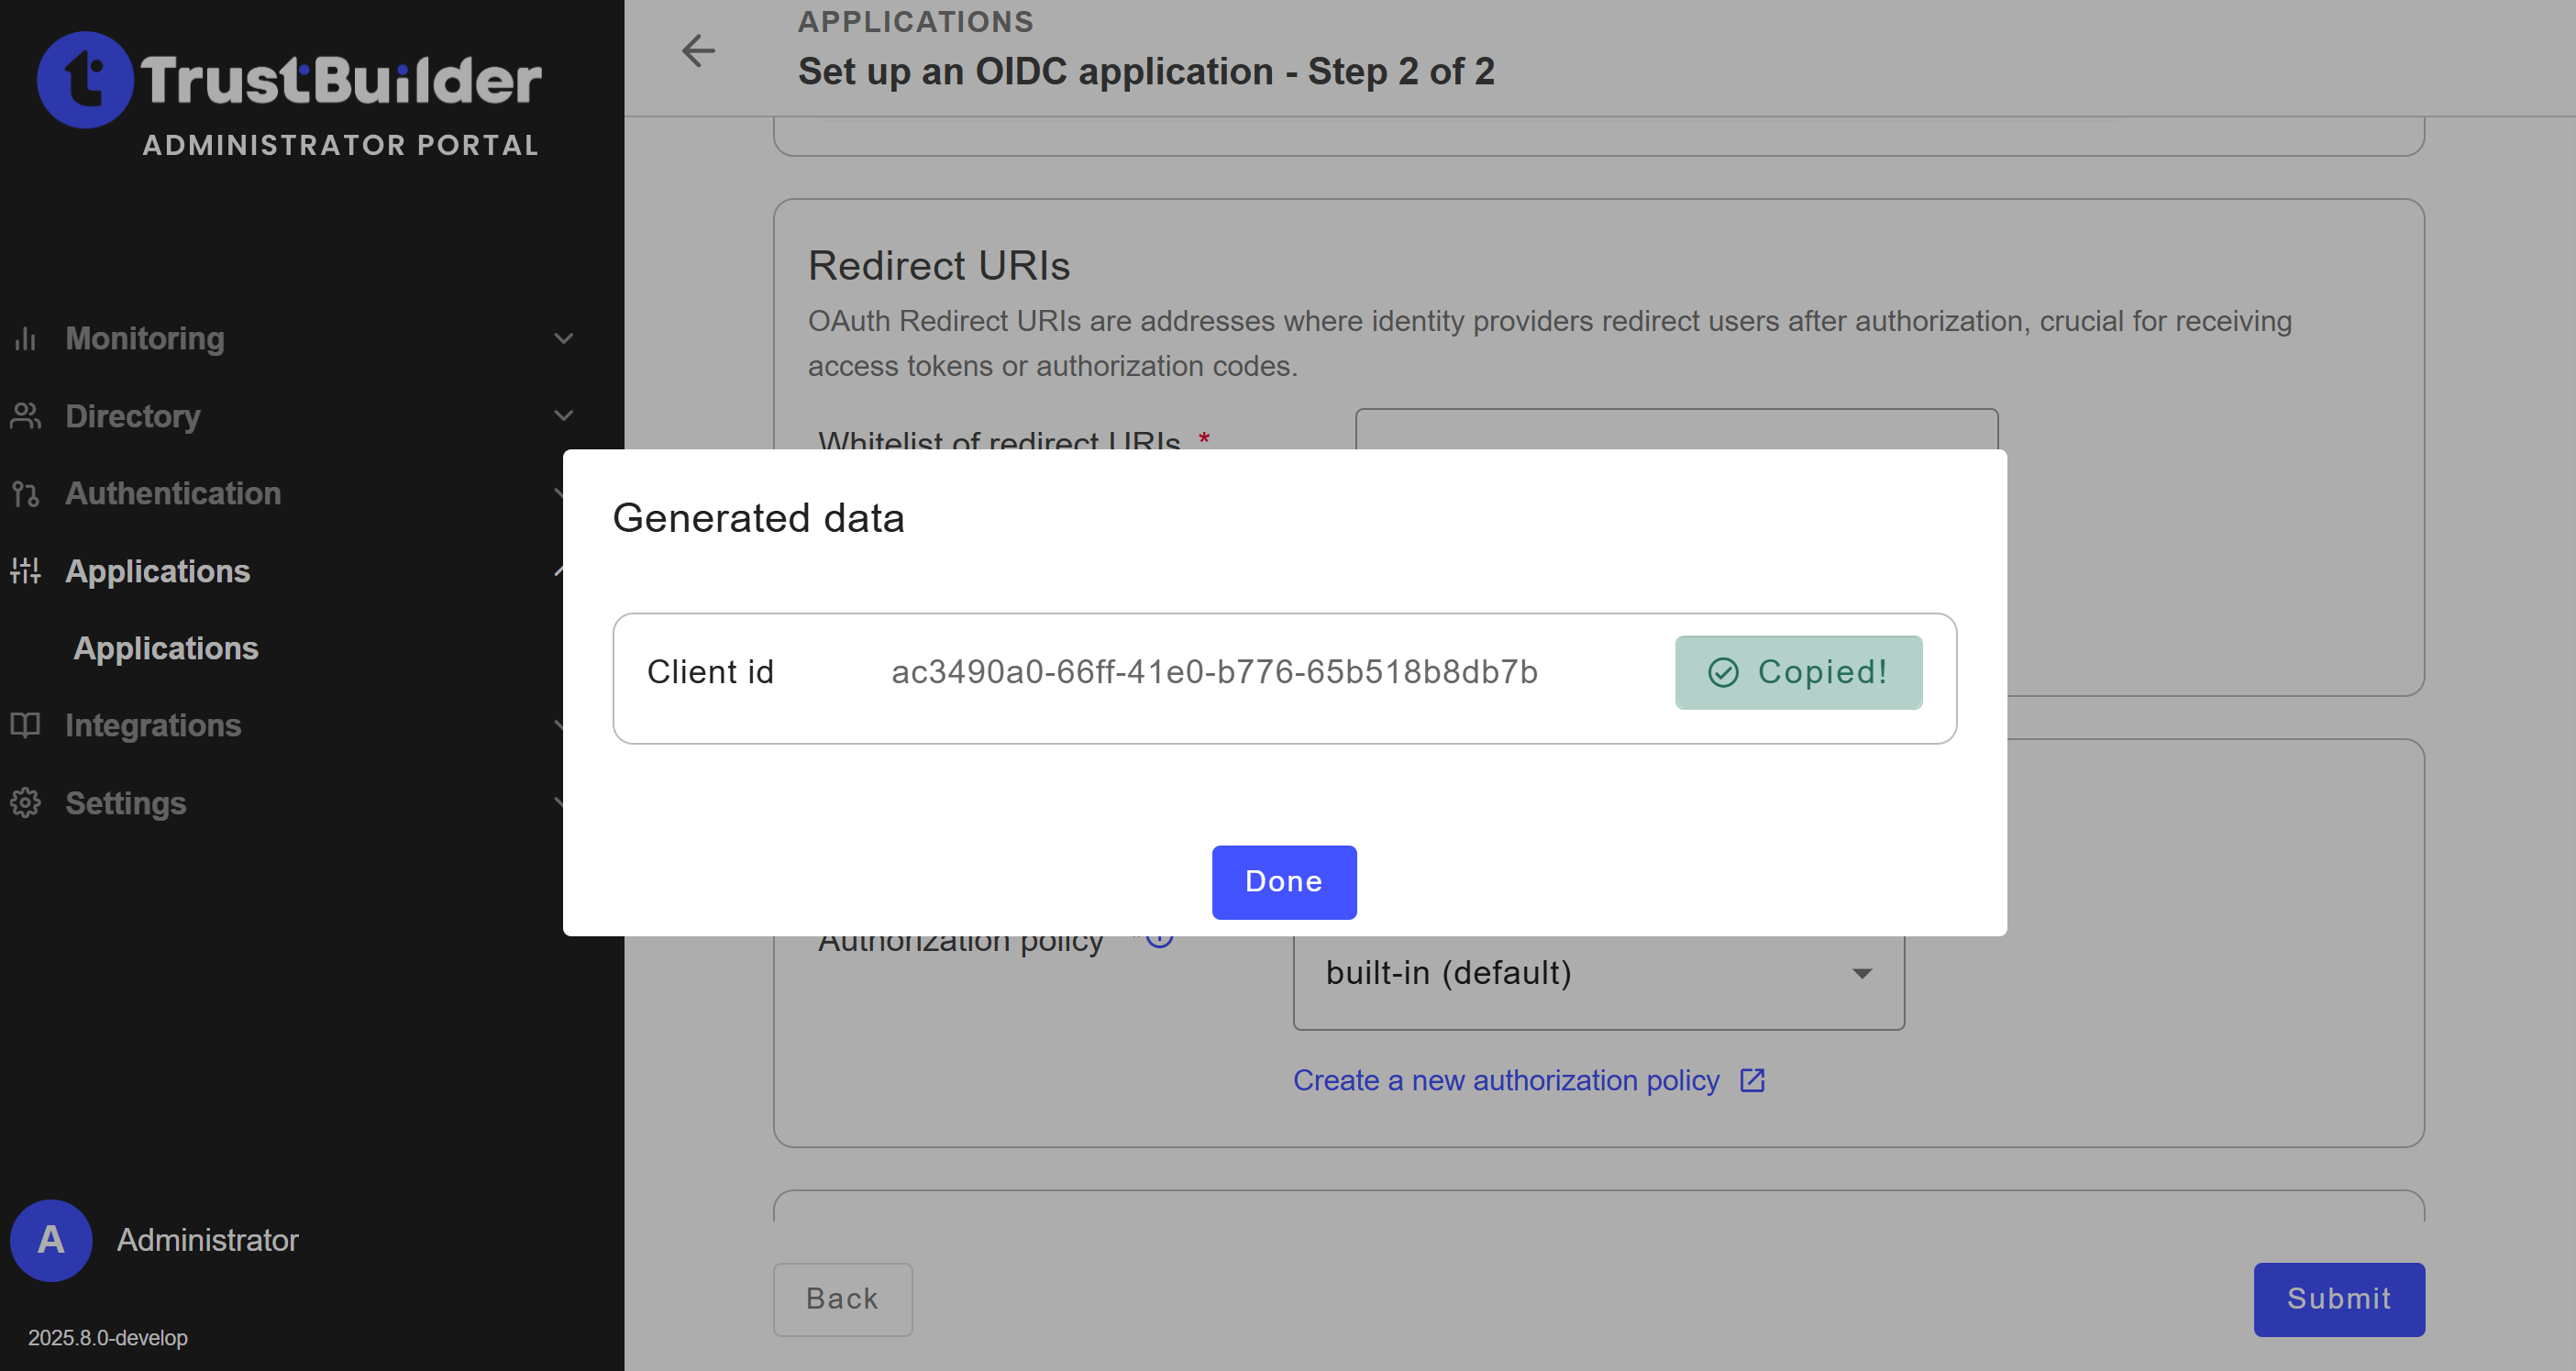
The main configuration is complete.
In the General tab, disable PKCE.
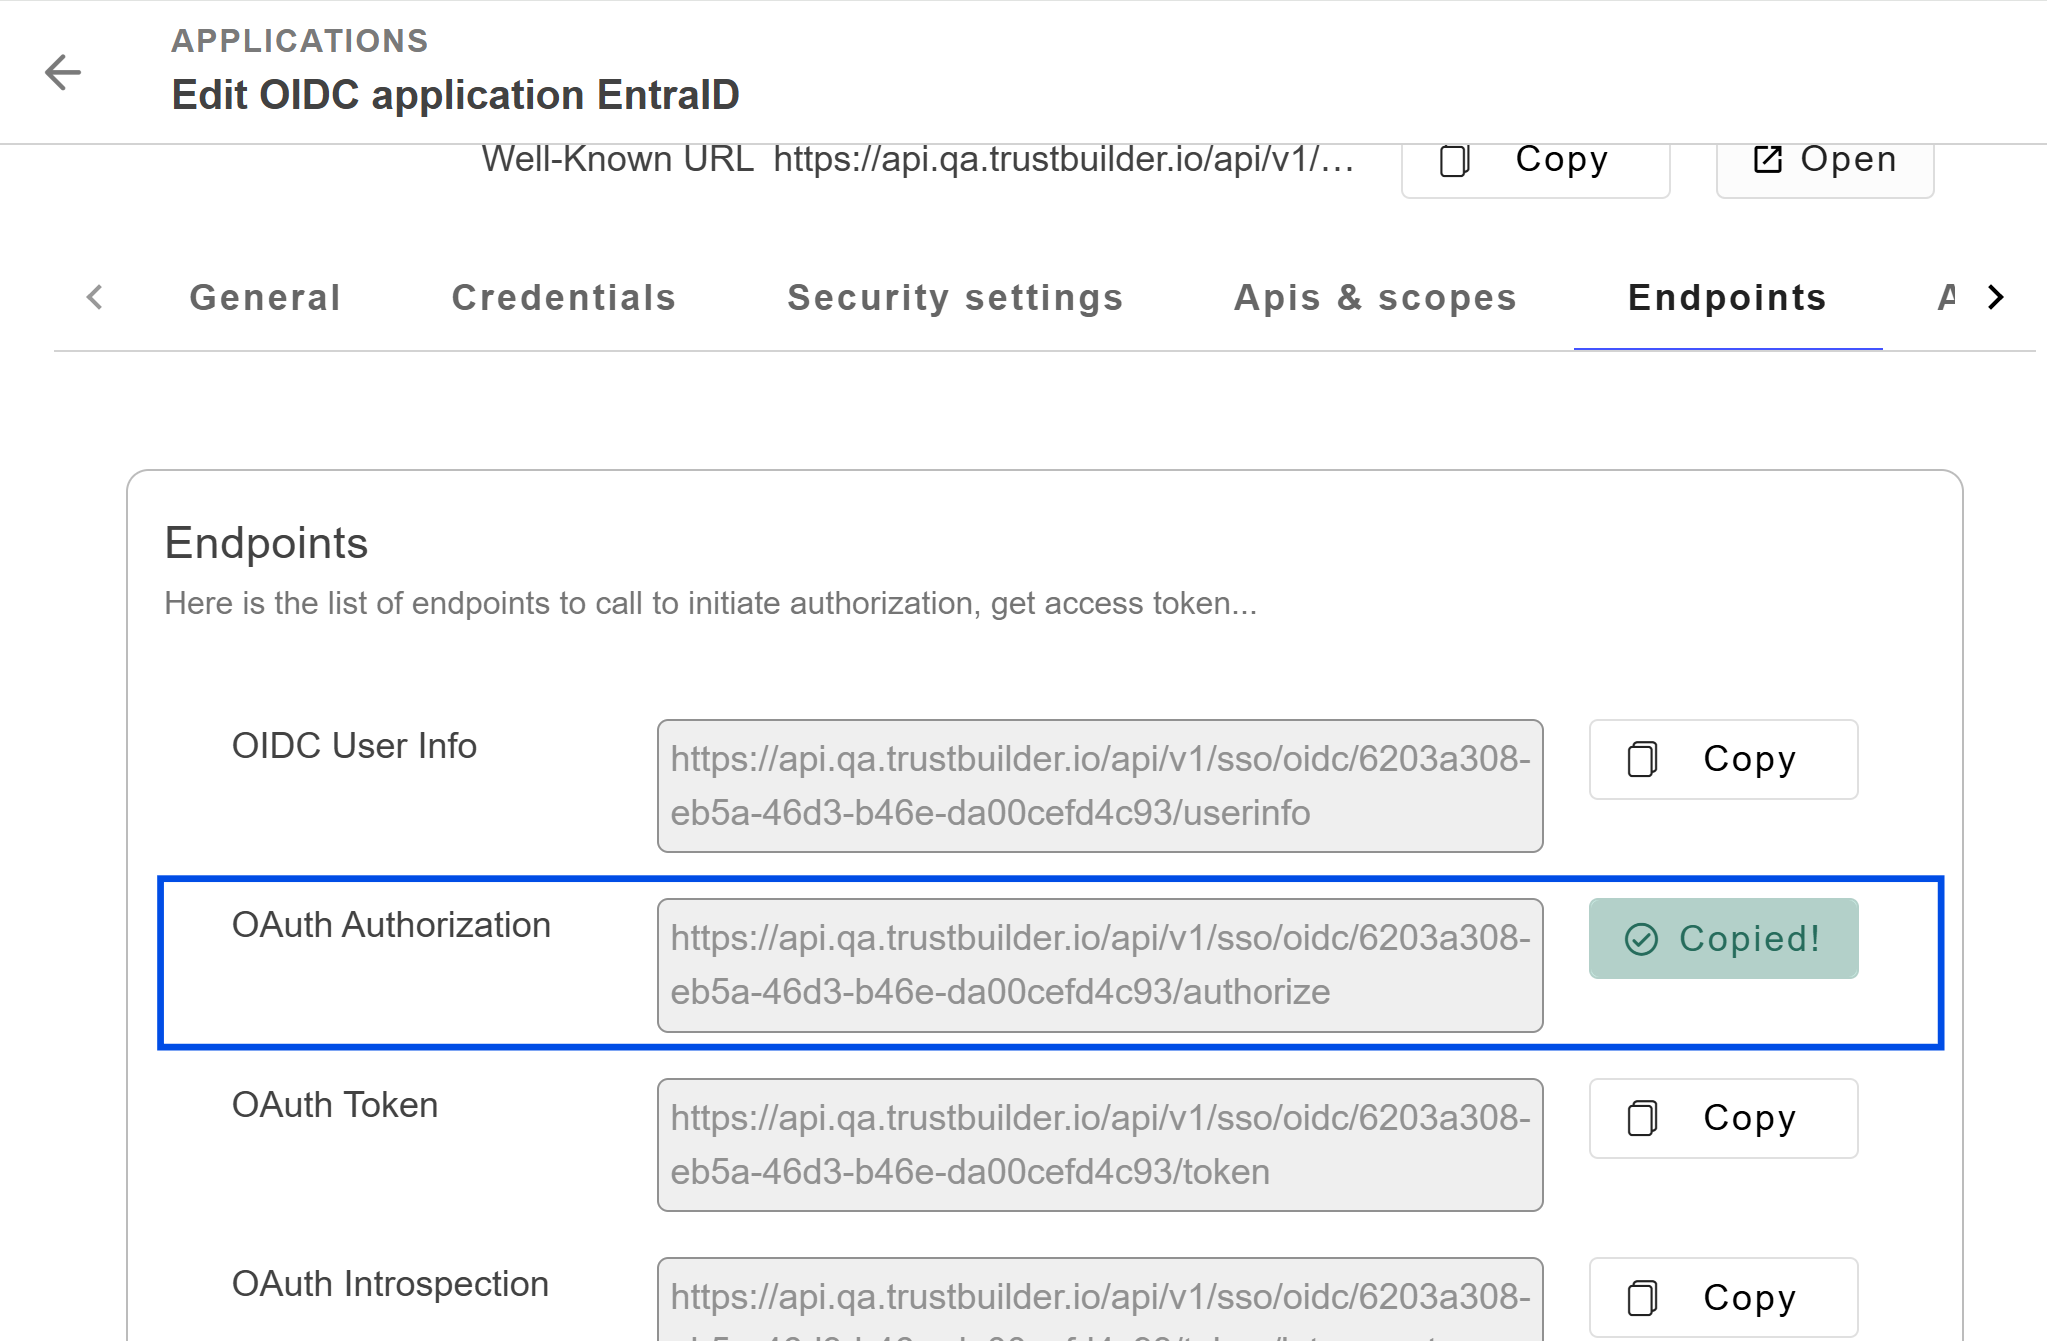
In the Endpoints tab, you will find the OAuth Authorization URL. Copy it as you will need this information in Entra ID to connect the application to TrustBuilder.
Step 2 - Register an application in Entra ID
Register an application in Entra ID and connect it to TrustBuilder:
Log in to Microsoft Entra admin center.
Go to App registration > + New registration.

Define a name and set the supported account types to "Accounts in any organizational directory (Any Entra ID directory - Multitenant)".
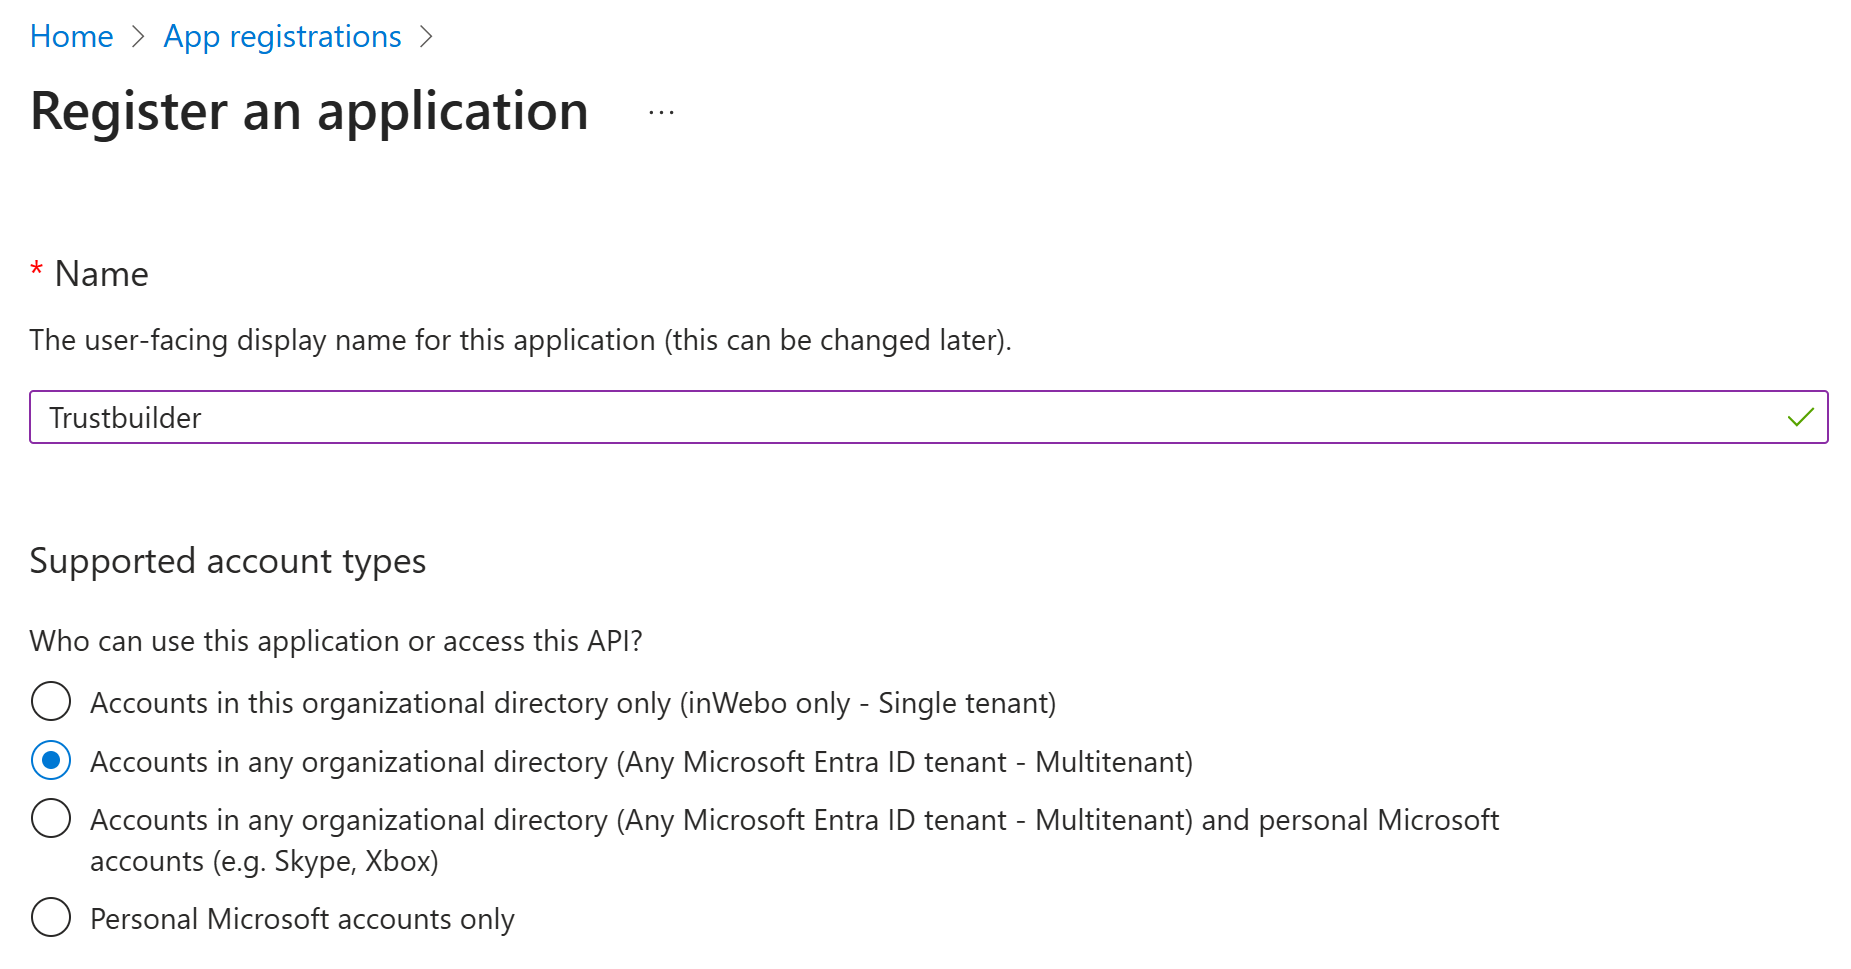
In the Redirect URI section:
Select Web platform,
Paste the Authorization endpoint previously copied from Trustbuilder.


Click on Register.
Once the app is created in Entra ID, you will find information in the Essentials section.
Keep the Application (client) ID handy, as you'll need it later to configure your EAM.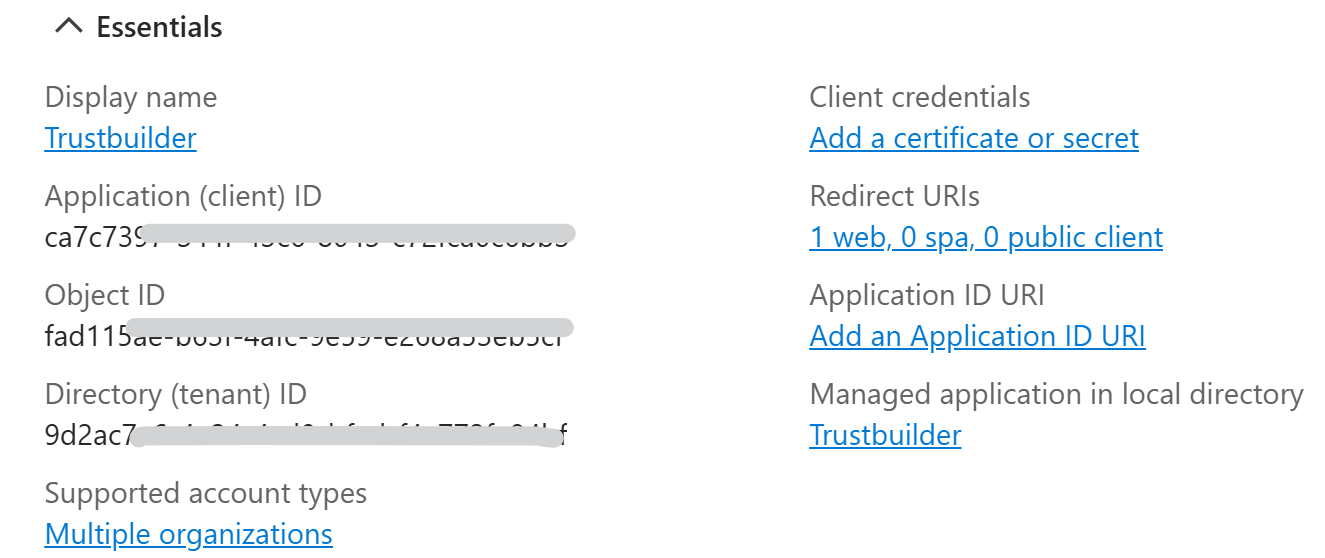
Step 3 - Add TrustBuilder as an External Authentication Method (EAM) in Entra ID
The number of external authentication methods is currently limited to 6 in Entra ID.
In Microsoft Entra admin center:
Go to Authentication methods > Policies.
Click on + Add external method.
Set parameters for TrustBuilder authentication method:
Name: Enter a name for TrustBuilder authentication method.
⚠️ Users will see this name when they select their authentication method during Entra ID login. Choose a name that is clear and recognizable to them. It cannot be changed.
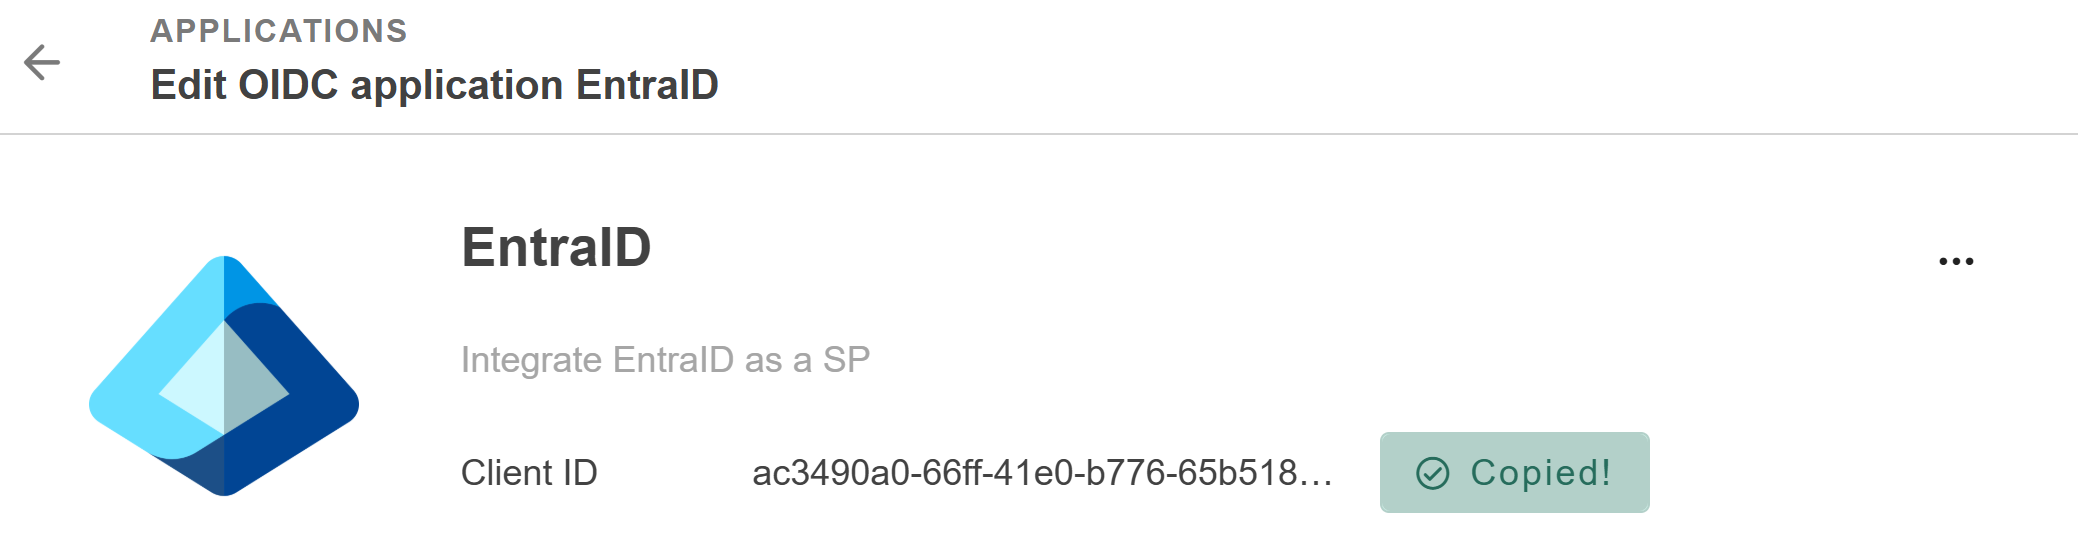
Client ID: Paste the Client ID of your TrustBuilder OIDC application.
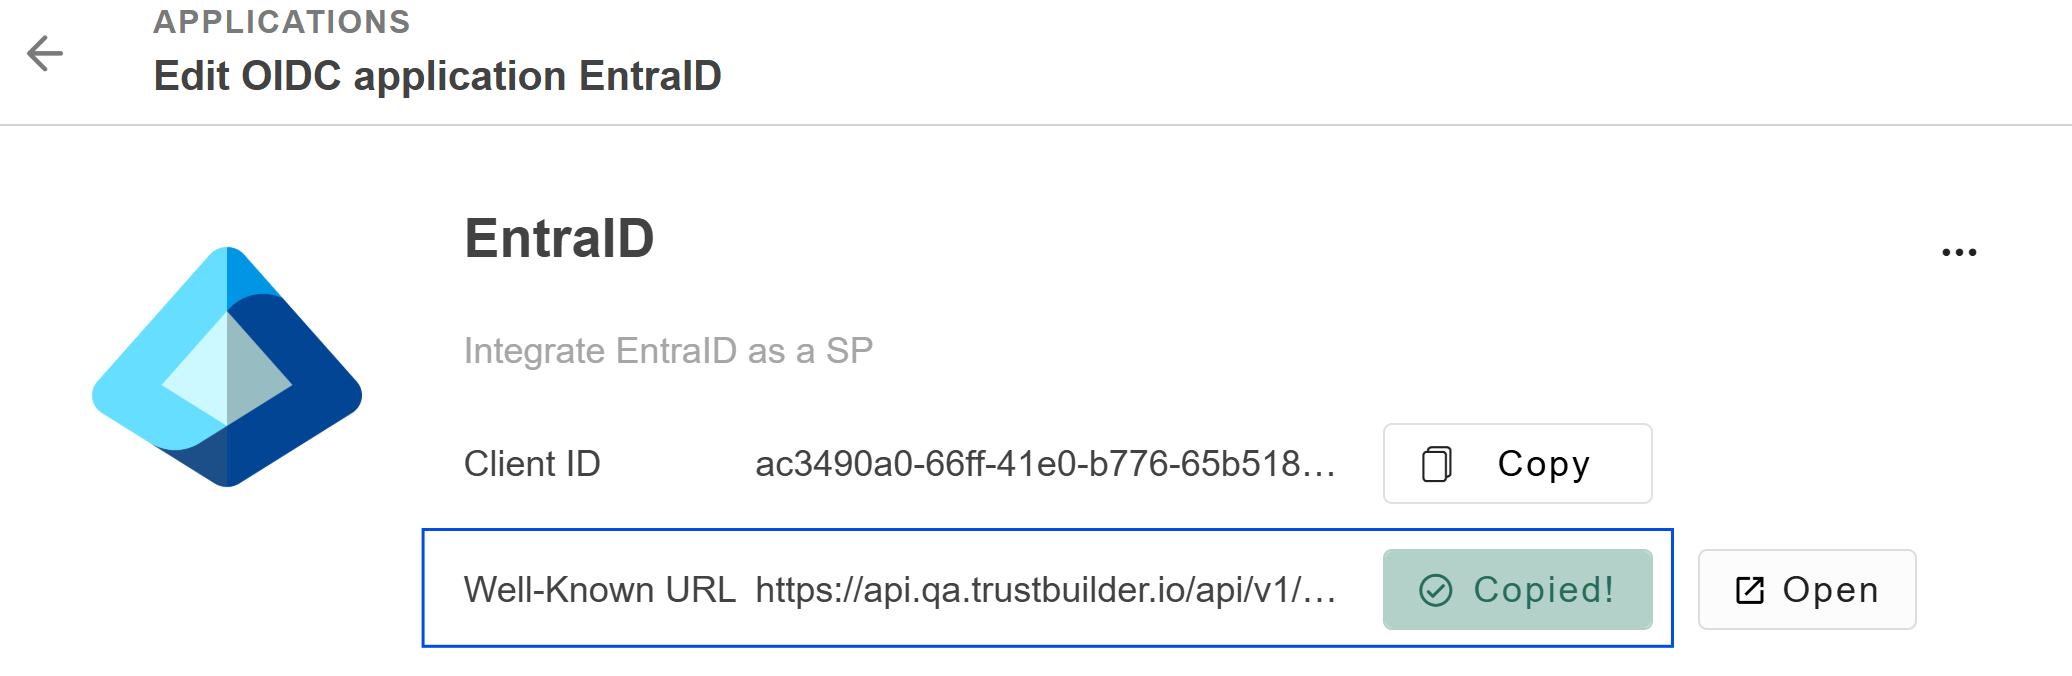
Discovery Endpoint: Paste the Well-Known URL of your TrustBuilder OIDC application.
App ID: Paste the Application ID value of your app in Entra ID.
(To retrieve the Application ID go to App registrations > All applications > Application (client) ID column)Request admin consent: Click on “Request permission” to request for admin consent to be granted to the application so that they can read the required info from the user to authenticate correctly.
You are prompted to sign in with an account with admin permissions and grant the provider’s application with the required permissions. After you grant admin consent and the change replicates, the page refreshes to show that admin consent was granted.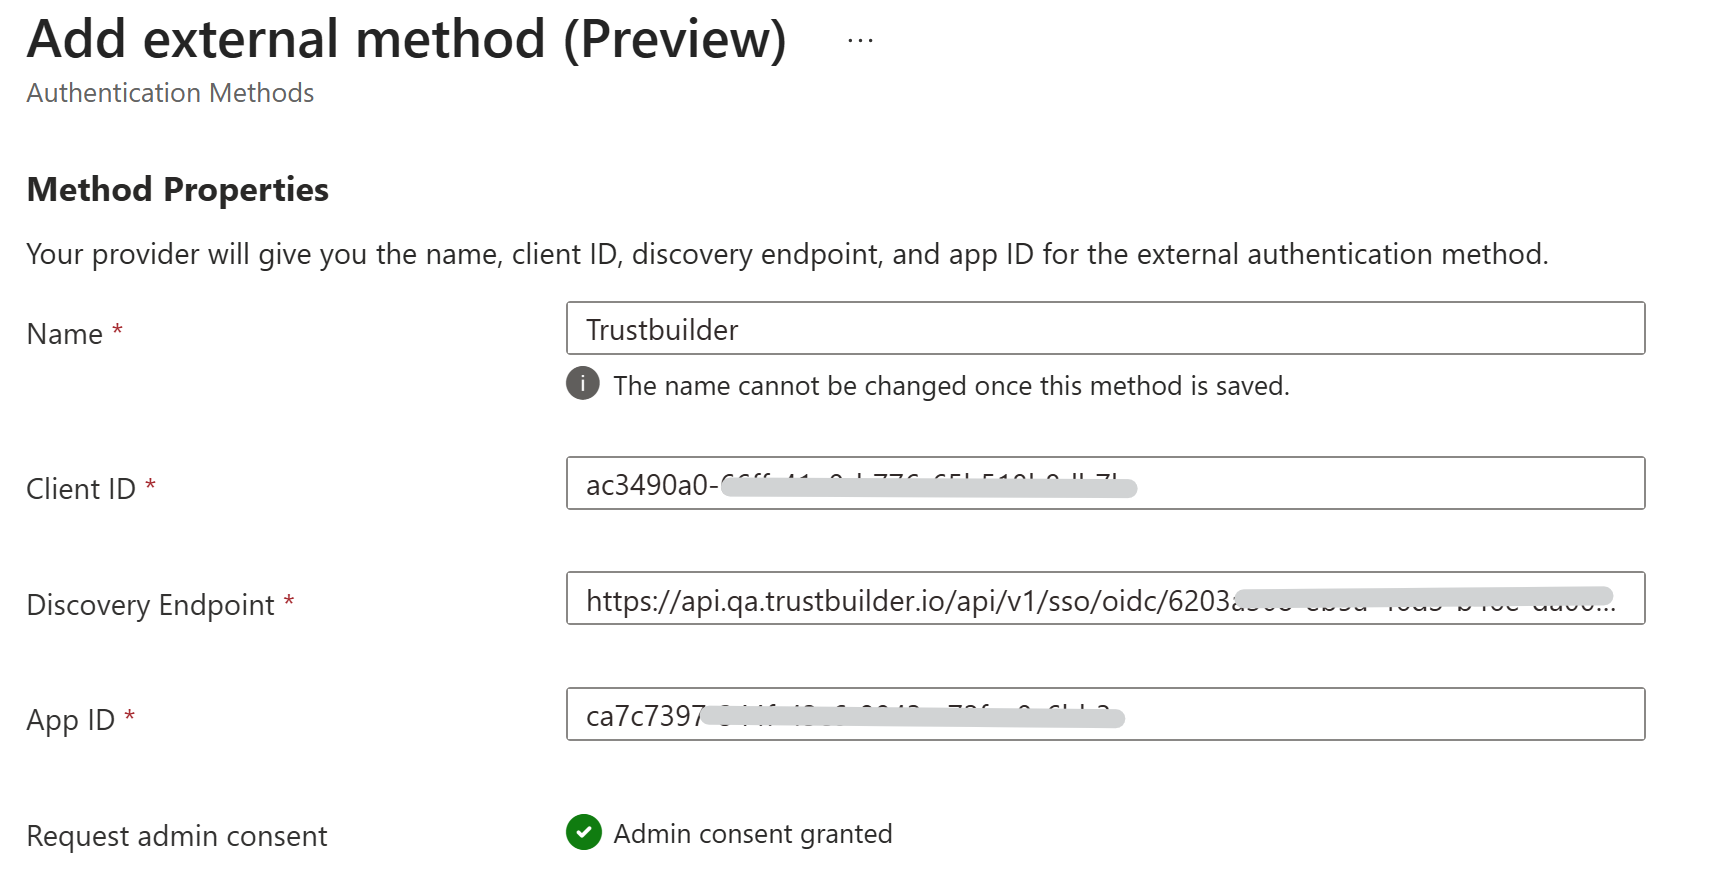
Check the included and excluded targets. All users are included by default.
Enable the TrustBuilder EAM.
If you want to enable only the newly created authentication methods, make sure the 'built-in' methods are disabled (in Authentication Methods > Policies).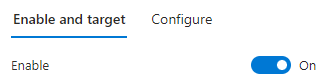
Save the configuration.
Step 4 - Configure a conditional access policy in Entra ID
In Microsoft Entra admin center:
Go to Conditional Access > Policies.
Click on + New Policy (or edit an existing one).
Enter a name
Specify the users that will be covered by this policy.
Specify the target applications.
Specify the access that should be granted.
In our case, check Require multifactor authentication. Thus, our EAM will be used as a MFA step.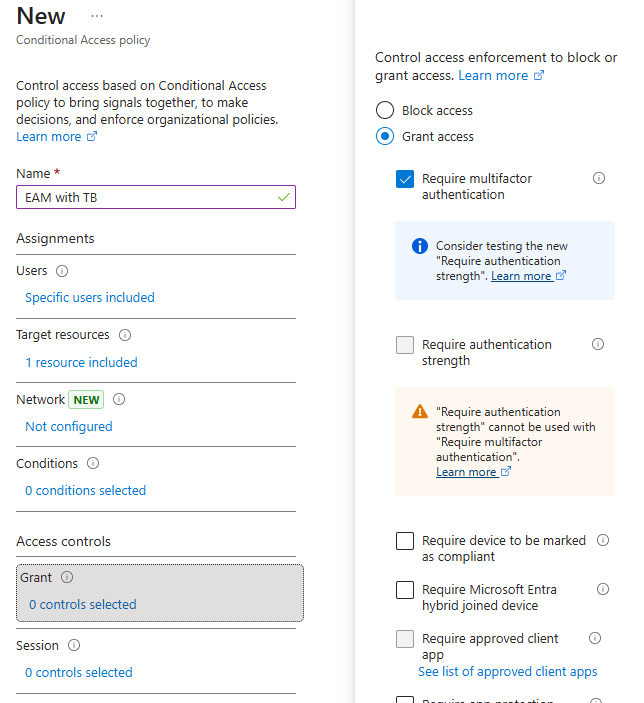
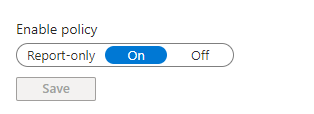
Enable the policy.
Click on Create.
When selecting "✅ Require multifactor authentication" you don't specify which EAM will be used. If multiple EAMs are defined for the same app and available to all users, the process might not use the intended EAM.
Make sure that both, the EAM and Conditional Access policy, include and exclude the relevant users to guarantee the correct EAM is applied.
Step 5 - Add the OID in the Attribute mapping
You should add a custom OID attribute to the attribute mapping to ensure TrustBuilder correctly identifies users.
In Microsoft Entra admin center:
Go to Enterprise Applications > [Your app] > Provisioning > Attribute Mapping (Preview).
Click on Provision Microsoft Entra ID Users to configure the attribute mapping.
Enable Show advanced options and click Edit attribute list for customappsso
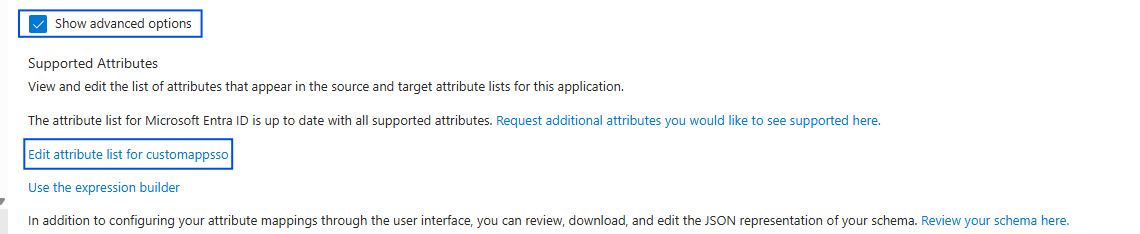
Add the following attribute:
Paste the URN of the custom attribute previously created (See Prerequisites)
CODEurn:ietf:params:scim:schemas:extension:trustbuilder:2.0:User:oidType: String
Click Save.
Click on Add New Mapping.
Fill in at least the mandatory parameters:
Source attribute → select
objectIdTarget attribute → select
urn:ietf:params:scim:schemas:extension:trustbuilder:2.0:User:oid
Click Ok.
Troubleshooting
AADSTS5001258: Failed to validate external id_token: 'acr' claim has unexpected value.
There two possible cases:
This error happens when the connector has been modified or when the external authentication method has been modified. Solution: wait some time and retry. The error should disappear.
Check the Connector type. It it is OIDC, create a OIDC Azure AD connector and use it instead.