This guide provides a step-by-step process to integrate SonicWall Cloud Secure Edge (CSE) with TrustBuilder MFA using SAML authentication.
Users do not need to be manually created in the Directory section; they are automatically added after a successful authentication.
Configuration
Step 1: Create a SAML connector on TrustBuilder MFA platform
-
Login to TrustBuilder MFA administration console.
-
Go to the Secure Sites tab.
-
In the Connectors section, click on “Add a connector of type… and select SAML 2.0.
-
Click on Add.
The SAML connector on TrustBuilder side has been created. You will need to use the Identity Provider (IdP) Metadata during Sonicwall CSE configuration.
-
Download the TrustBuilder IdP certificate. You will import it into Sonicwall CSE later.
You will come back later to this connector to insert the Sonicwall CSE SP metadata and configure attributes.
Step 2: Retrieve Sonicwall CSE inputs
On the Sonicwall CSE platform:
-
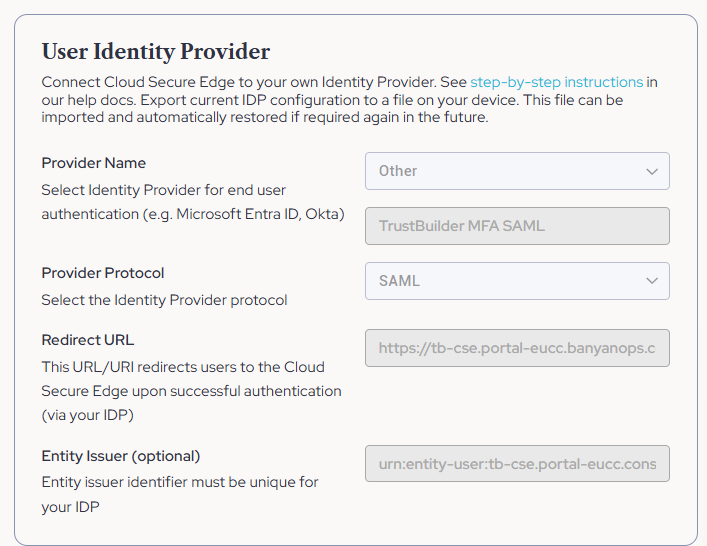
Navigate to Settings > End User > User Identity Provider
-
Fill in User Identity Provider section:
-
Provider Name: Other (TrustBuilder MFA SAML)
-
Provider Protocol: SAML
-
Redirect URL:
https://[YOUR_TENANT].portal-eucc.banyanops.com
You can find the value for[YOUR_TENANT]in the callback URL https://[YOUR_TENANT].portal-eucc.banyanops.com/v2/callback -
Entity Issuer (Optional):
urn:entity-user:[YOUR_TENANT].portal-eucc.console.banyanops.com
-
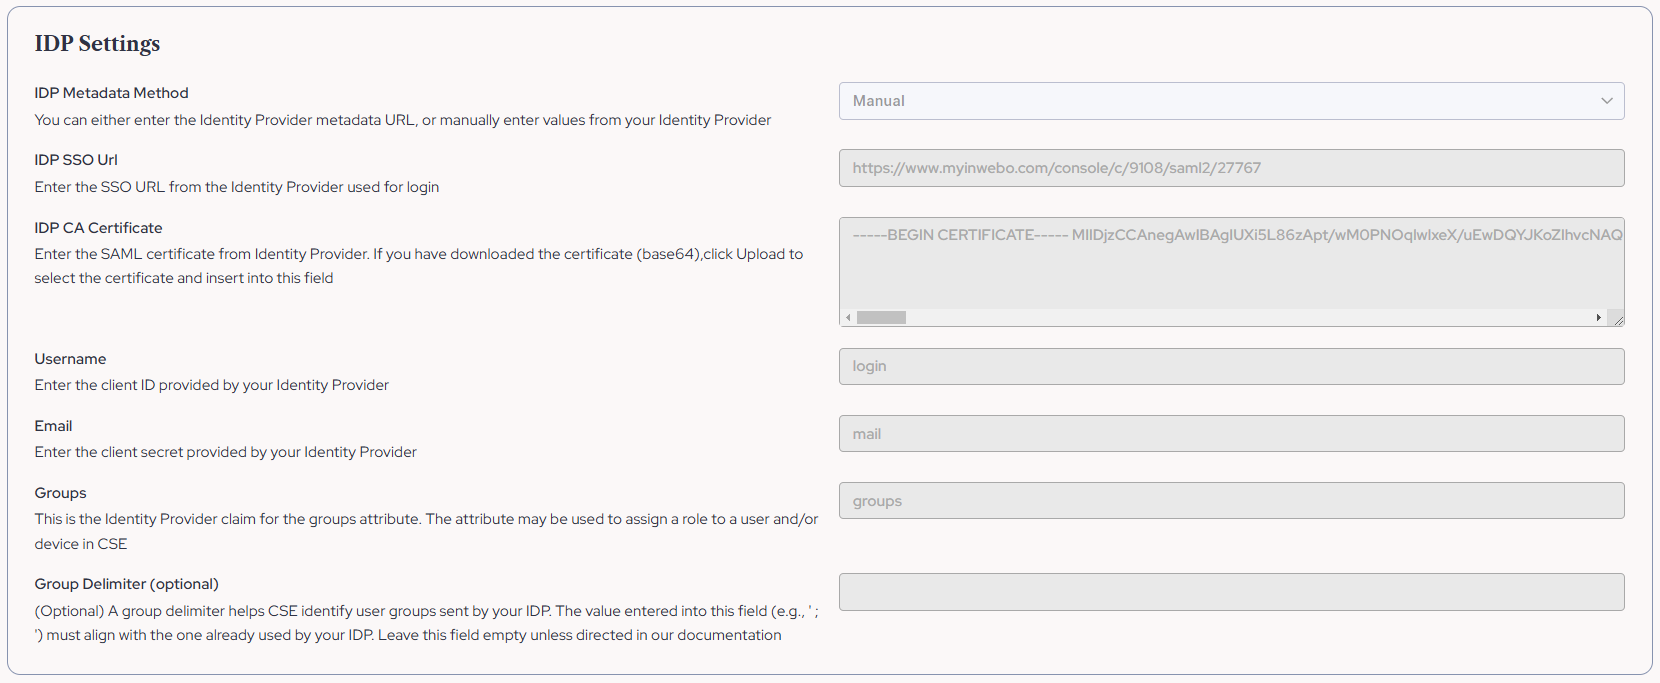
Step 3: Provide the TrustBuilder IdP metadata to Sonicwall CSE
On Sonicwall CSE platform, fill in the IDP Settings form:
-
IDP Metadata Method: Manual
-
IDP SSO URL:
https://www.myinwebo.com/console/c/XXXX/saml2/YYYYY
It is the Single Sing On URL you can find in TrustBuilder connector previously created. -
IDP CA Certificate: Upload the IdP SAML 2.0 certificate from TrustBuilder you have downloaded.
-
Username:
login -
Email:
mail -
Groups:
groups -
Group Delimiter (Optional): Leave empty unless otherwise specified
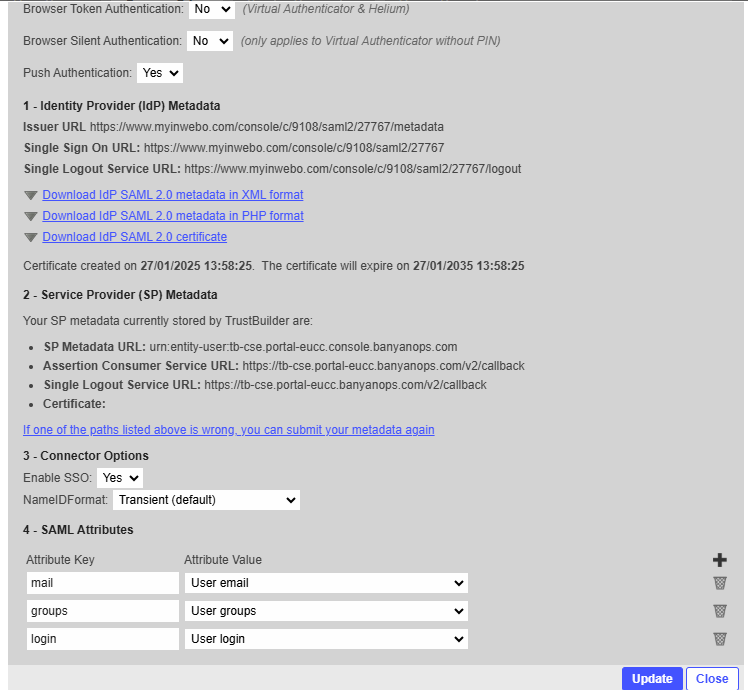
Step 4: Provide Sonicwall CSE SP metadata & attributes to TrustBuilder
On TrustBuilder platform, edit the connector previously created:
-
In Service Provider (SP) metadata, paste the following metadata:
⚠️ Replace[YOUR_TENANT]by your tenant code.<?xml version="1.0" encoding="UTF-8"?> <md:EntityDescriptor xmlns:md="urn:oasis:names:tc:SAML:2.0:metadata" entityID="urn:entity-user:[YOUR_TENANT].portal-eucc.console.banyanops.com"> <md:SPSSODescriptor AuthnRequestsSigned="false" WantAssertionsSigned="true" protocolSupportEnumeration="urn:oasis:names:tc:SAML:2.0:protocol"> <md:SingleLogoutService Binding="urn:oasis:names:tc:SAML:2.0:bindings:HTTP-POST" Location="https://[YOUR_TENANT].portal-eucc.banyanops.com/v2/callback"></md:SingleLogoutService> <md:AssertionConsumerService Binding="urn:oasis:names:tc:SAML:2.0:bindings:HTTP-POST" Location="https://[YOUR_TENANT].portal-eucc.banyanops.com/v2/callback" index="0" isDefault="true"></md:AssertionConsumerService> </md:SPSSODescriptor> </md:EntityDescriptor> -
Add the following SAML attributes:
|
Attribute key |
Attribute value |
|---|---|
|
|
User mail |
|
groups |
User groups |
|
login |
User login |
-
Click on Update.
Step 4: Create a secure site on TrustBuilder platform
On TrustBuilder MFA administration console:
-
Go to the Secure Sites tab.
-
Click on “Add a Secure Site of type” and select the SAML connector name you configured related to your connector for Sonicwall CSE.
-
In the opening window, set the Secure Site name of your choice and the Called URL to point to your Sonicwall CSE internet address.
The Called URL setting is only used to set a bookmark for the user on My account portal, it has no impact on the security.
-
Click on Add to save the configuration.
The secure site related to your SAML connector for Sonicwall CSE has been successfully created.
Testing
SonicWall CSE App
-
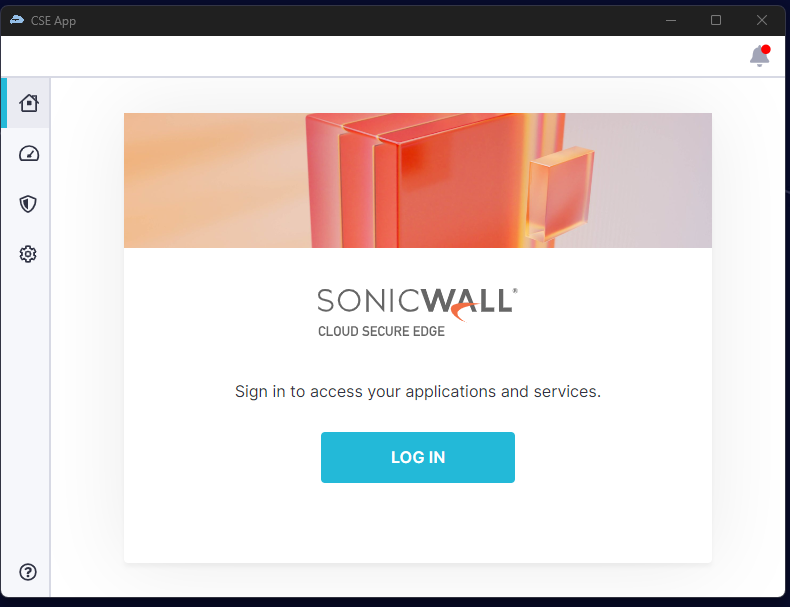
Open the SonicWall CSE App.
-
Click on Log in.
-
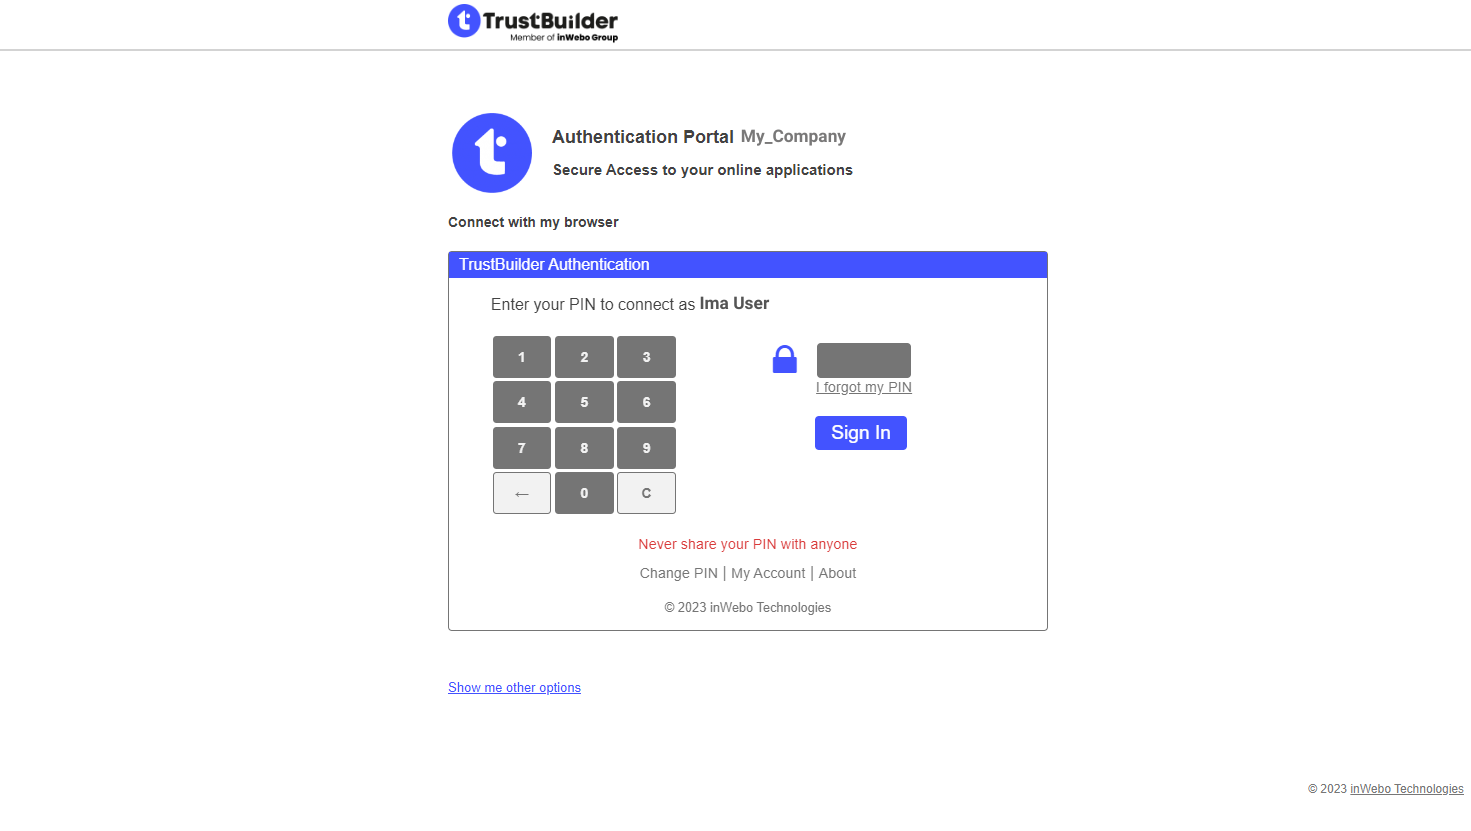
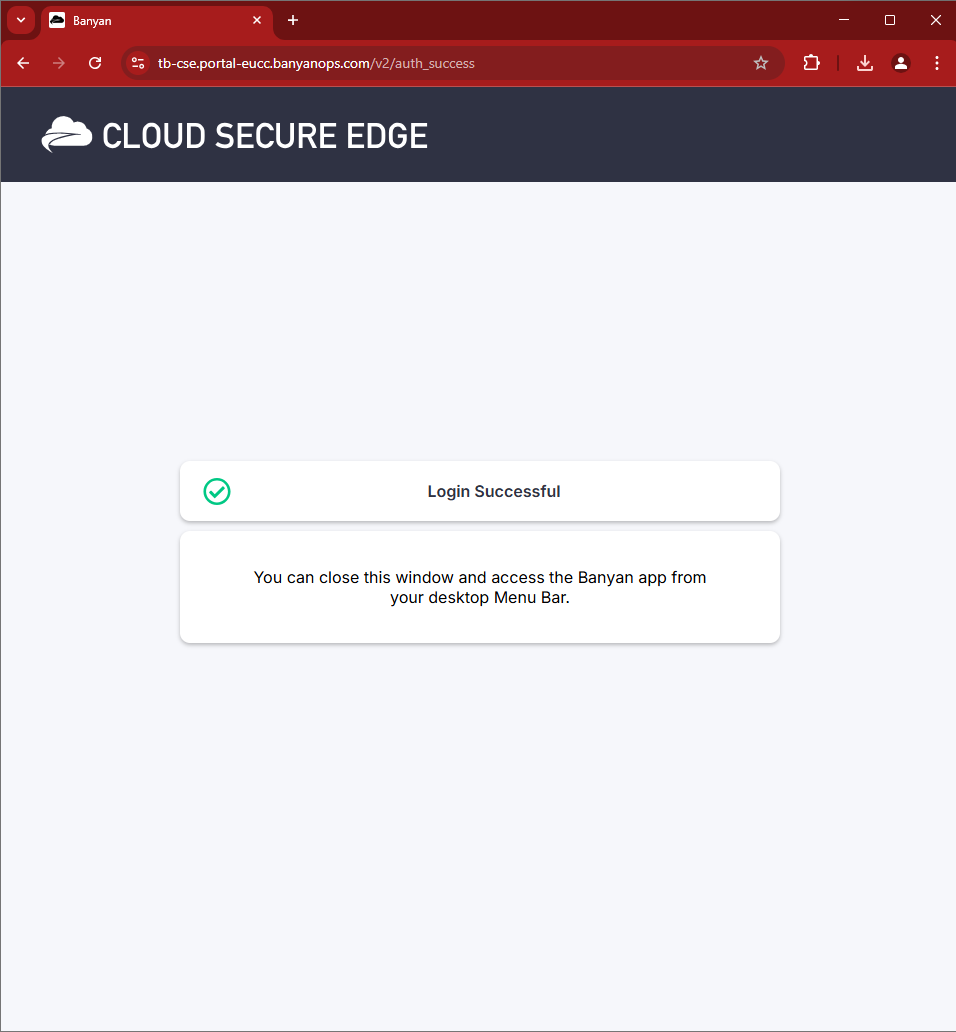
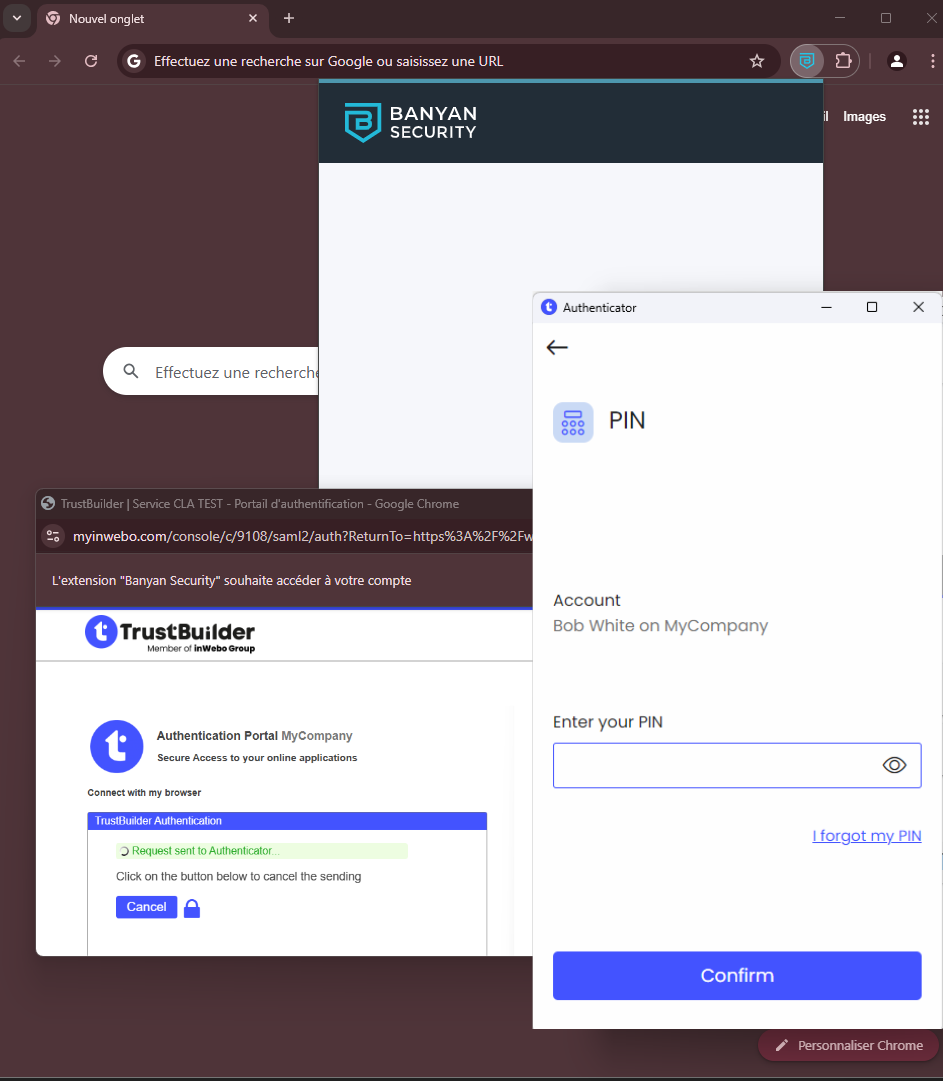
You are redirected to authenticate through TrustBuilder.
Enter your PIN:-
on TrustBuilder browser authentication page
-
or on TrustBuilder Authenticator app
.png?cb=08771bcf4bfa548d3ff40833694c6cc3)
-
-
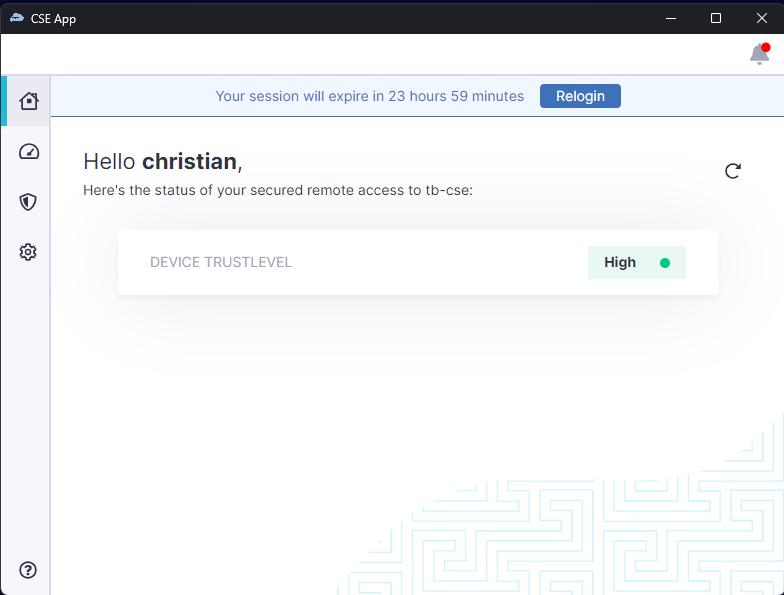
Once successfully authenticated, you can access the SonicWall CSE App.
Bayan Security browser extension
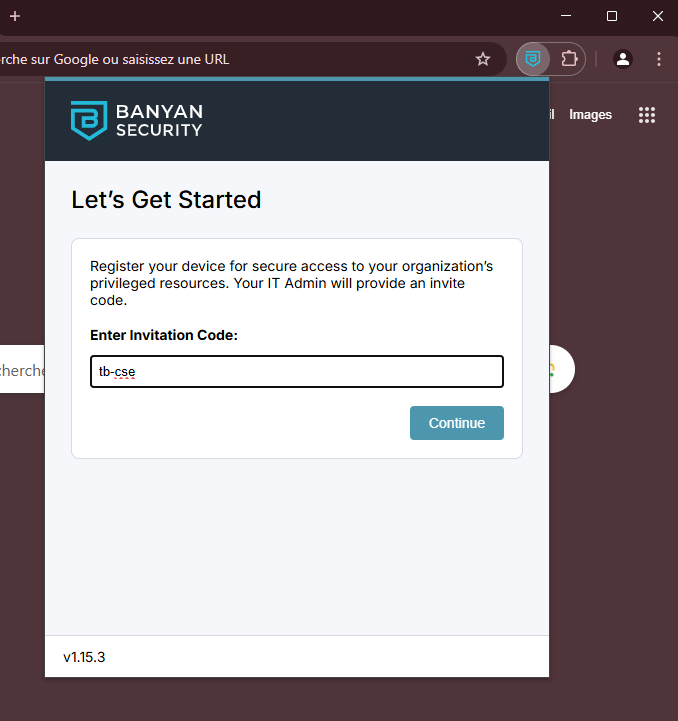
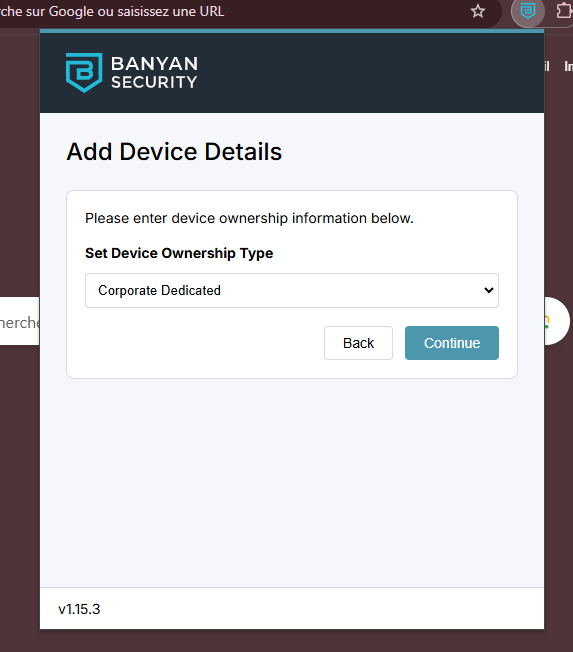
For this integration testing, we used the Banyan Security Chrome Extension.
-
Once installed, click on the Banyan Security Chrome extension icon.
-
Enter an Invitation Code.
-
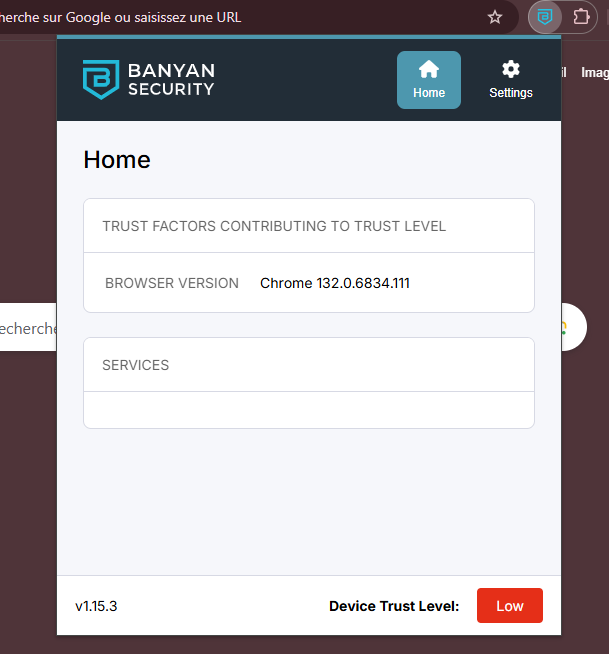
Upon login, a popup window appears to perform the SAML authentication.
-
After authentication, you can access services.
This setup successfully enables SAML-based authentication between Sonicwall CSE and TrustBuilder MFA.