SCIM (System for Cross-Domain Identity Management) is a standard protocol that helps automate user management between systems. In TB Authentication Manager, we added SCIM API endpoints to allow user provisioning and synchronization from external directories.
This guide explains how to connect Microsoft Entra ID (formerly Azure AD) to TrustBuilder using SCIM. It shows how to automatically create, update, and delete user accounts.
Support for other identity providers may be added later.
Refer to Microsoft documentation - Integrate SCIM endpoints with the Microsoft Entra provisioning service to get more information.
Provisioning from Entra ID via SCIM
Microsoft Entra ID will act as the source directory. This means that user data is managed in Entra ID and automatically synchronized with TrustBuilder through SCIM.
As a result, user attributes should not be modified in the TrustBuilder admin console. Any changes made there will be overwritten during the next synchronization. Always make updates (such as name, email, or status) directly in Entra ID.
✅ Prerequisites
-
The SCIM endpoint for your TrustBuilder MFA environment: https://kiwi.myinwebo.com/auth/v1/customer/services/scim
-
A valid Bearer token for the TrustBuilder service you want to synchronize users with (REST API).
-
Microsoft Entra ID Requirements
-
An account with the Application Administrator role.
-
A Microsoft Entra ID Premium P1 license.
-
Step 1: Create an Enterprise app in Microsoft
-
Sign in to the Microsoft Entra admin center.
-
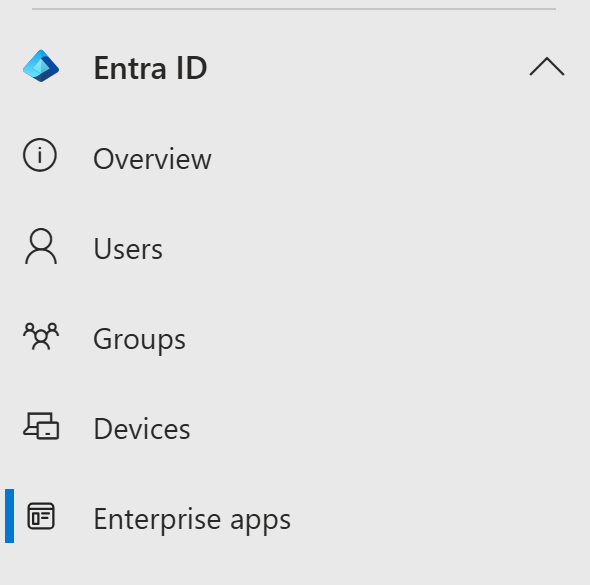
Browse to Entra ID > Enterprise apps.
-
A list of all configured apps is shown.
-
Select + New application > + Create your own application.
-
Enter a name for your application (e.g: SCIM app)
-
Choose the option "Integrate any other application you don't find in the gallery (Non-gallery)".
-
Select Create to create an app.

-
The new app is added to the list of enterprise applications.
Step 2: Configure the Enterprise app in Microsoft
Once the app is created:
-
Navigate to Entra ID > Enterprise Apps.
-
Select your SCIM app.
-
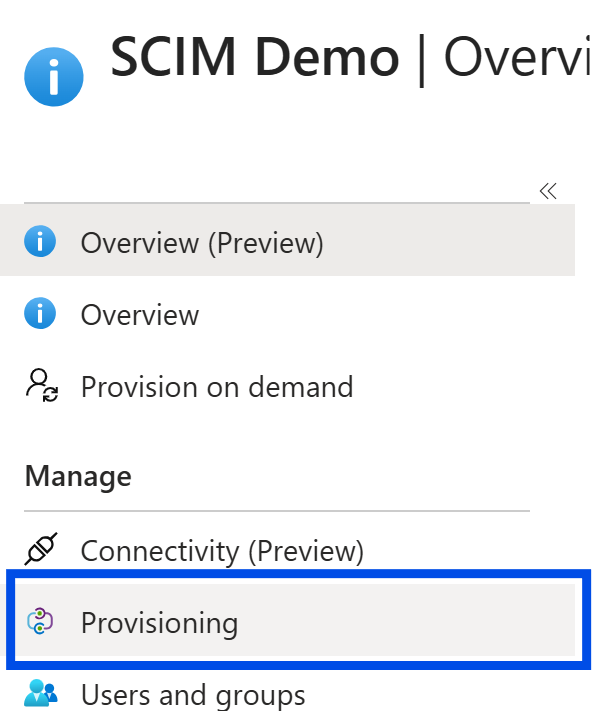
Go to Provisioning section in the left panel.
-
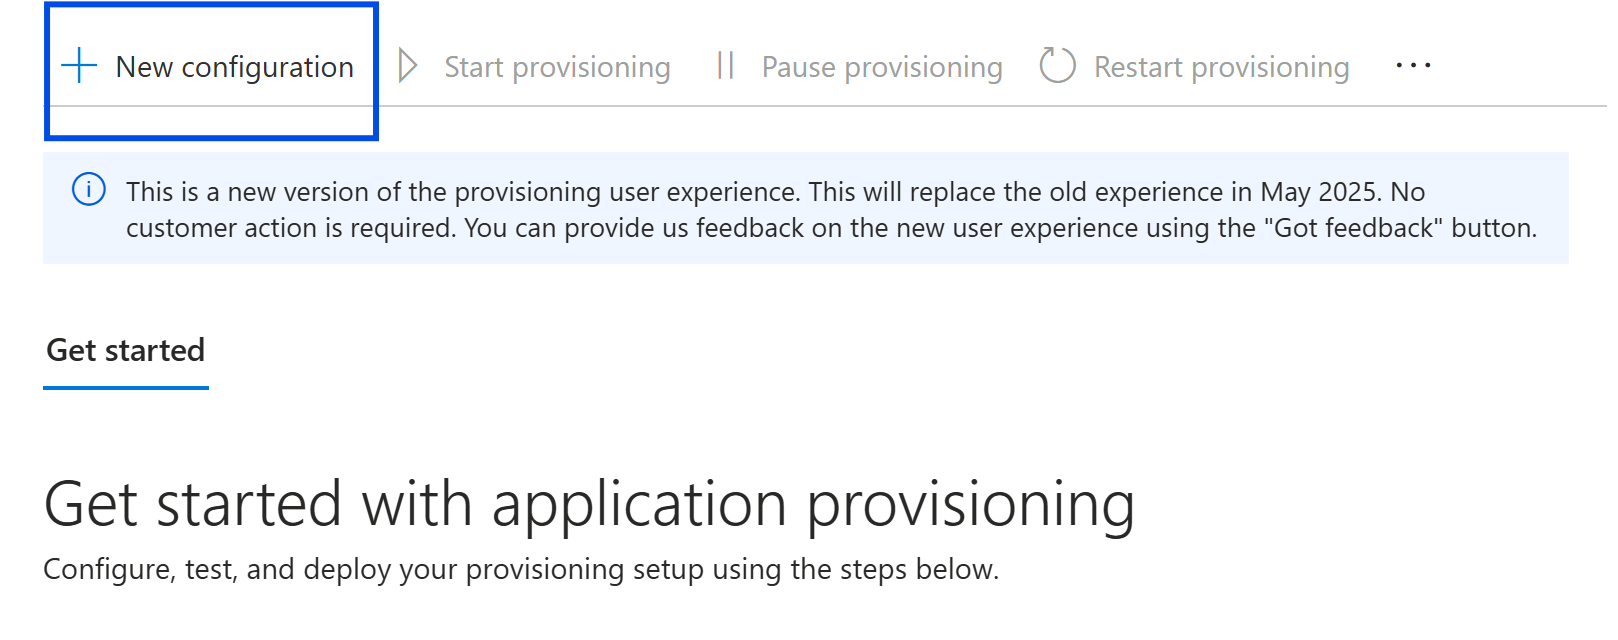
Click on + New configuration.
-
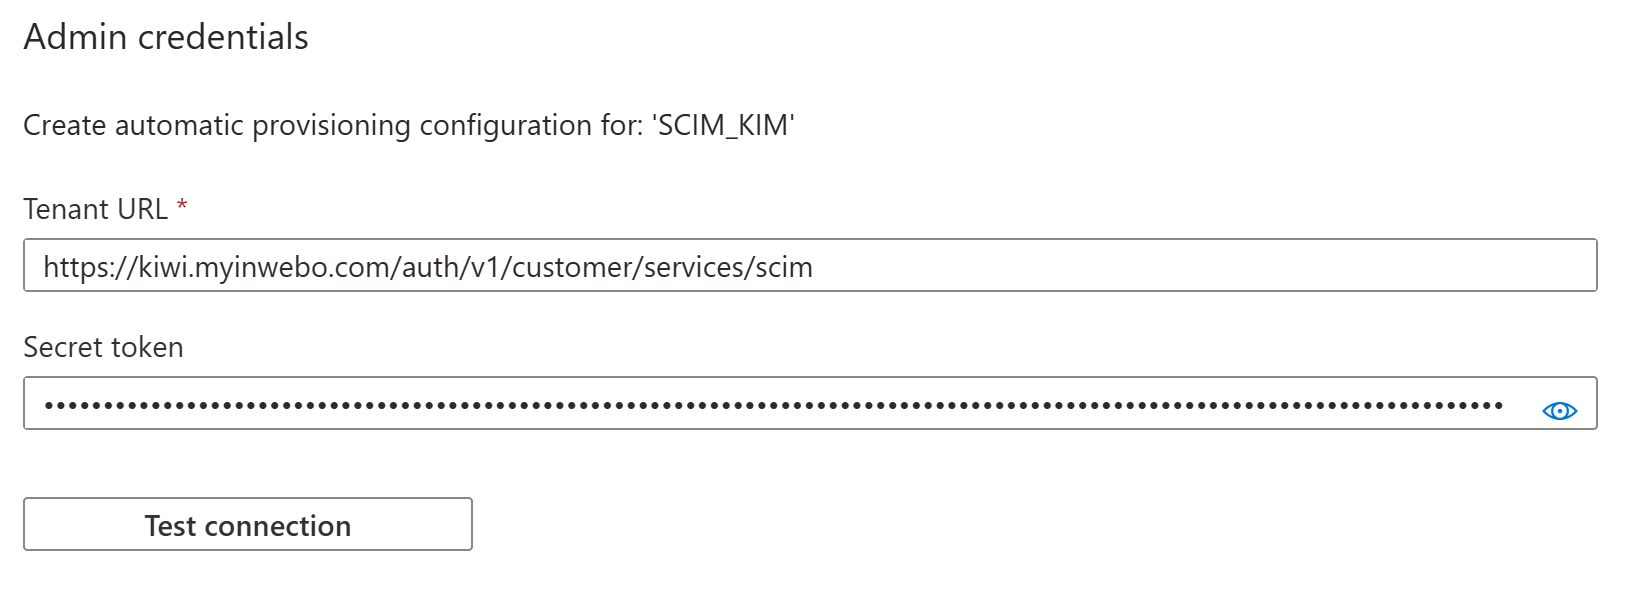
In Admin Credentials:
-
Enter the Tenant URL to TrustBuilder SCIM endpoint and the Secret token (without “Bearer” prefix).
See Prerequisites above. -
Click on Test connection. If the attempt fails, error information is displayed.
-
-
Click on Create if the attempt to connect to the application succeeded.
-
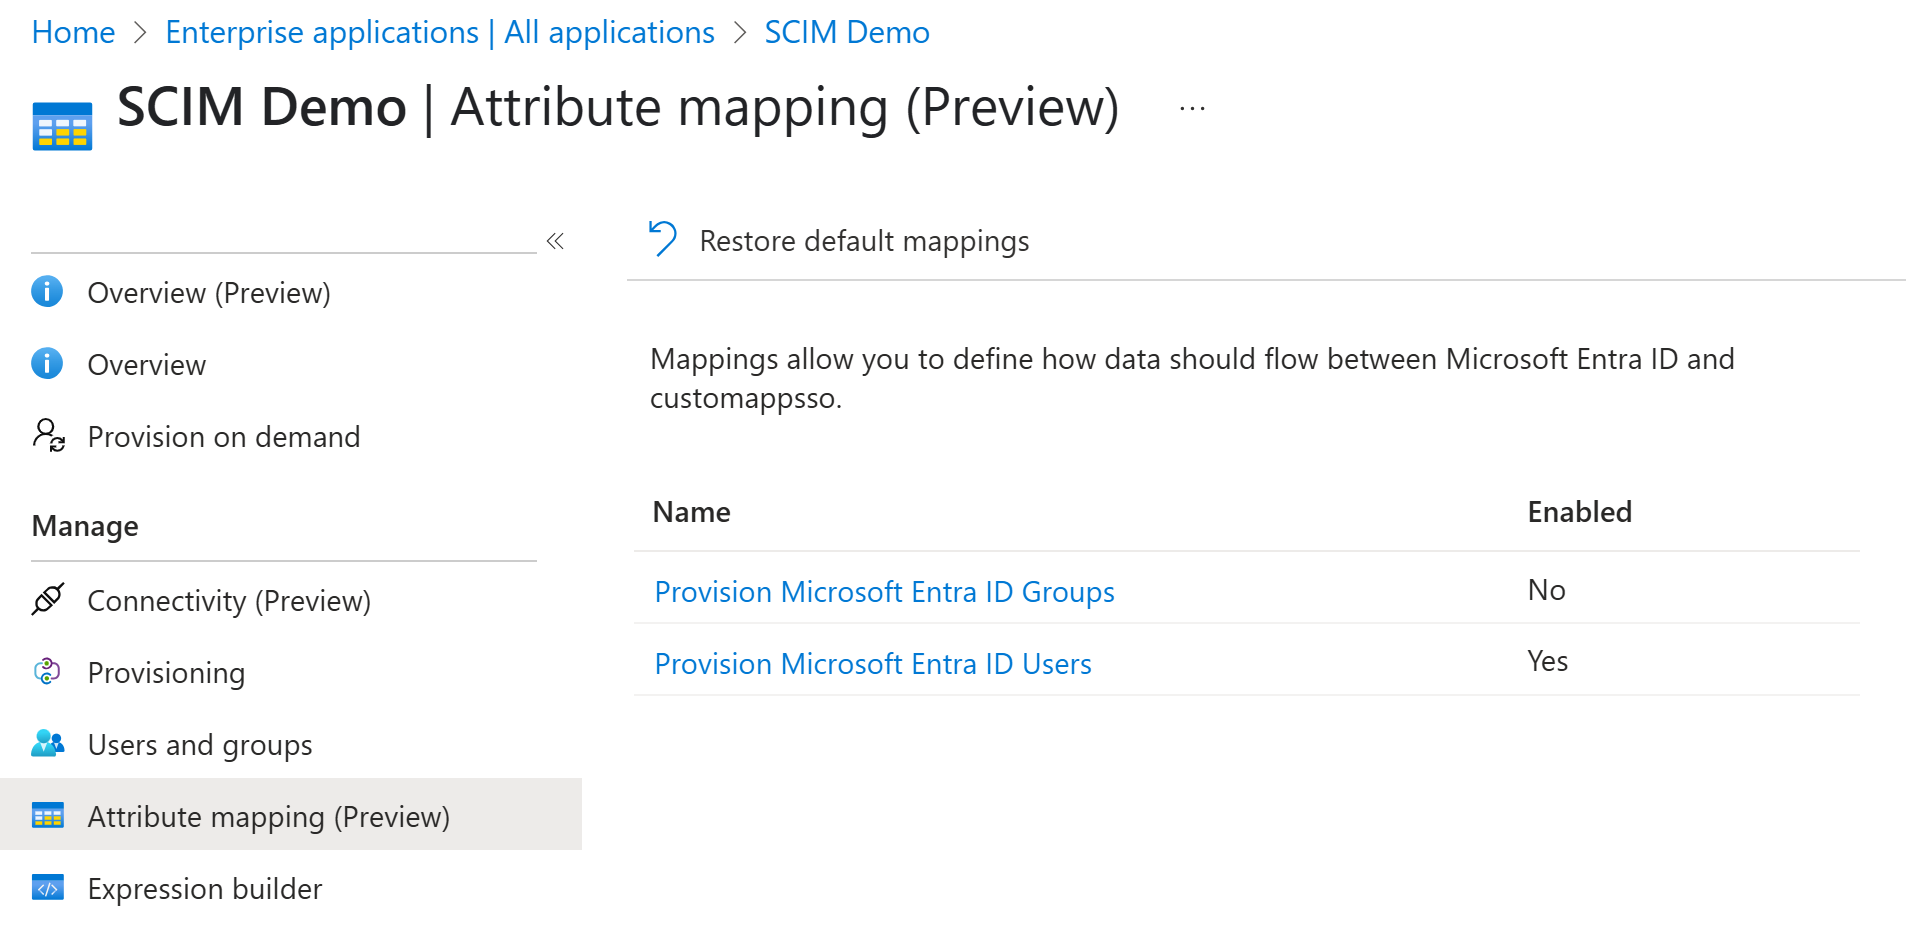
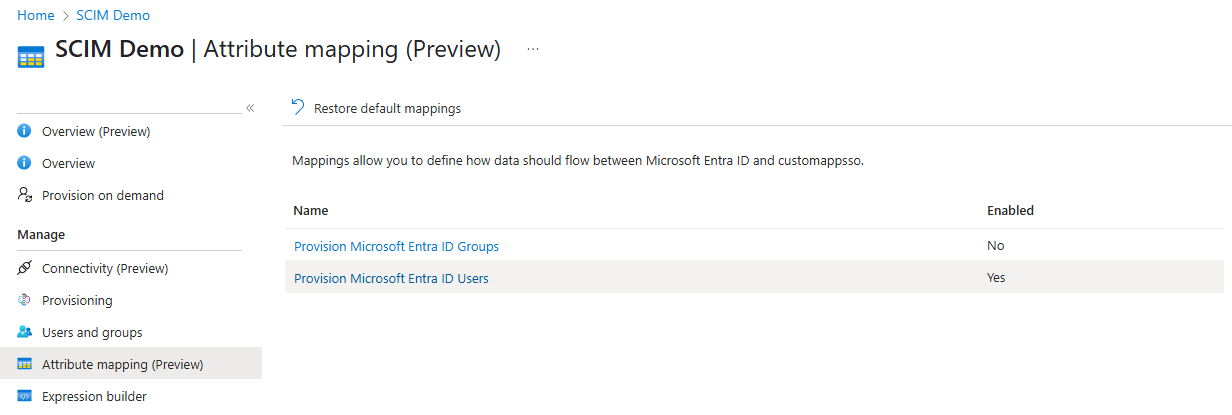
Go to Attribute mapping in the left panel.
-
Enable provisioning for users. You can also enable for groups if needed.
When syncing groups, both the group objects and their users are synchronized.
-
-
Click on Provision Microsoft Entra ID Users to configure the attributes that are synchronized from Microsoft Entra ID to your app.
-
Keep the attributes supported by TrustBuilder which are the following:
|
Customappsso Attribute |
Microsoft Entra ID Attribute |
Comment |
|---|---|---|
|
|
|
Mandatory
|
|
|
|
⚠️ Do not confuse it with the following status: activate / pending activation / inactive |
|
|
|
Mandatory if you want to send an activation email to users
|
|
|
|
Optional - Used for email language. Set via Microsoft Graph API only. Default is 'en'.
|
|
|
|
Optional
|
|
|
|
Optional
|
|
|
|
Optional -
|
Delete attributes that are not in the table above. ⚠️ Mapping unsupported attributes may cause the sync operation to fail.
-
Click on Save.
For groups, attributes mapping can remain unchanged.
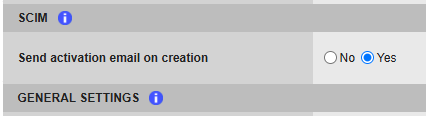
ACTIVATION EMAIL
In TrustBuilder MFA admin console, in Service Parameters tab > SCIM section, there is a Send activation email on creation parameter. It defines whether activation emails are automatically sent to users upon creation. If set to:
-
Yes (default for new services) → Users with an email address are set to pending activation and receive an activation email with a code (valid for 3 weeks).
-
No → Users are set to not activated and no email is sent.
Step 4: Provision users / groups
⚠️ Users and groups should be managed in Entra ID rather than in TrustBuilder to keep data consistent and avoid redundancy.
In Microsoft Entra admin center:
-
In the left menu, select Enterprise applications.
-
Click on your SCIM application.
-
Go to Provisioning in the left panel then Provisioning.
-
In Settings, choose the scope: Sync only assigned users and groups.
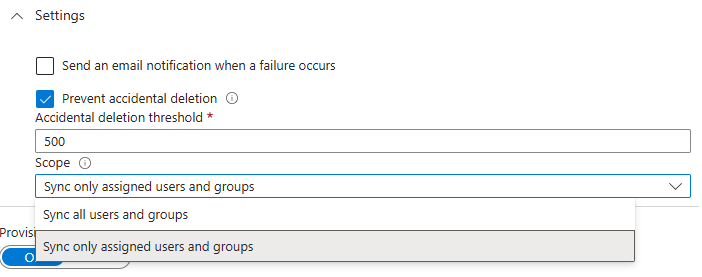
-
Click on Save.
-
Click Users and groups > + Add user/group.
-
Click on None Selected.

-
Select the users and groups to provision and click Select.
-
Click on Assign.
Provisioning occurs every 40 minutes. Once completed, you can verify that users and groups have been created in the TrustBuilder MFA Admin console.
GROUPS SYNC
-
Group owner ≠ Group member → both owners and members can be defined for a group on Entra. Only members are synchronized.
-
Nested groups → to avoid provisioning errors, do not sync Security groups that contain nested groups, as recommended by Microsoft.
Alternative to group synchronization: provisioning using scoping filters
-
In Microsoft Entra admin center, in the left menu, select Enterprise applications.
-
Click on your SCIM application.
-
Go to Provisioning in the left panel then Provisioning.
-
In Settings, choose the scope: Sync all users and groups.
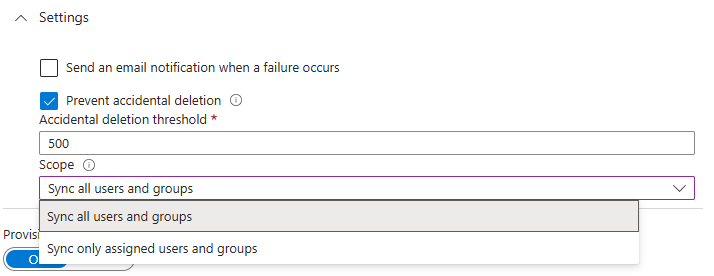
-
Click on Save.
-
Go to Attribute Mapping (Preview).
-
Click on Provision Microsoft Entra ID Users.
-
At Source Object Scope, click on All records.

-
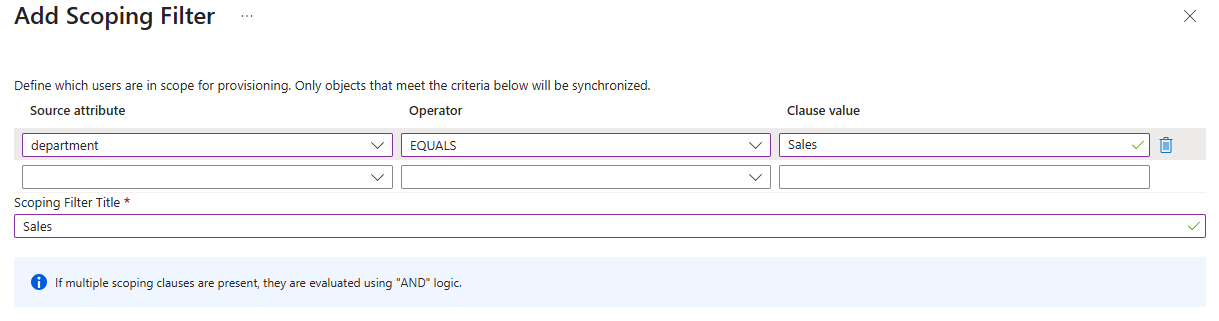
Click on + Add new filter group.
-
Define a clause by selecting a source Attribute Name, an Operator and an Attribute Value to match against. See Microsoft documentation
-
In Scoping Filter Title, add a name for your scoping filter.
-
Click OK then OK again on the Scoping Filters screen.
-
Select Save on the Attribute Mapping screen.
Once the filter is applied, only users matching its condition are provisioned into TrustBuilder MFA.
Users out of scope
If a user no longer matches the scoping filter (after a department change for example) they still exist in TrustBuilder but are automatically blocked at the next synchronization.
Provisioning occurs every 40 minutes. Once completed, you can verify that users have been created in the TrustBuilder MFA Admin console.
About deletion
User deletion
Microsoft Entra ID handles user deletion in two steps and TrustBuilder reacts differently to each:
-
Soft-deleted user in Entra:
-
The user is moved to the "Deleted users" section (trash).
-
Their UPN is changed (Object ID + previous UPN, if the UPN is mapped with the login).
-
In TrustBuilder:
-
The user is not deleted.
-
The user is blocked (administratively disabled).
-
The login is updated if UPN is mapped → may cause issues.
-
-
-
Hard-deleted user in Entra
-
The user is permanently deleted from Entra.
-
In TrustBuilder, the user is deleted.
-
Group deletion
In Microsoft Entra ID:
-
if a group is soft-deleted, hard-deleted or unassigned from the app → in TrustBuilder the group is deleted and its members are blocked (administratively disabled).
-
if a group is restored from soft-deletion or re-assigned to the app → in TrustBuilder the group is created again and its members are no longer blocked (administratively disabled).
Limitations
|
Characters |
Users TrustBuilder does not support all characters or lengths allowed in Microsoft Entra ID. This may lead to errors when editing provisioned users. ✅ Supported in both Entra ID and TrustBuilder:
❌ Allowed only in Entra ID (not supported in TrustBuilder): UPN with ❌ Allowed only in TrustBuilder (not supported in Entra ID): login with backslash |
|---|---|
|
Groups ✅ Supported in both Entra ID and TrustBuilder:
Max length (group name):
|
|
|
Provisioning ID conflict |
IWDS and SCIM should not be used together. Both use the same provisioning ID in TrustBuilder. One source can overwrite the other. |