Pulse Connect Secure - RADIUS integration
Configuring the Connect Secure appliance
Open your Connect Secure administration console,
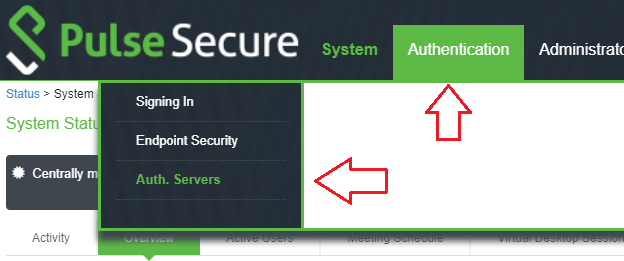
in the top menu, select Authentication > Auth. Servers
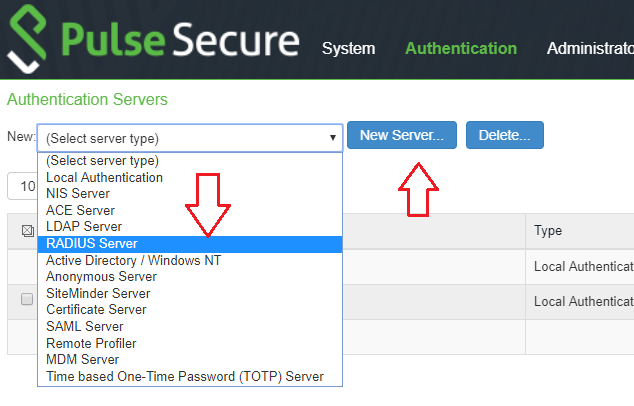
On the Authentication servers page, at the top of the page select : "RADIUS Server" in the drop down list and click on "New Server..."
On the New RADIUS Server page:
Fill the form with the following information:
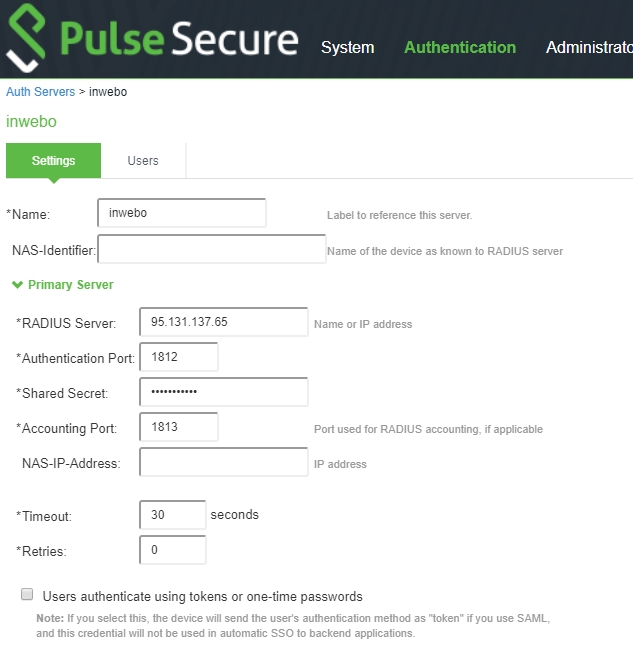
(For RADIUS "Push" configuration you have to indicate a 60 seconds timeout with no (0) retries.)
Fill the indication for your first inWebo RADIUS authentication server ex:radius1.myinwebo.com
inWebo Radius server addresses :
Primary: radius-a.myinwebo.com (95.131.139.137)
Secondary: radius-b.myinwebo.com (217.180.130.59)
(See RADIUS integration and redundancy for additional details and configuration)
It's highly recommended to fill the "Backup Server" information.

Click on "Saves changes"
Creating a new user Realms
In the Users Menu at the top of the window, Select "User Realms" and "New User Realms..."

In the New Authentication Realm form:
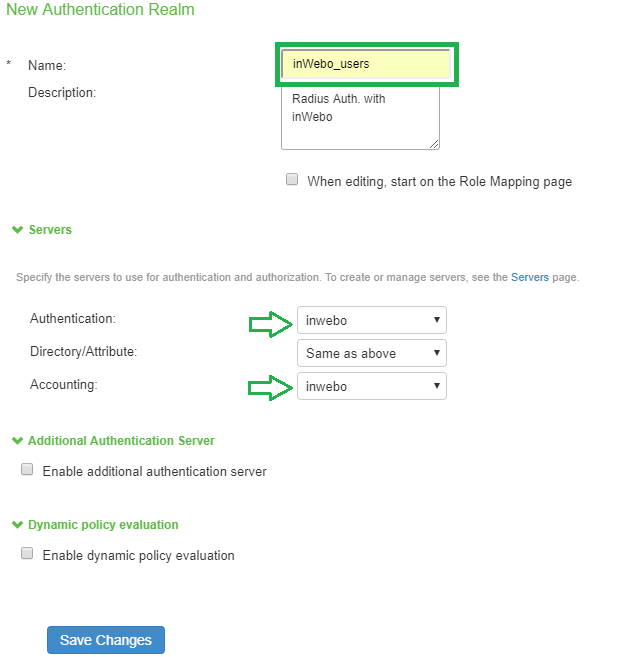
Indicates the information and the Authentication name of the inWebo server
Click "Saves changes"
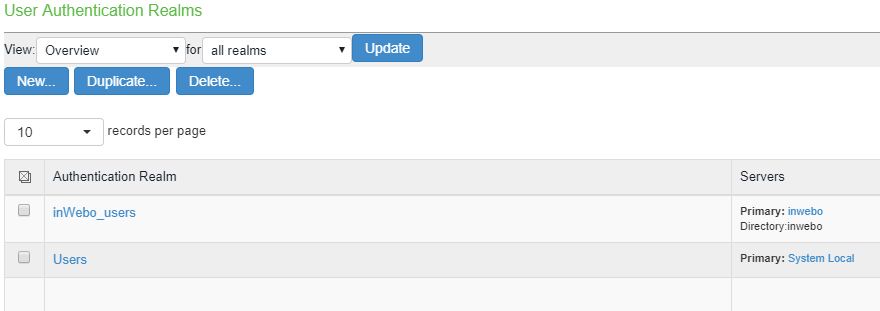
The new Realm appear in the Realms list:
Creating the Private portal
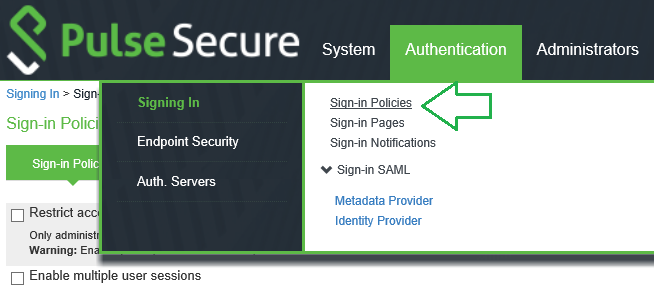
Creating a New URL for your private portal
Select "New URL..."

Fill the path of your authentication portal
Check "User picks from a list of authentication realms"
Select the Realm of your users
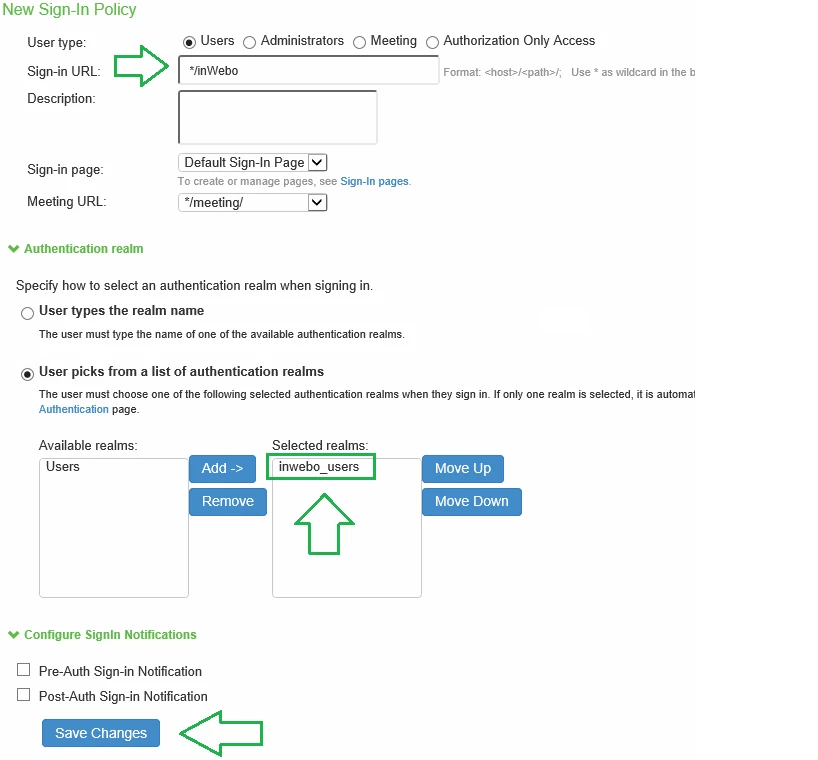
Click on "Save Changes"
Configuring inWebo RADIUS connector
In the inWebo Administration Console.
Once connected, go to Secure Sites tab > CONNECTORS section.
Select “Add a connector of type…”, and choose “Radius” or “Radius Push” :
The popup below will appear. Enter the External URL of your Pulse appliance, along with the RADIUS secret you have defined earlier:
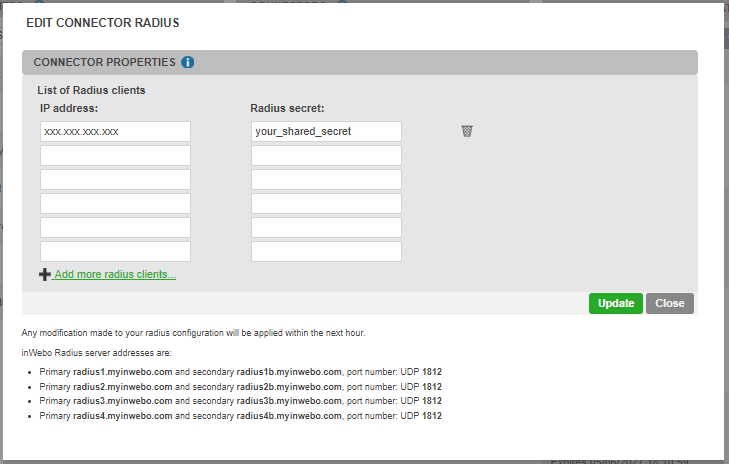
Click “Add/update”
About ‘Push’ RADIUS mode
If you are using the 'push' radius mode (notification sent to the user's smartphone), the global response time must be long enough to allow the user to authenticate with his smartphone. A "Radius Authentication time" of 60 seconds is recommended.
Additional PULSE SECURE Authentication parameters
Enabling Traffic Control
Select Authentication > Auth Servers
Select "Enable Auth Traffic Control"
Select "Auth Server level"
Indicates "External" or the port names that routes the external Auth Requests
