Okta Custom IdP Factor Authentication
The purpose of this guide is to explain how to use InWebo as an MFA solution for your Okta users through a SAML 2.0 integration and Okta's custom IdP factor authentication feature (https://help.okta.com/en/prod/Content/Topics/Security/MFA_Custom_Factor.htm)
inWebo SAML connector initial configuration
Create a new SAML connector in the inWebo Administration console
go to the "Secures Sites" tab,
select "Add a connector of type" SAML 2.0.
In your SAML connector properties :
note down the “Issuer URL” and the “Single Sign On URL”
click on “Download inWebo IdP SAML 2.0 certificate”

Okta initial configuration
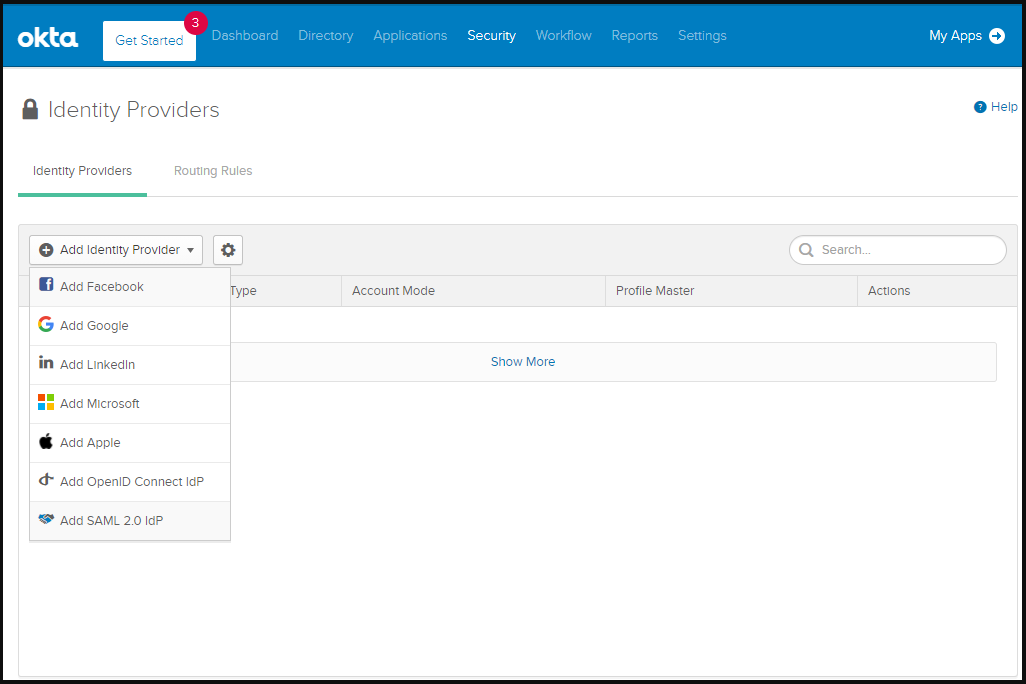
In the Okta Administration console, navigate to Security > Identity Providers and click on “Add Identity Provider” menu the select “Add SAML 2.0 IdP”.
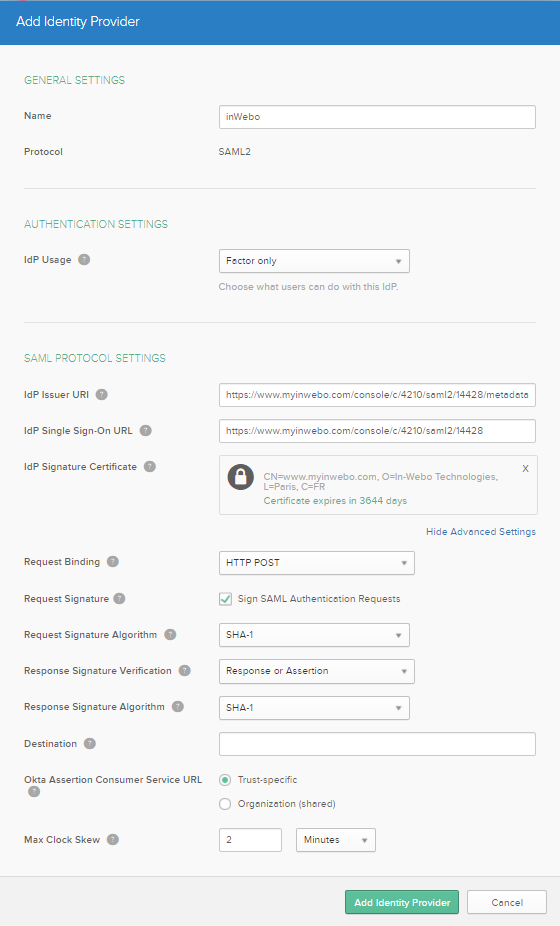
Choose a convenient name for this new Idp
Choose Factor only as IDP Usage.
Fill the “IdP Issuer URI” and the “IdP Single Sign-On URL” fields with the information from previous step
To provide the “IdP Signature Certificate”, click on “Browse files…” and import the certificate downloaded in the previous step.
Click on Show Advanced Settings
Change “Request Signature Algorithm” and “Response Signature Algorithm” to SHA-1
Save the configuration by clicking on “Add Identity Provider”
Finalize inWebo SAML connector configuration
Provide SP metadata
In Okta Administration console, Navigate to Security > Identity Providers
Expand the inWebo IdP and click on “Download metadata”

Edit the SAML connector in the inWebo administration console and paste in section 2 the metadata file content you just download from Okta.
Click on “Update” to save your modifications.
Configure SAML Assertion
Edit the SAML connector in the inWebo administration console and configure section 3 as follow. Note that you can change the NameID value to User email if the inWebo user login do not match the login known by Okta.

Remove the SAML Attributes in section 4. Note that you can't provision Okta directory from inWebo directory because Just in time provisioning is not supported by Okta when using the IdP as a Custom IdP Factor.
Click on “Update” to save your modifications.
Add a secure site for your SP
in Secure site column of the secure site tab of the inWebo Administration console
click on Add a Secure Site of type…
select the SAML connector name you configured. Configure the Secure site to your Okta login page (https://yourtenant.okta.com)
Configure inWebo as a Multifactor IdP
Now that inWebo and Okta are respectively configured as IdP and SP you can configure inWebo as an IdP Factor for Okta.
To configure inWebo as an IdP factor for Okta, you should enable the “Custom IdP factor” feature in Okta. Please, refer to Okta “Custom Idp Factor “ documentation to know more.
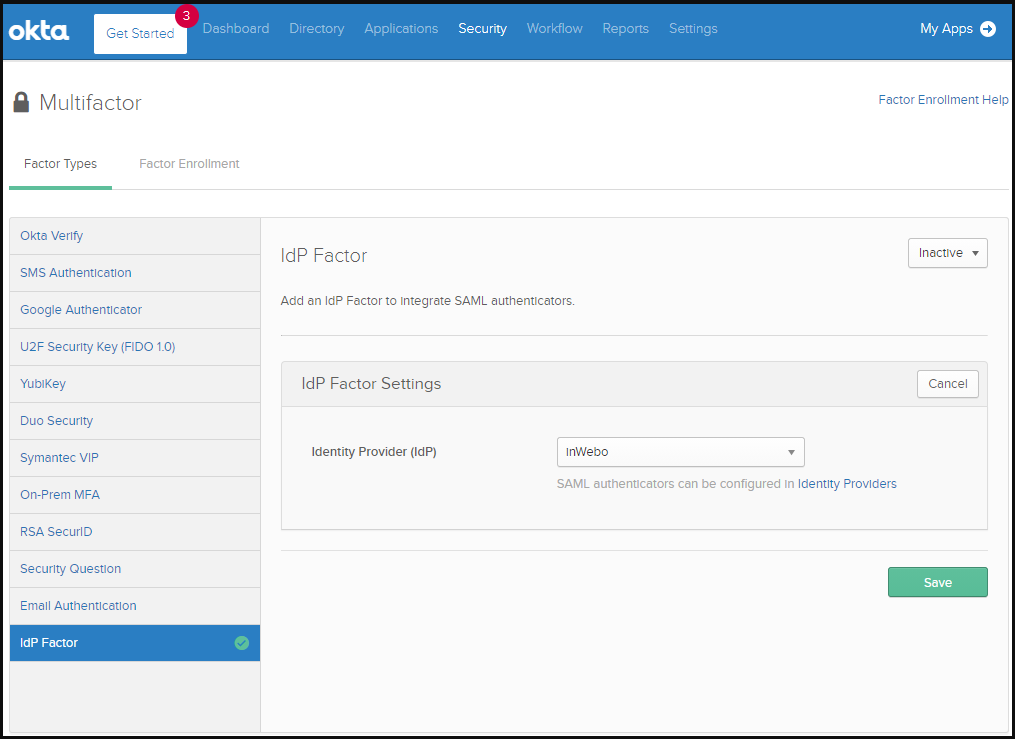
Navigate to Security > Multifactor
Under “Factor types” choose “IdP Factor”
Click “Edit” and choose inWebo as the Identity Provider (IdP)
Click “Save” then activate this Multifactor by changing is status from “Inactive” to “Active”
Activate inWebo MFA as a user login requirement
IdP factor can now be enabled in a Sign-On policy. The requirement can be applied to all users, every time, for a specific group, from a specific zone, or after a session duration, etc. These features are outside the scope of this document, please refer to the Okta documentation for more details on creating policies.
To require inWebo for a group of users navigate to Security > Authentication > Sign-On
Click on “Add New Okta Sign-on Policy”
Assign this Policy to a specific user group as shown below (not that you can also assign the policy to Everyone).
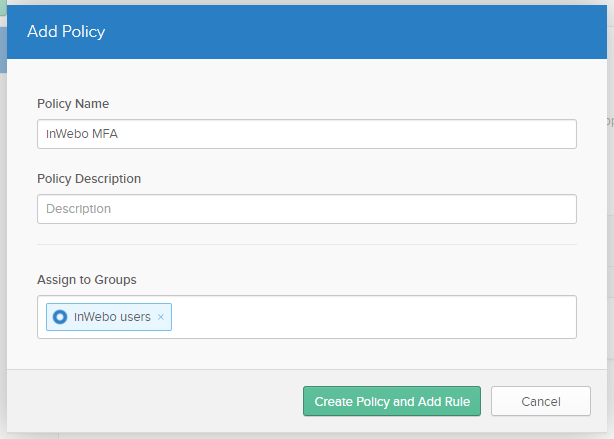
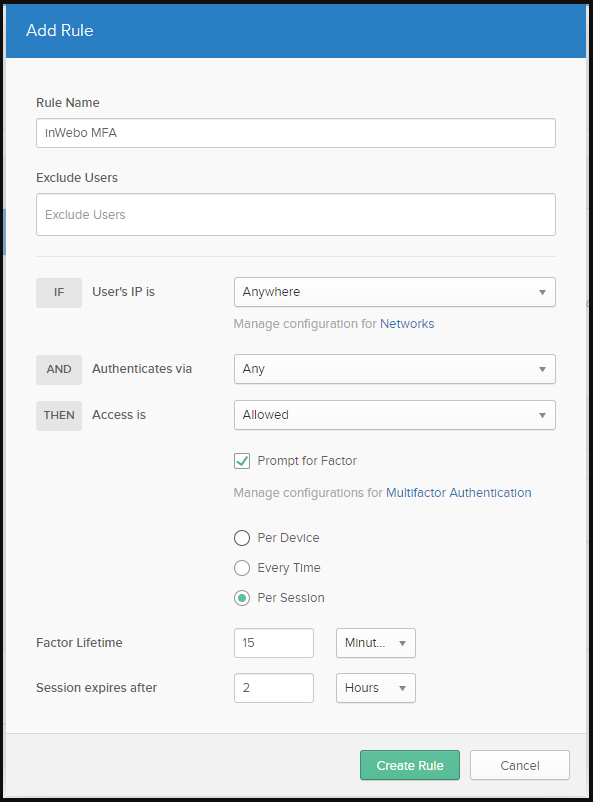
Click on “Create Policy and Add Rule” and name the new rule
Make sure to select “Prompt for Factor”
Save by Clicking on “Create rule”
Test Authentication
After completing the previous steps, users will log in by entering their username and password, and then they will be prompted for inWebo.
Here is an example with an inWebo browser token.
Note that the first time the user logs in, Okta will prompt them to register their factor. As the inWebo registration is not managed by Okta, the user will simply need to authenticate in the usual way.
