Microsoft Remote Desktop Gateway RADIUS integration
A Remote Desktop Gateway-based infrastructure relies on NPS to authenticate users. The following steps are necessary to configure NPS to use TrustBuilder RADIUS servers to authenticate users with multi-factor authentication in addition to the traditional login / password.
Prerequisites
TrustBuilder connections must respect the following format Domain\sAMAccountname.
Install the Remote Desktop Gateway infrastructure and required roles:
https://docs.microsoft.com/en-us/windows-server/remote/remote-desktop-services/rds-deploy-infrastructure
Configure TrustBuilder to accept authentication requests issued by NPS
On the TrustBuilder MFA management console
go the “Secure Sites” tab
in the “Connectors” column click on “Add a connector of type” and select “Radius Push”

Fill in the “IP Address” field with the IP of the public interface of your device (or NAT address if behind a firewall).
Enter the “secret” configured previously on NPS.
Validate your connector configuration by pressing “Add” or “Update” button.
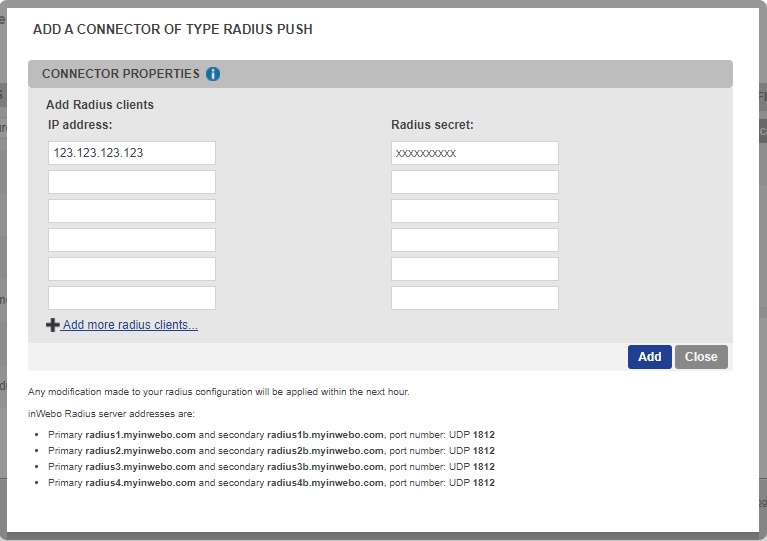
Point to be noted: “Any configuration or modification made to your RADIUS connector will be applied at the start of the next hour”.
Configure TrustBuilder RADIUS servers on NPS
In NPS MMC, (Microsoft Management Console)
expand "NPS (local)> RADIUS Clients and Servers".
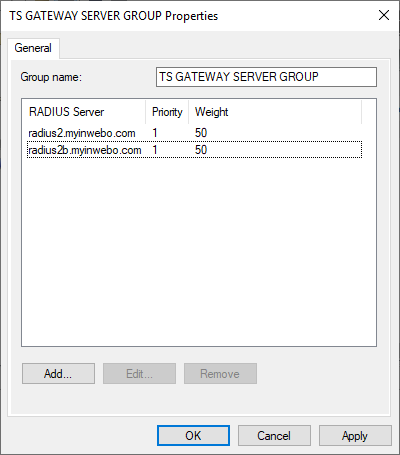
Select “Remote RADIUS Server Groups” and double click on “TS GATEWAY SERVER GROUP” to edit it.
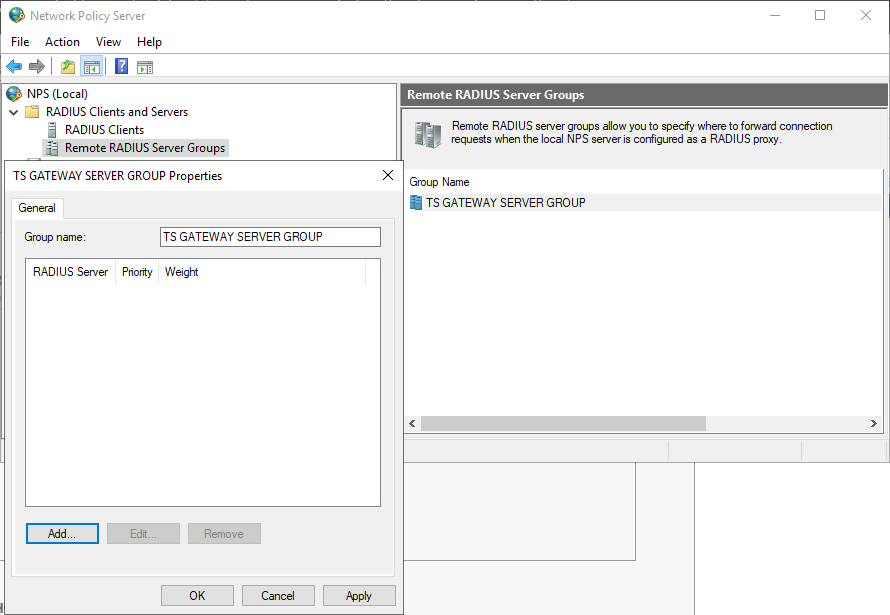
In the “TS GATEWAY SERVER GROUP” Properties window,
Click on “Add” to configure the TrustBuilder RADIUS servers.
In the “Add RADIUS Server” window
On the "Address" tab
provide the IP or DNS address of the TrustBuilder RADIUS server
click on "Verify" to solve it.
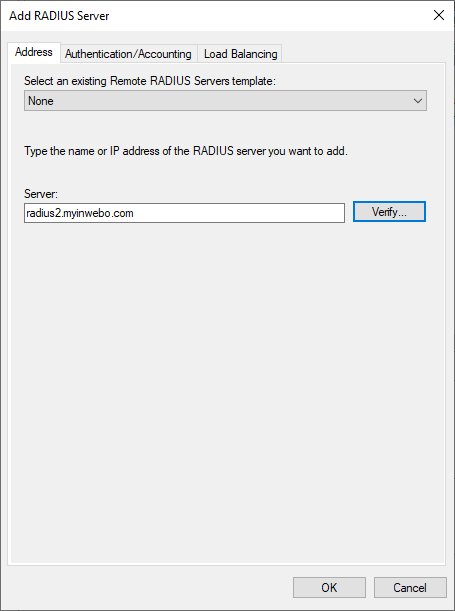
RADIUS recommended Addresses and pair configuration
In most of RADIUS client configurations, you will have to choose one of the following pair of RADIUS servers to have failover:
TrustBuilder Radius server addresses :
Primary: radius-a.myinwebo.com (95.131.139.137)
Secondary: radius-b.myinwebo.com (217.180.130.59)
(See RADIUS integration and redundancy for additional details and configuration)
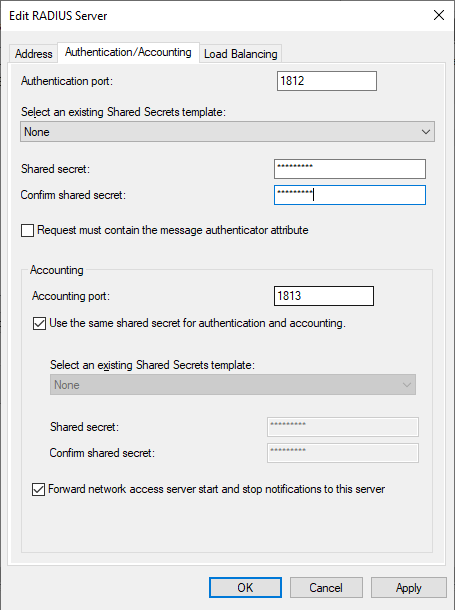
On the "Authentication / Accounting" tab
Configure a “Shared secret”
(That same secret should be also provided on the TrustBuilder MFA platform later)
In the “Load Balancing” tab, change the timeout as follows.
For “Push” RADIUS mode: Configure NPS to send authentication requests every 30 seconds and fallback to another server after 1 failed attempts.
(For more details: check the following documentation: RADIUS integration and redundancy )
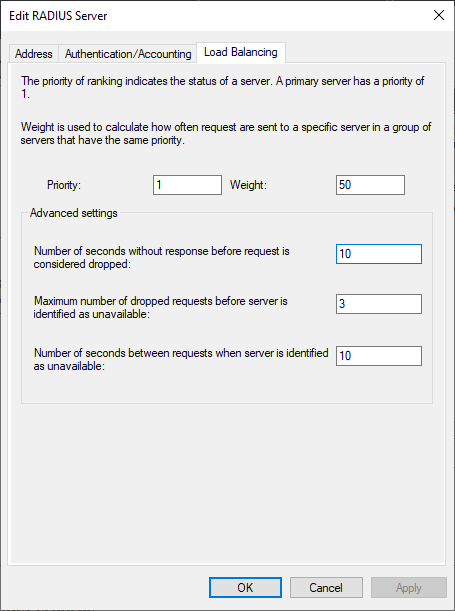
Repeat both operations to add a secondary server. Setting the same Weight and Priority while implement a load balancing between both servers.
Configure NPS policies to forward authentication requests to TrustBuilder RADIUS servers
Users on TrustBuilder MFA are set-up without the domain, so we will here setting up a policy to remove the domain from the username used for the Radius request
In NPS MMC:
Navigate to "NPS (local)> Policies> Connection request policies"
Double click on "TS GATEWAY SERVER GROUP" to modify it.
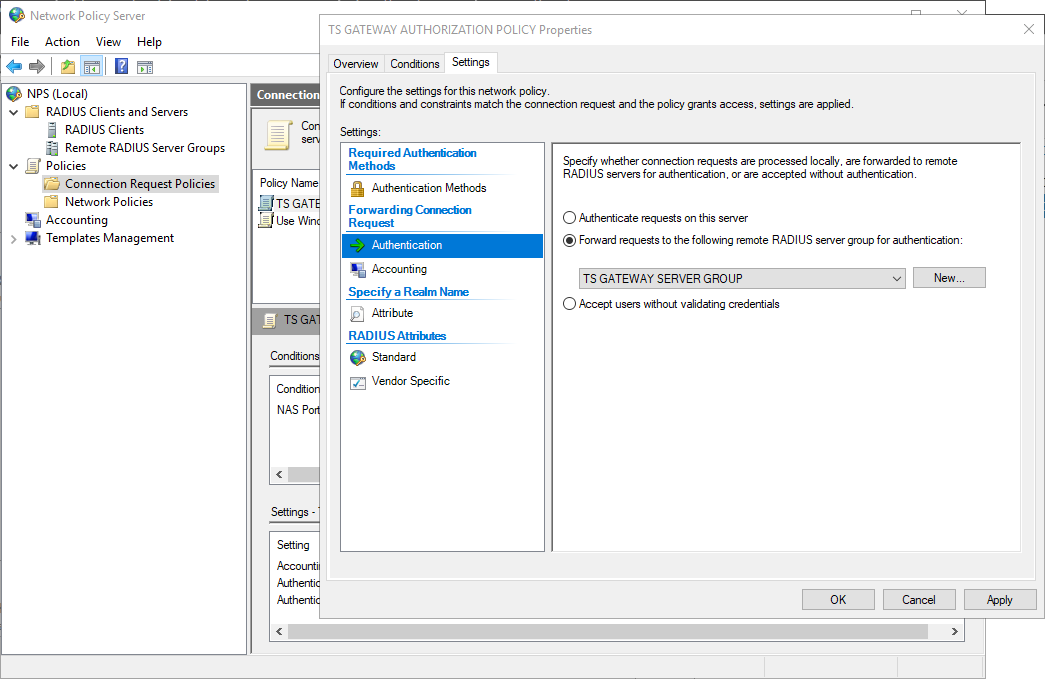
In the “TS GATEWAY AUTHORIZATION POLICY" Properties
In the “Settings” tab:
Go to “Authentication”, in the “Forwarding Connection Request” section
Select “Forward requests to the following remote RADIUS server group for authentication”.
Make sure that “TS GATEWAY SERVER GROUP” is selected.
Go to "Attribute", in the “Specify a Realm Name" section
Select "User-Name" attribute and click on Add
in the “Find” field → ^DOMAIN\\ (Uppercase)
Where DOMAIN is your own domain namein the “Replace with” field → leave it empty
Click on OK
Click on Apply to validate the configuration
