Fortinet gateway Radius integration
To enable Mutli Factor Authentication (MFA) with your fortinet, you can activate RADIUS authentication which is compatible with inWebo MFA solution.
With mobile or desktop authentication, you can validate the OTP that was generated by inWebo tools, via a RADIUS connection to our platform.
In order to get the whole system up and running, your company system administrator only has to:
Configure your Fortinet with RADIUS (5 to 10 min)
Create an inWebo account (2 min)
Download, install and activate one of inWebo tokens (4 min)
Configure RADIUS in your inWebo account (2 min)
Perform a test authentication (1 min)
Basically, the whole system can be up and running in 15-20 minutes.
Depending of your version of FortiGate, the screens and the procedure could be slightly different.
Prerequisites
An administrator access to your FortiGate software
An administrator access to your inWebo account
Configuring the Fortinet gateway
How to configure a new RADIUS Server
In the Fortinet administrative console, click on “User & Device” section and navigate to “Authentication → RADIUS Servers”
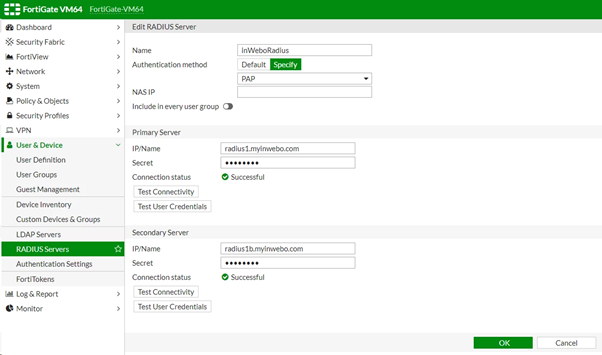
Defining the inWebo RADIUS Server
Name > Define a name for the inWebo RADIUS server authentication
Authentication method: Select Specify then PAP
IP/Name for the primary and secondary server:
Fill the indication for your inWebo RADIUS authentication servers:
inWebo Radius server addresses :
Primary: radius-a.myinwebo.com (95.131.139.137)
Secondary: radius-b.myinwebo.com (217.180.130.59)
(See RADIUS integration and redundancy for additional details and configuration)
Secret: Enter the RADIUS secret that you share with the inWebo RADIUS configuration (cf.3)
Creating a firewall Group
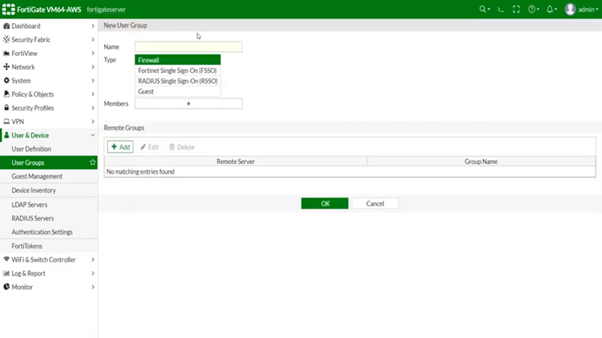
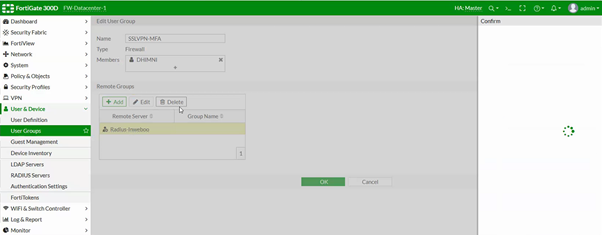
Click the “User & Device” section and navigate to “User → User Groups”.
Create or edit a Group to add the RADIUS connection you have created previously.
Defining your policy
Navigate to Policy & Objects > IPv4 Policy, and then locate and edit the policy related to your SSL-VPN interface. Edit the Source → User , as shown below.
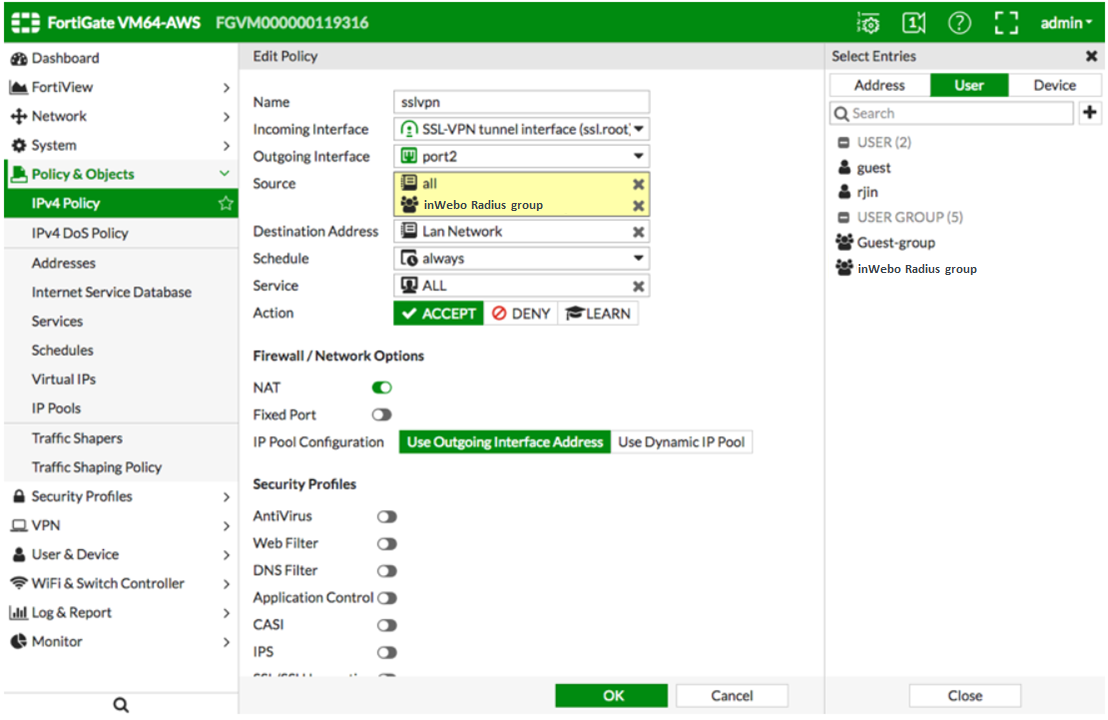
Select and add the group you created in the previous step.
Apply
Activating RADIUS authentication for your portal
You may have to add the new RADIUS configuration to your VPN settings.
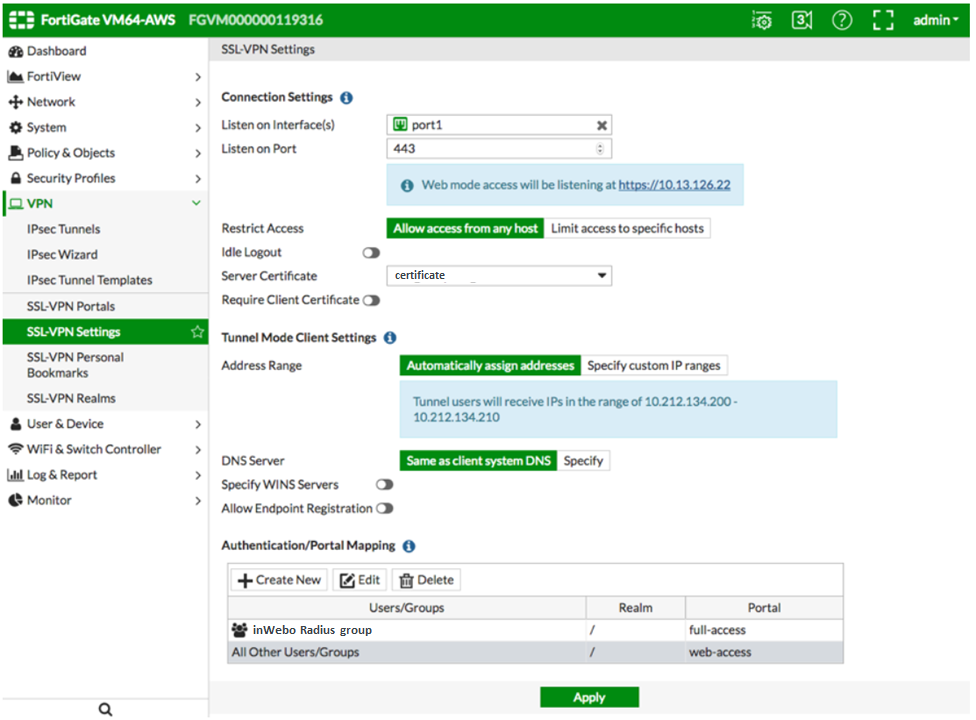
Click the “VPN” section and navigate to “VPN SSL Settings”.
Create a new or edit an existing VPN settings and grant access to the Firewall group you just created in the previous step in the “Authentication / Portal Mapping”
Timeout configuration
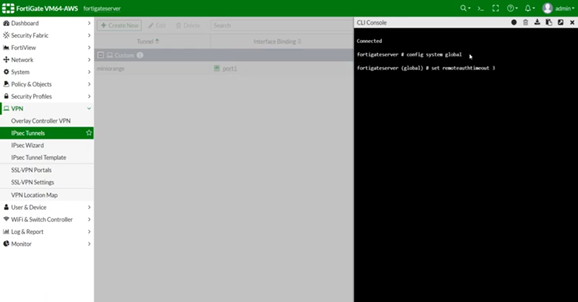
You need to increase the Fortinet timeout value (5 seconds by default are not enough for MFA authentication). It can be changed from the command line interface (CLI).
We advise you to configure a timeout with at least 28 seconds.
Connect to the appliance CLI and use the following commands:
config system global
set remoteauthtimeout 28
end
Configuring the inWebo service
Any modification made to your radius configuration will be applied within the next 15 minutes.
Log in to the inWebo administration console https://www.myinwebo.com/console
Navigate to the Secure site tab
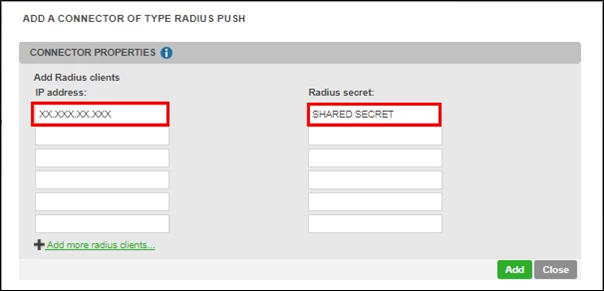
Add a RADIUS Push connector in the Connectors section
Fill in the parameters as shown below:
IP Address: fill with the IP of the public interface of your Fortigate server (or NAT address if behind a firewall)
RADIUS secret: it is a secret shared between Fortigate and the inWebo RADIUS server
Final testing
To perform a real test, you must create at least a user in your inWebo administration console (Service Users tab) and activate a mobile and/or desktop token for this user.
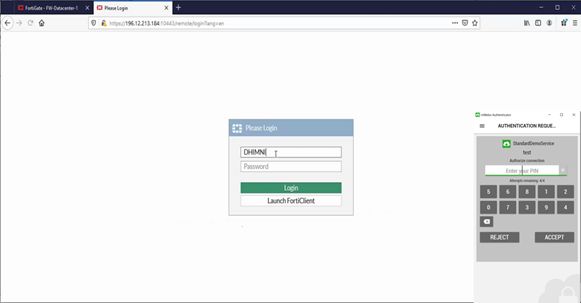
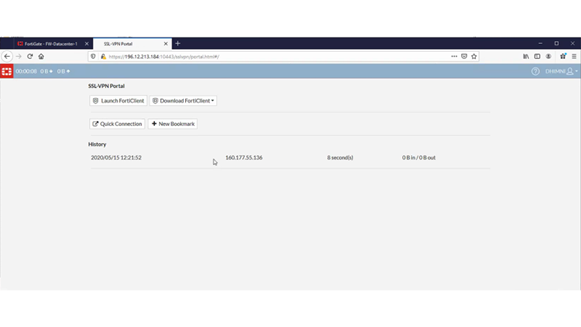
When you enter the login and one random character in the password field, you will receive an automatic push on your mobile and/or desktop token.
