Citrix Netscaler - RADIUS integration
Netscaler Gateway RADIUS Configuration
Any modification made to your radius configuration will be applied within the next 15 minutes.
In the configuration utility, on the Configuration tab, expand NetScaler Gateway > Policies > Authentication.
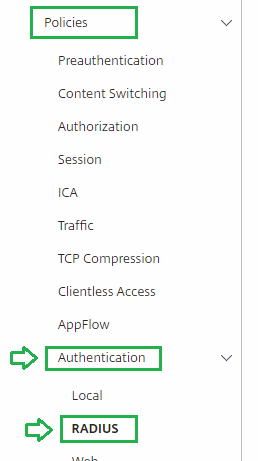
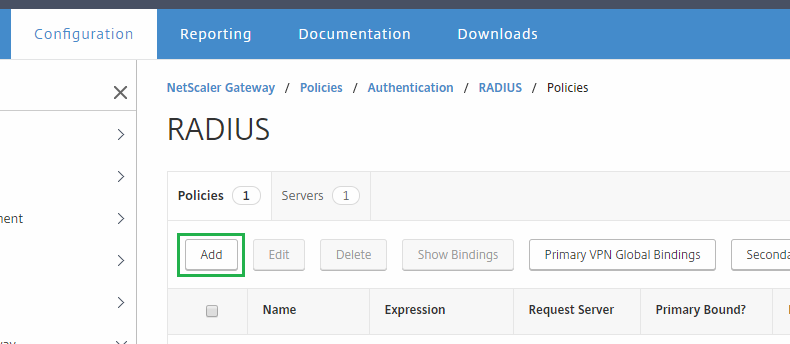
Click RADIUS, and then in the details pane, on the Policies tab, click Add .
In the Create Authentication Policy dialog box, in Name, type a name for the policy.
In Name, type a name for the policy.
Next to Server, click New.
In the Create Authentication Policy dialog box, in Name, type a name for the server.
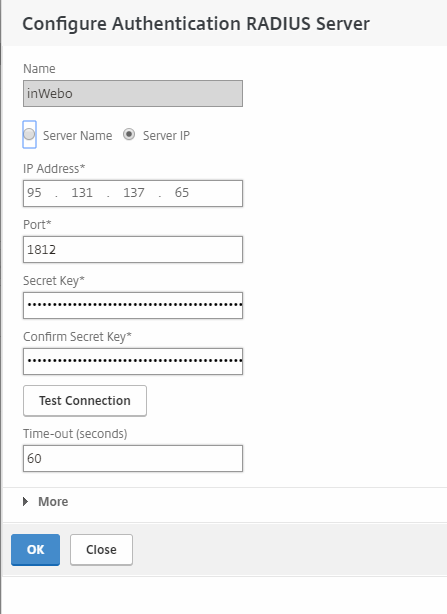
Under Server, in IP Address, type the IP address of the RADIUS server.
inWebo Radius server addresses :
Primary: radius-a.myinwebo.com (95.131.139.137)
Secondary: radius-b.myinwebo.com (217.180.130.59)
(See RADIUS integration and redundancy for additional details and configuration)
6. In Port, type the port. The default is 1812. and 15 seconds for Time-out
( If you are using a standard radius mode (without push), with a server pair: the OTP is sent in the request, so we recommend configuring a "Server timeout period" of 5 seconds to enable validation of the authentication request by the Secondary server before the OTP expires. 60s in "Push" mode)
You can find more details on redundancy here : Redundancy and Radius-client configuration (old)
7. For your Secret Key, type the RADIUS server secret and repeat this under Confirm Secret Key,
8. Click on "More" to expand radius configuration parameters and configure the Password encoding to PAP (Password Authentication Protocol). Then click on Create.
9. In the Create Authentication RADIUS Policy dialog box, next to Named Expressions, select the expression, click Add Expression. You can use one of the following or create a custom one :
a. For a RADIUS policy for non-mobile devices. To bind this policy to only non-mobile devices, use the following expression: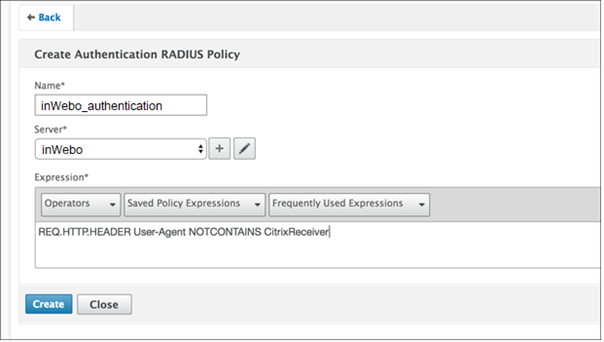
b. Put ns_true as the expression as this policy is to be used for all authentication.
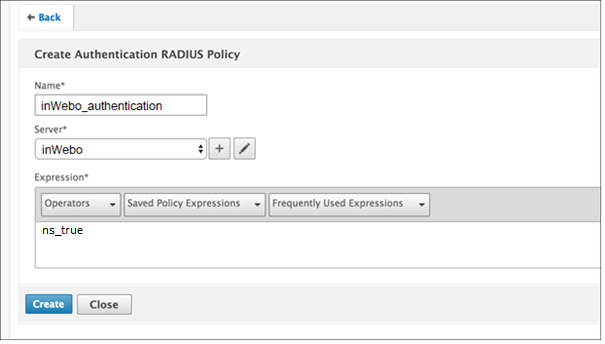
12. Click Create and then click Close
inWebo Radius connector configuration
You can create your own InWebo account at InWebo Signup page. This will give you access to the InWebo Administration Console.
Once connected, go to
Secure Sites tab > CONNECTORS section.
Select “Add a connector of type…”, and choose “Radius” or “Radius Push” :
The popup below will appear. Enter the
public IP addresses of your Netscaler Gateway, along with the Radius secret you defined earlier:
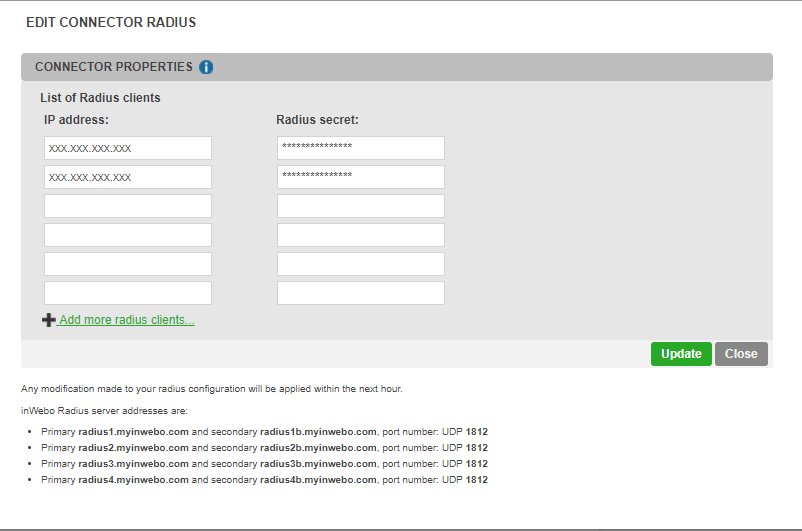
Click “Add”.
NetScaler Gateway Virtual Servers configuration
In your Netscaler Gateway appliance, select "Virtual Servers"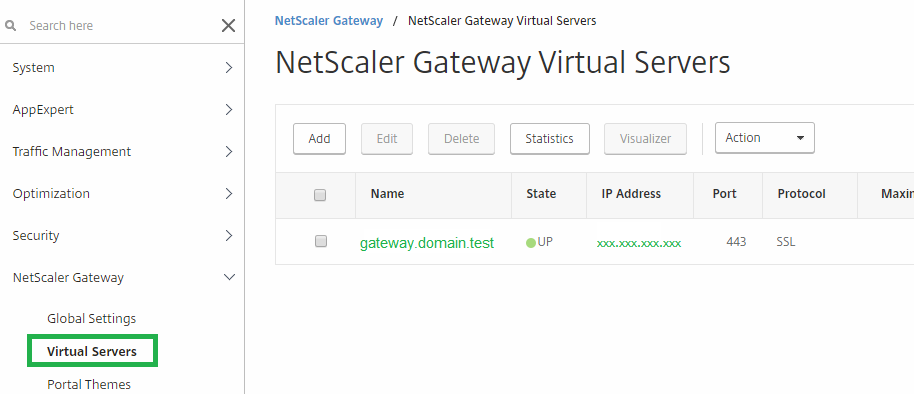
Create or Edit the virtual server you want to configure with inWebo.
Edit the "Basic Authentication" section with the "+"

Select an Authentication policy (in Primary or secondary):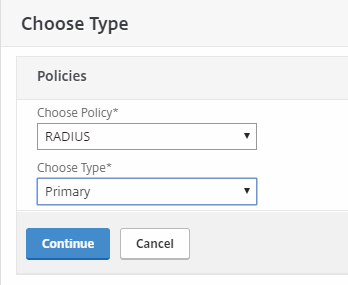
Select and bind the newly created inWeb_RADIUS policy:
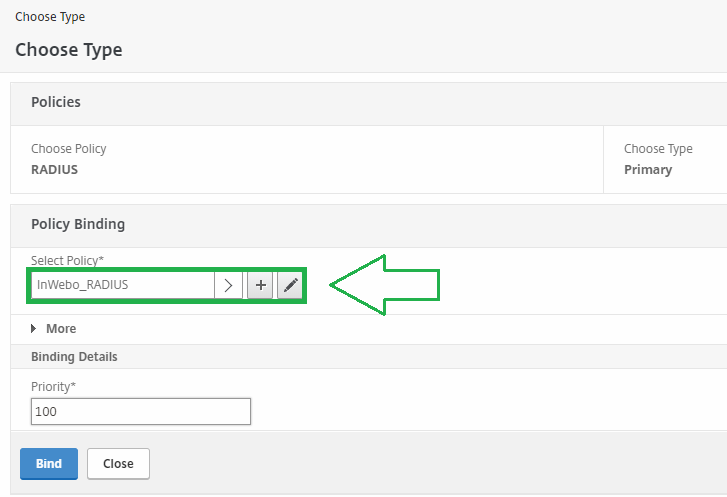
Click and "Bind" then OK to validate the change on this virtual server.
Testing your Netscaler Gateway access with inWebo RADIUS
Connect to your Virtual server IP access:
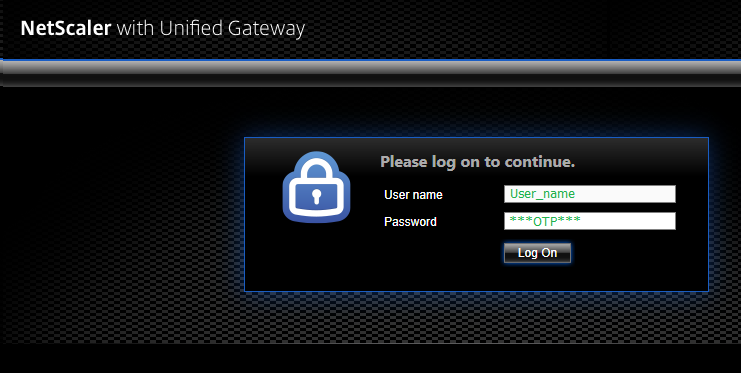
Indicate your login (username) and a correct OTP in RADIUS standard mode or a random character in RADIUS "push" mode
in RADIUS "push" mode you'll receive a notification on your mobile device:
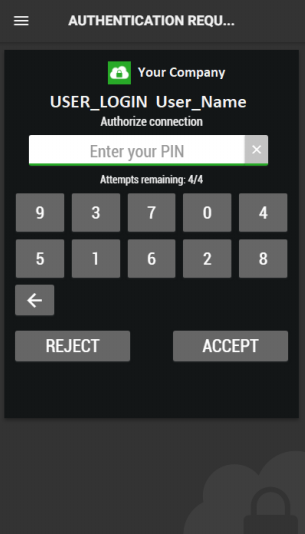
If you acknowledge the connection your access with the netscaler will be granted.
