Workflows Tab
Add, edit, upload, convert and delete workflows.
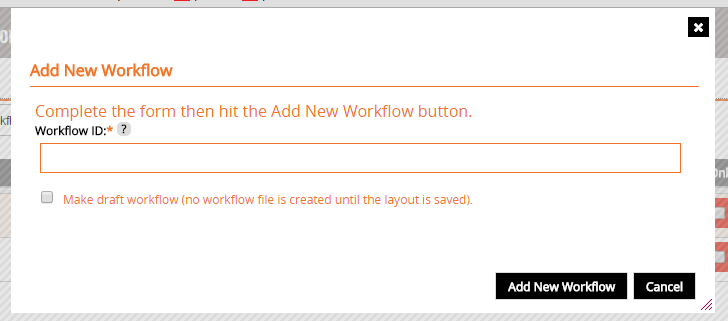
Add New Workflow
To add a new workflow click the Add New Workflow button.
This will open a form, complete the form and click the Add New Workflow button.
Field | Description | Required |
|---|---|---|
Workflow ID | This is the ID of the workflow that will be used by the configuration as a reference. | yes |
Make Draft Workflow | Select this to create a work in progress workflow that will not be validated on save and not exported. | no |
Layout and workflow file names are specified automatically using the workflowID provided.
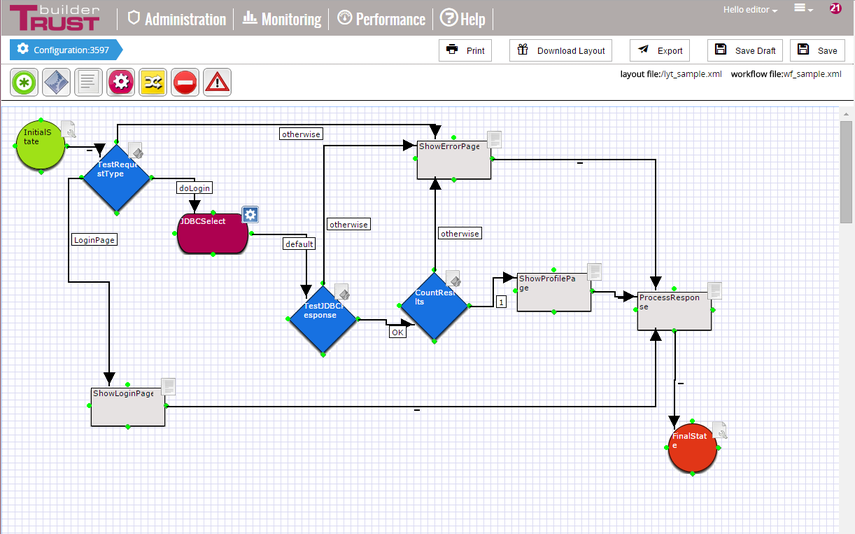
Once the workflow is added the workflow editing screen is displayed to begin creating a workflow.
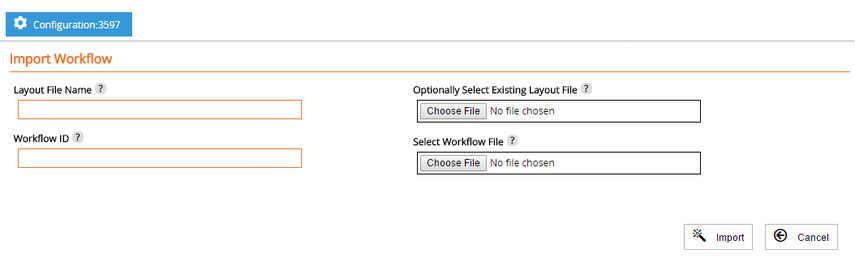
Upload and Import Workflow
If you have received a workflow from an external source this can be added to the current configuration but uploading it.
Click the Upload and Import Workflow button. A new screen will be displayed with a form.
Field Name | Description | Required |
|---|---|---|
Layout File Name | This is the name of the XML file that will be created by TBA which is a representation of the workflow. | yes |
Workflow ID | This ID will be used by the configuration to reference the workflow | yes |
Select Workflow File | Here select the workflow.xml file that you have from your local machine. | yes |
Select Existing Layout File | If a layout file has also been supplied with the workflow.xml file this can also be uploaded. | no |
If no layout file is supplied then the workflow will be converted by TBA as per a usual import.
Once the Import button is clicked then the workflow will be uploaded and the workflow console screen displayed with the new workflow.
Imported Workflows
If a configuration has been imported all the workflow files are also imported.
For any imported workflow to be used within the TrustBuilder Administrator it must have a layout file that represents the workflow in a graphical manner.
If an imported workflow is imported without a layout file the option to create a layout file will be provided.

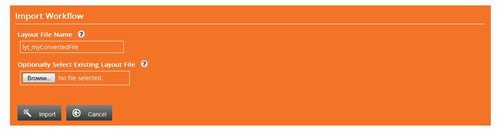
Click the Convert to Layout button and a form is presented, click the Import button to import the workflow and the workflow console will be displayed:
Form Field | Description | Required |
|---|---|---|
Layout File Name | Name of the layout file that is to be created | yes |
Select Existing Layout File | If a layout file has been provided it can be uploaded from the local machine. | no |
Workflow Is Only Sub-Workflow
If a workflow is only to be used as a sub-workflow; one that is only referenced from a parent workflow and not directly from an incoming request, then it can be marked that it is only to be used as such. This will mean that this workflow is not directly accessible using it's ID through an endpoint url. It is an internal, private, workflow.
This is done by ticking the check box under the Only Sub heading in the relevant workflow row in the list.
A workflow that is not only a sub-workflow can be used as both; either a parent workflow or a sub-workflow.

Workflow Type
The type of the workflow, which can define it's purpose and use, can be specified by selecting one of the available types from the Workflow Type drop down box. When the type is selected the configuration is saved immediately.

Draft Workflows
If a workflow is created or saved as a draft workflow. A draft workflow is one that can be invalid and is not validated upon save, is not exported or added to the configuration file. In this instance the row is highlighted orange.

Delete a Workflow
To delete workflows check boxes beside the workflows that you wish to delete and then click the Delete Selected button.
Deletion of a workflow is final, there is no undo.
Export a Workflow
If this configuration is related to one or more servers an Export Selected button will be available. To export a single or number of workflows check the box to the left of the workflow row that is to be exported and then click the Export Selected button. The standard export screen will then be displayed.
Exporting a workflow only exports the workflow XML file not any scripts related to that workflow or the configuration file. If a new workflow has been created then the configuration file needs to be exported also so that the engine is aware of the new workflow.
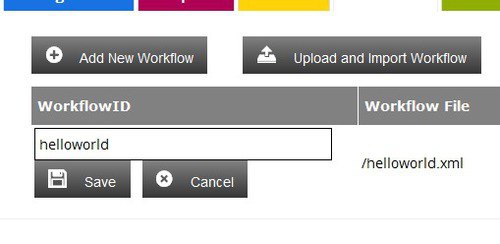
Changing the Workflow ID
It is possible to change the workflow ID by clicking the ID. This will display a single form input to change the workflowID.