Register your first user
This tutorial shows you how to register a user in TrustBuilder through the Admin Portal.
TrustBuilder fundamentally implements the model of “every user has one and only one profile” even if they have different subscription accounts and even when they work with different mandates or in different capacities. To enable this, TrustBuilder introduced its persona-model. Every person receives a single user profile to which one or more personas are added. A persona reflects the role the person relative to your organization and your digital services.
To register a user, you should login to the Admin Portal with the administrator credentials you have received from us (or another user that has “IDHub Administrator” set to TRUE).
Step 1 - Create a user profile
Start by creating a new user profile:
Go into Directory > Users > + Add User.
Fill in the user profile details.
First name → the user’s first name.
The value will be stored in thegiven_nameattribute.Last Name → the user’s last name that will be stored in the
family_nameattribute.Phone → the user’s phone number
Email → the user’s email address.
The value will be stored in thepreferred_emailattribute. It will be used for sending access-related mails to the user (e.g. activation of a user profile and resetting a password)Username → The name used by the user to identify their profile and that will be stored in the
usernameattribute.
It must be unique across your universe and enables the user to uniquely identify themselves.Id at customer → the value will be stored in the
id_at_customerattribute.
Use this field as foreign key into your current database in which you manage contacts, e.g. the identifier in a CRM or in an HRM.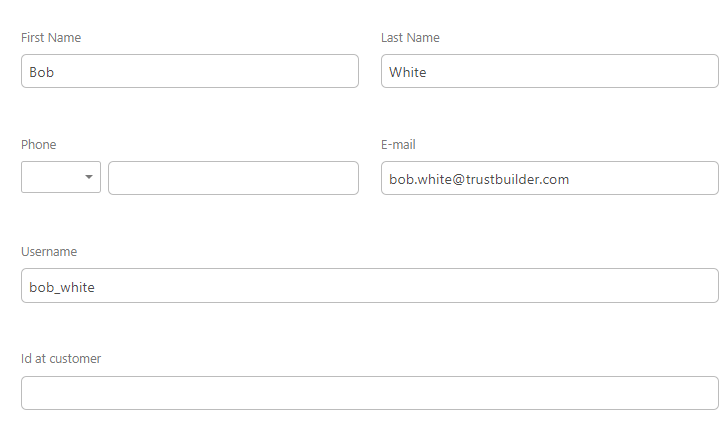
Click on Save And Close
Well done! The user profile is successfully created.
Step 2 - Assign a persona
To enable a user profile to be used, you should assign at least one “persona” to it (more information).
In order to assign personas, your company must have a valid subscription to the Personas. If not, the “default persona” will automatically be assigned.
From the users list, click on the user previously created.
Go to Personas tab.
Click on +Add a persona.
Select an appropriate persona.
In the initial set-up, only the “administrator” and “basic” personas are available.Click on Next.
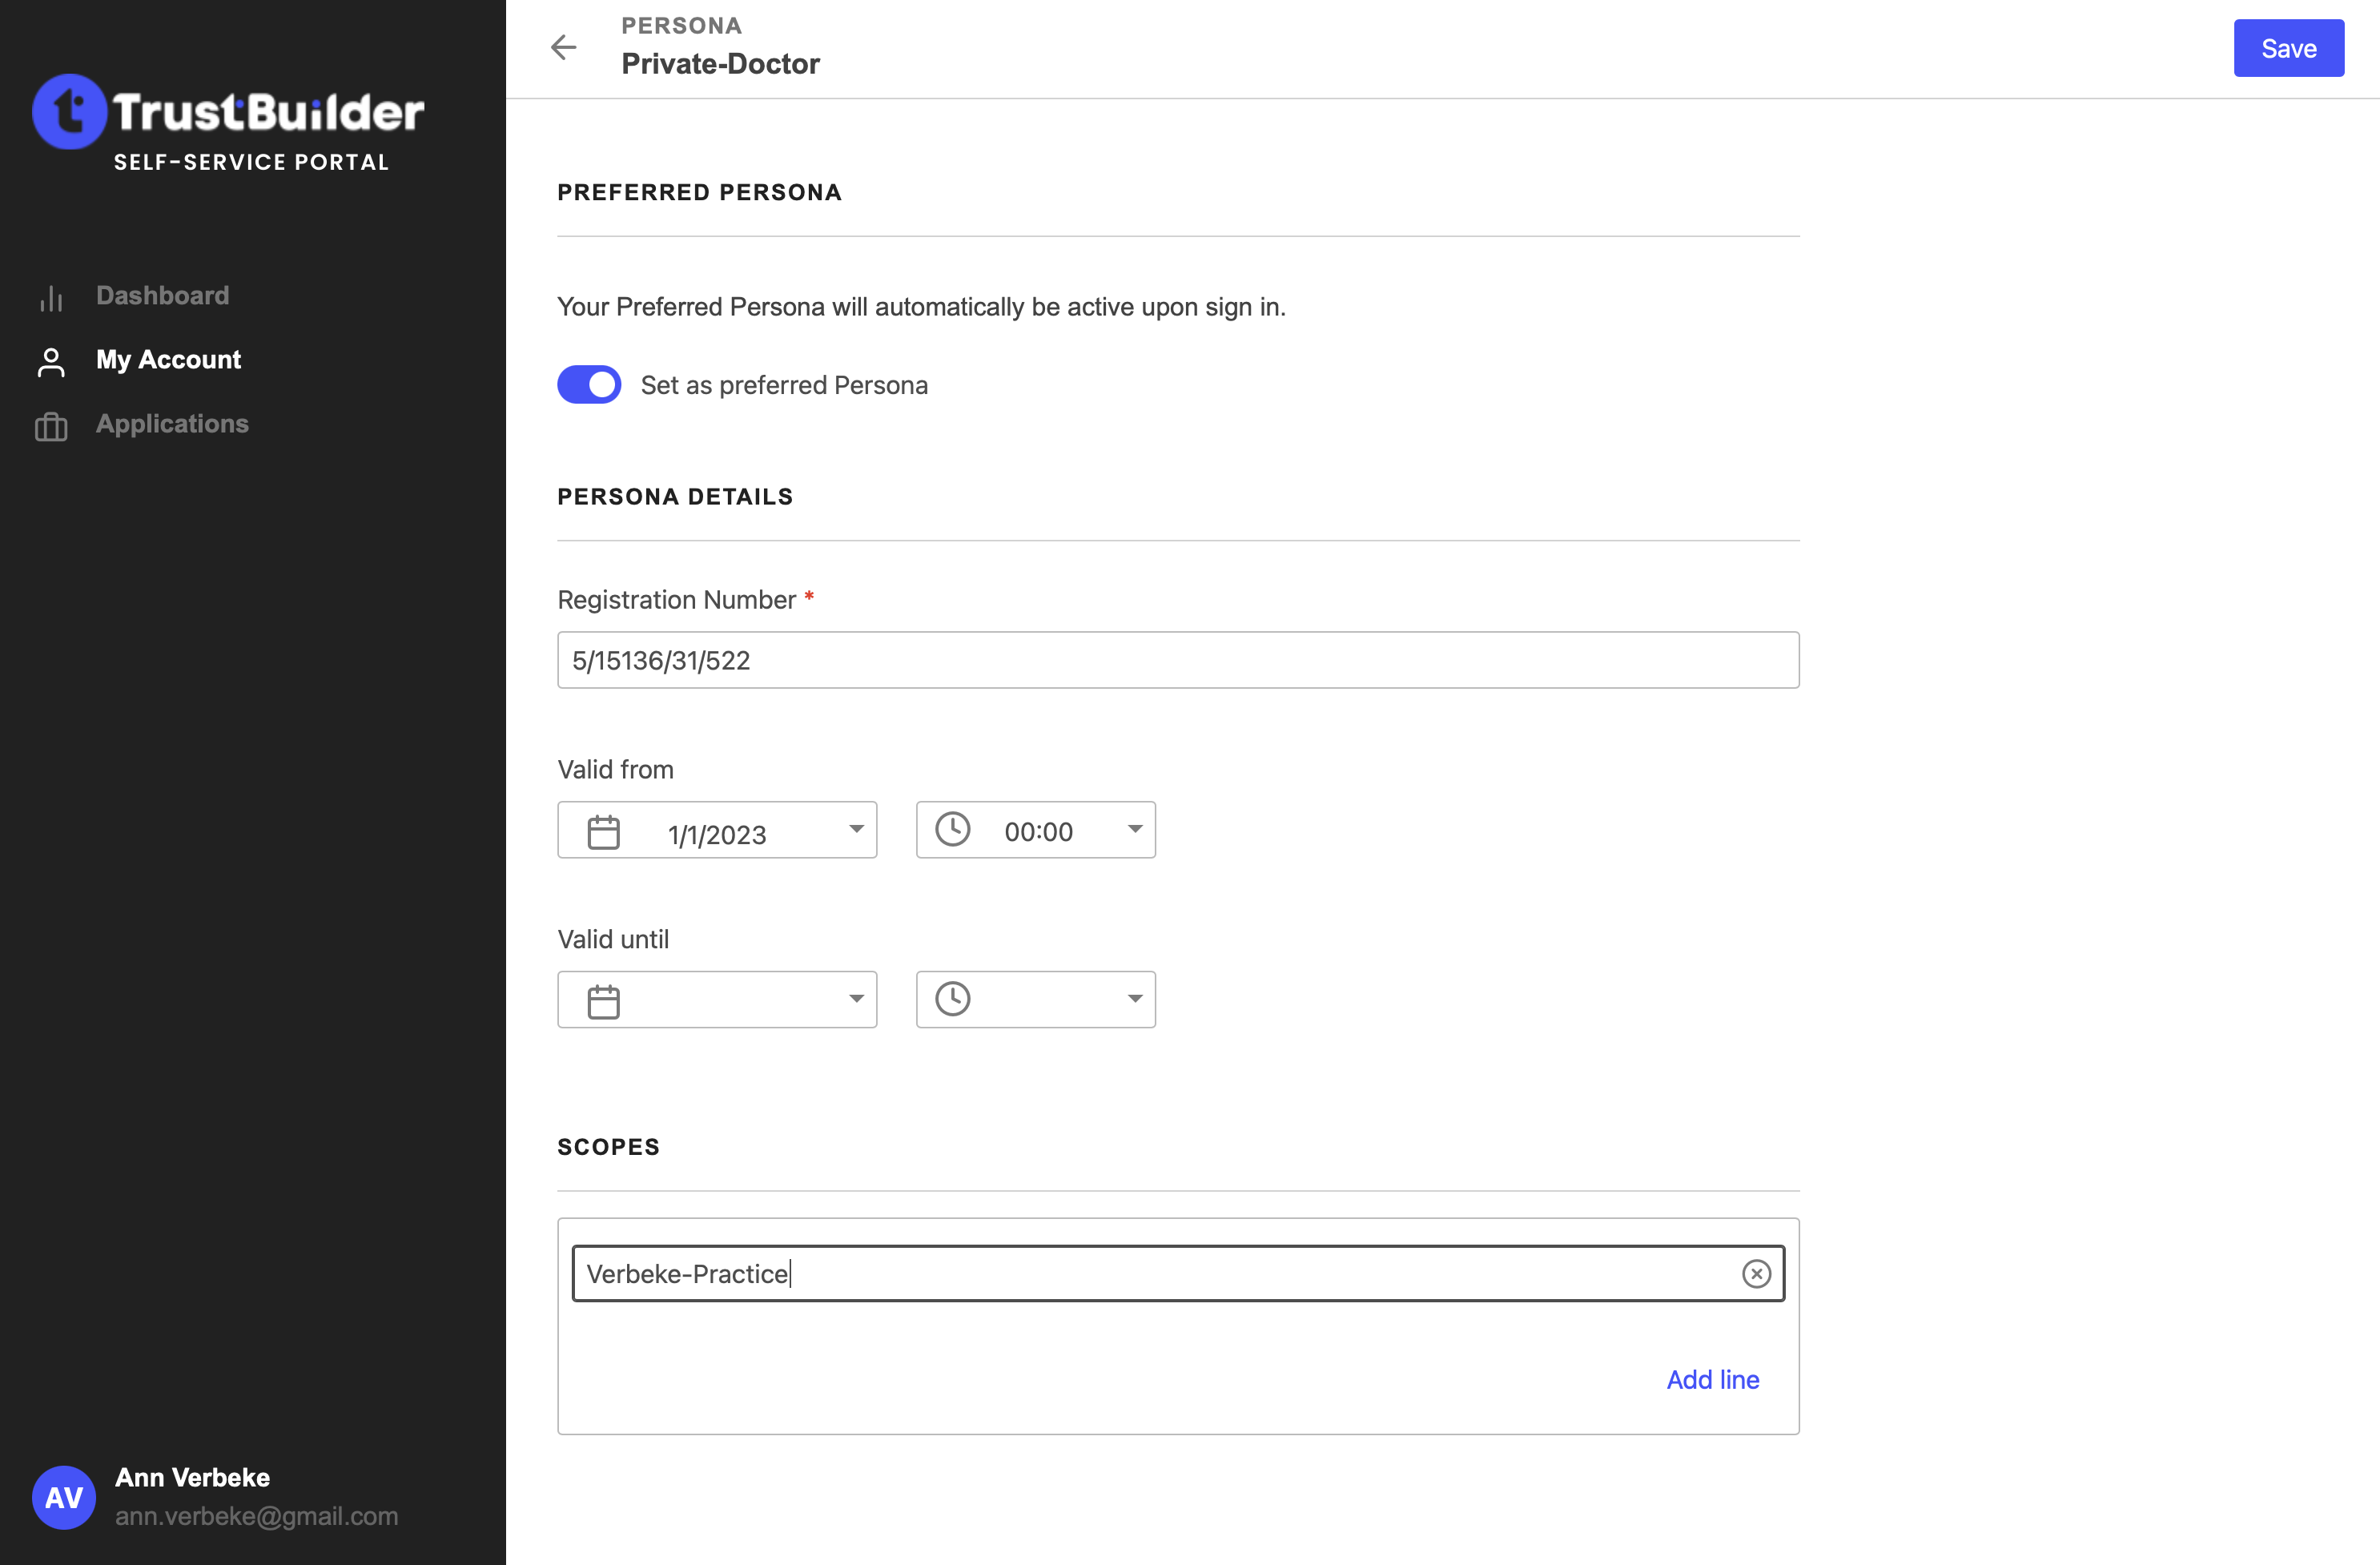
You can now fill in persona-related details, specifically for the user you created:
Preferred persona → The
preferred_personais a toggle.
When activated, it indicates that this persona will automatically be selected when the user first logs in. After login, the user can always switch persona. They can change thepreferred_personathemselves by going to the Self-Service Portal.Valid from → the
valid_fromattribute allows you to set a date & time as of which the persona can effectively be used by the user. The Session Manager will enforce this and the user will not be able to switch to the persona beforevalid_from.Valid until → the
valid_tillattribute allows you to set a date & time until which the persona can effectively be used by the user. The Session Manager will enforce this and the user will not be able to switch to the persona aftervalid_till.Scopes → the
scopesattribute allows you to specify the area/domain/company for which the persona can be used. Thescopereflects the extent and range. It can be used in policies for authorization, access control and delegated administration purposes. It also allows to add more than one persona with the same persona definition, for example if a person is Doctor in more than 1 hospital.
Click on Save
Well done! You just assigned a persona to the user.
Be careful when assigning the Administrator persona as the user will get administrator rights. In case you select the Administrator persona, it has the following attributes:
when the flag “IDHub Administrator” is set to
TRUE, the user will have administrative privileges in the Admin Portal.when the flag “TBA Access” is set to
TRUE, the user will have administrative privileges in the Admin interface of TB.Connect.
Step 3 - Assign credentials
To enable the user to login, you can define a credentials provider to the user profile.
From the user editor, go to Provision tab. You will find a list of the available identity providers for the user.
Click on the chain icon to link the identity provider to the user.

In this example, the TrustBuilder Repository will be linked to the user. Using the TrustBuilder Repository, the user must login using username/password.
Click on the key icon to set a password on behalf of the user. This enables you to test a login with the user (see step 5).
In production, you should ask the user to set the password themselves during their first login using Forgot password. This avoids that you need to send a password to the user.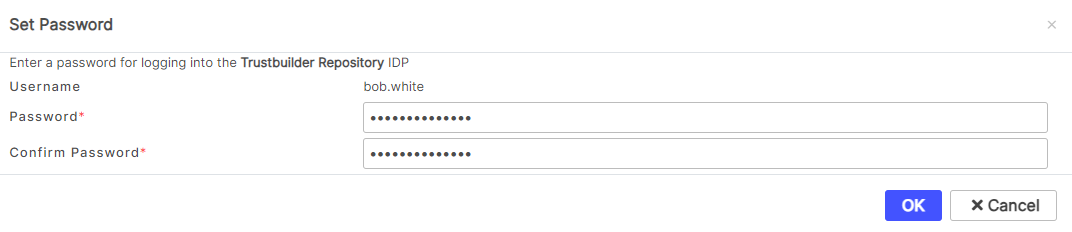
Click on OK to save the password.
Password format
Password can be any combination of letters (upper and lower case), numbers, and symbols (ASCII-standard characters only).
Well done! You’re all set. the new user can log in with the username and the password you set.
Step 4 - Add applications
The person can now use their user profile to login.
They need to be able to use their login to enter an application. You can give a person access to an application by adding a “consent” for that application. A “consent”, in this context, means that you consent (on behalf of the user) that the application uses login-information from that user.
From the user editor, go to Consents tab > + Add Consent
Select an application, a so-called “SP” for Service Provider. The consoles of TrustBuilder platform are also SP that can be selected.
TrustBuilder comes with two applications built-in: the TrustBuilder Self Service Portal for end users, and the TrustBuilder Administration Portal for admin users. The Admin portal can only be accessed by users that have the Administrator persona.
Since we are setting up a regular end user, select the TrustBuilder Self Service Portal.Click on Create Consent to allow the user access the Self Service Portal.
Well done! The person can now login and access the Self-Service Portal.
You can configure access to other applications in the ‘Service Providers’ section. Once configured, they can be linked to user profiles.
Step 5 - Login the new user
You can perform a login test with the user profile you just created.
Instead of the url of the admin portal you can construct the url of the Self-Service Portal as follows:
Admin Portal:
https://<my domain>.trustbuilder.io/idhub/adminSelf-Service Portal:
https://portal.<my domain>.trustbuilder.io
You should get a login screen of which you can change the language.
Enter the username and the user’s password.
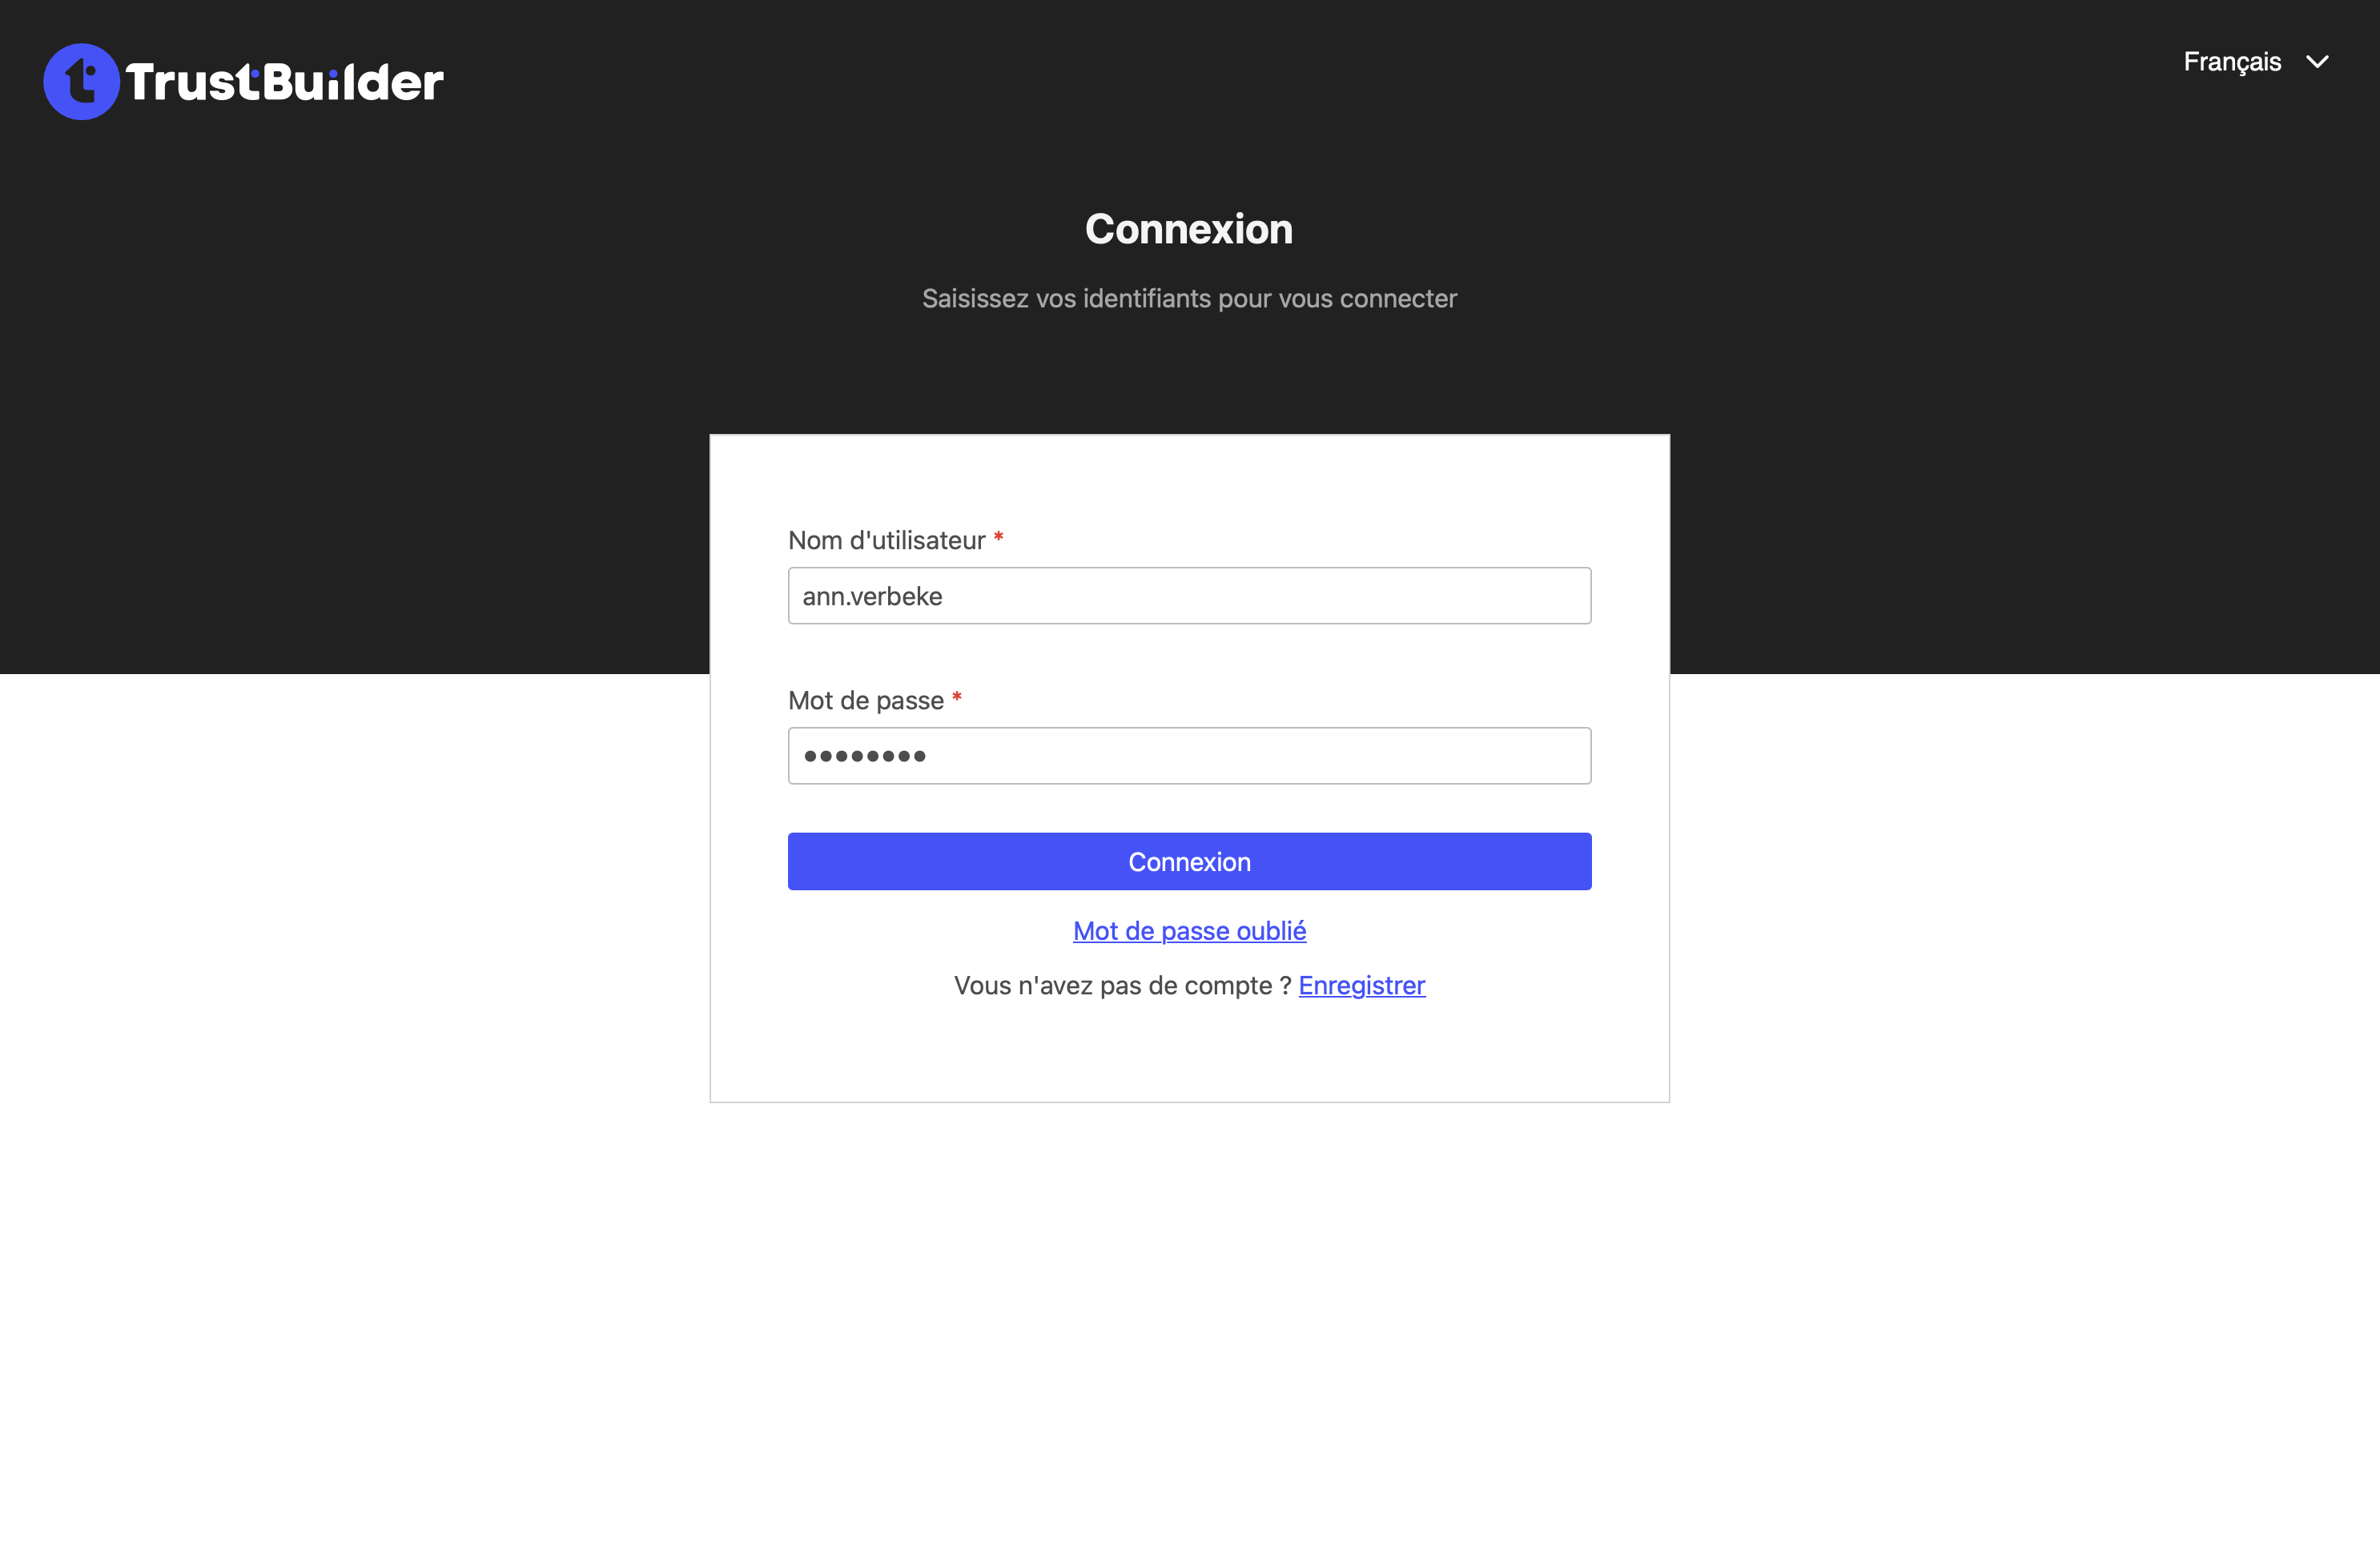
Click on Allow to give your consent.
The Self-Service Portal is a Service Provider in its own right. As such, you (this time as the end user)need to give your consent for it to be able to read the user profile.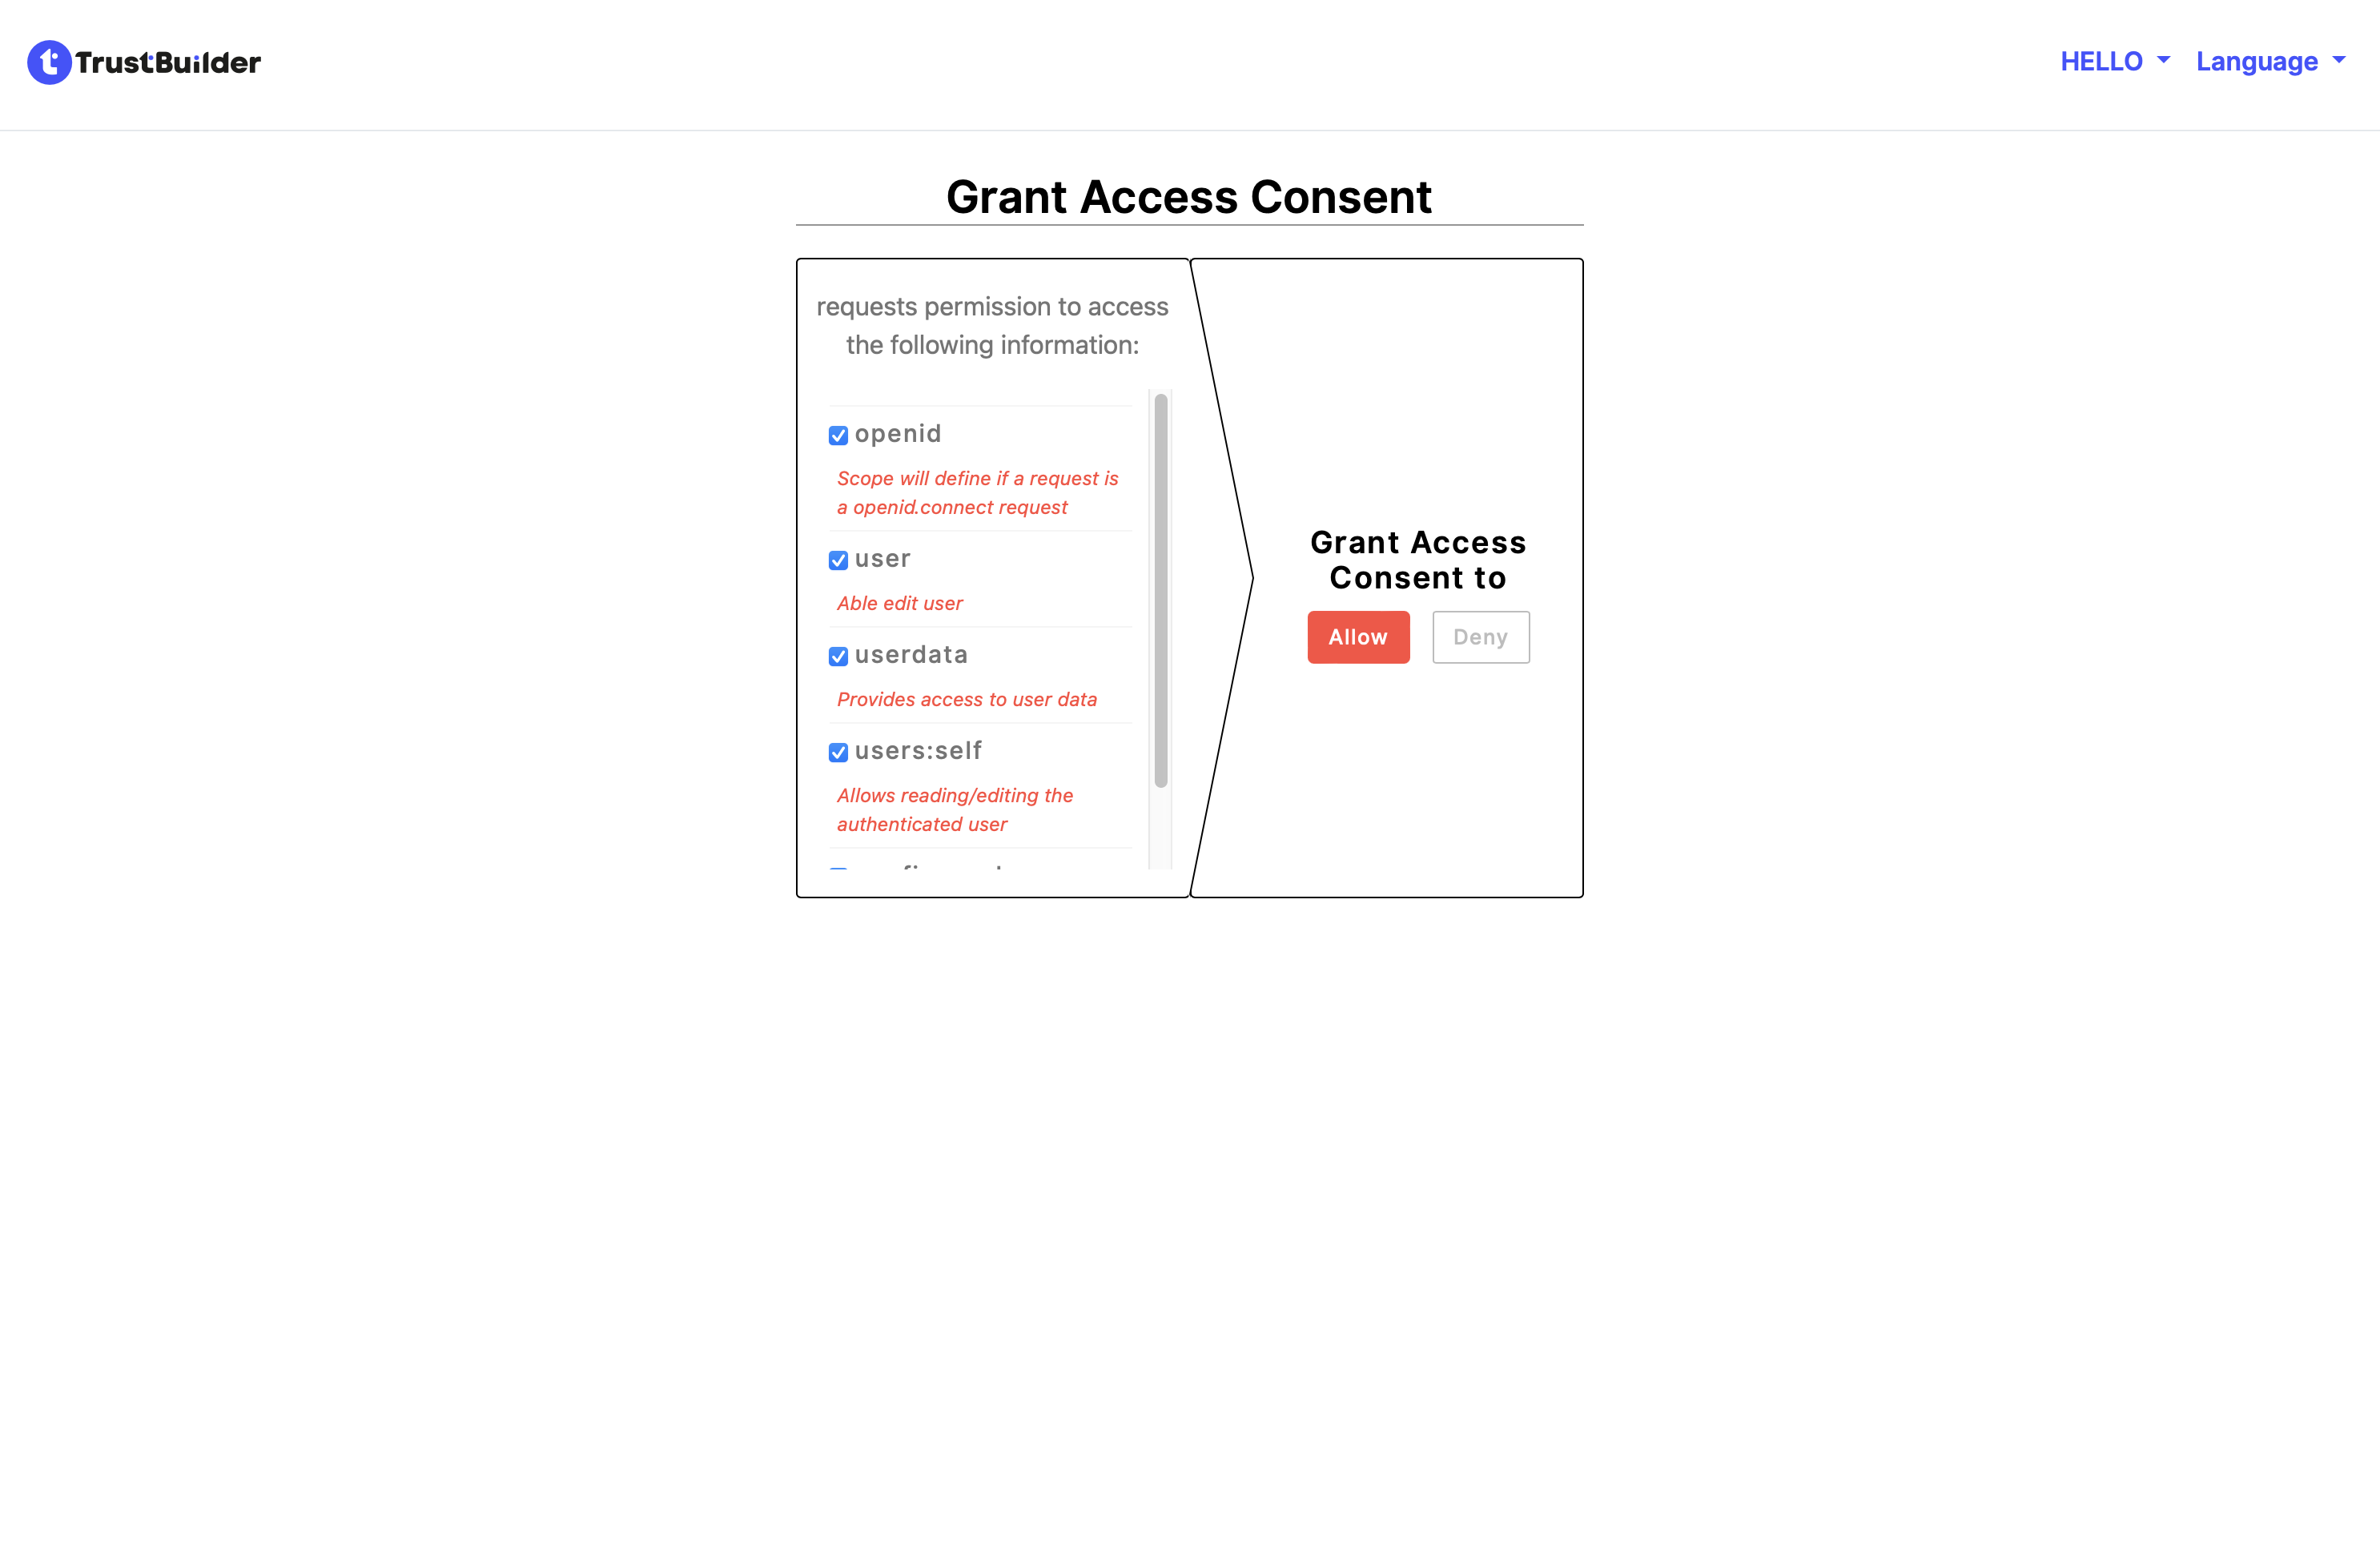
You are now logged in and can use the Self-Service Portal.
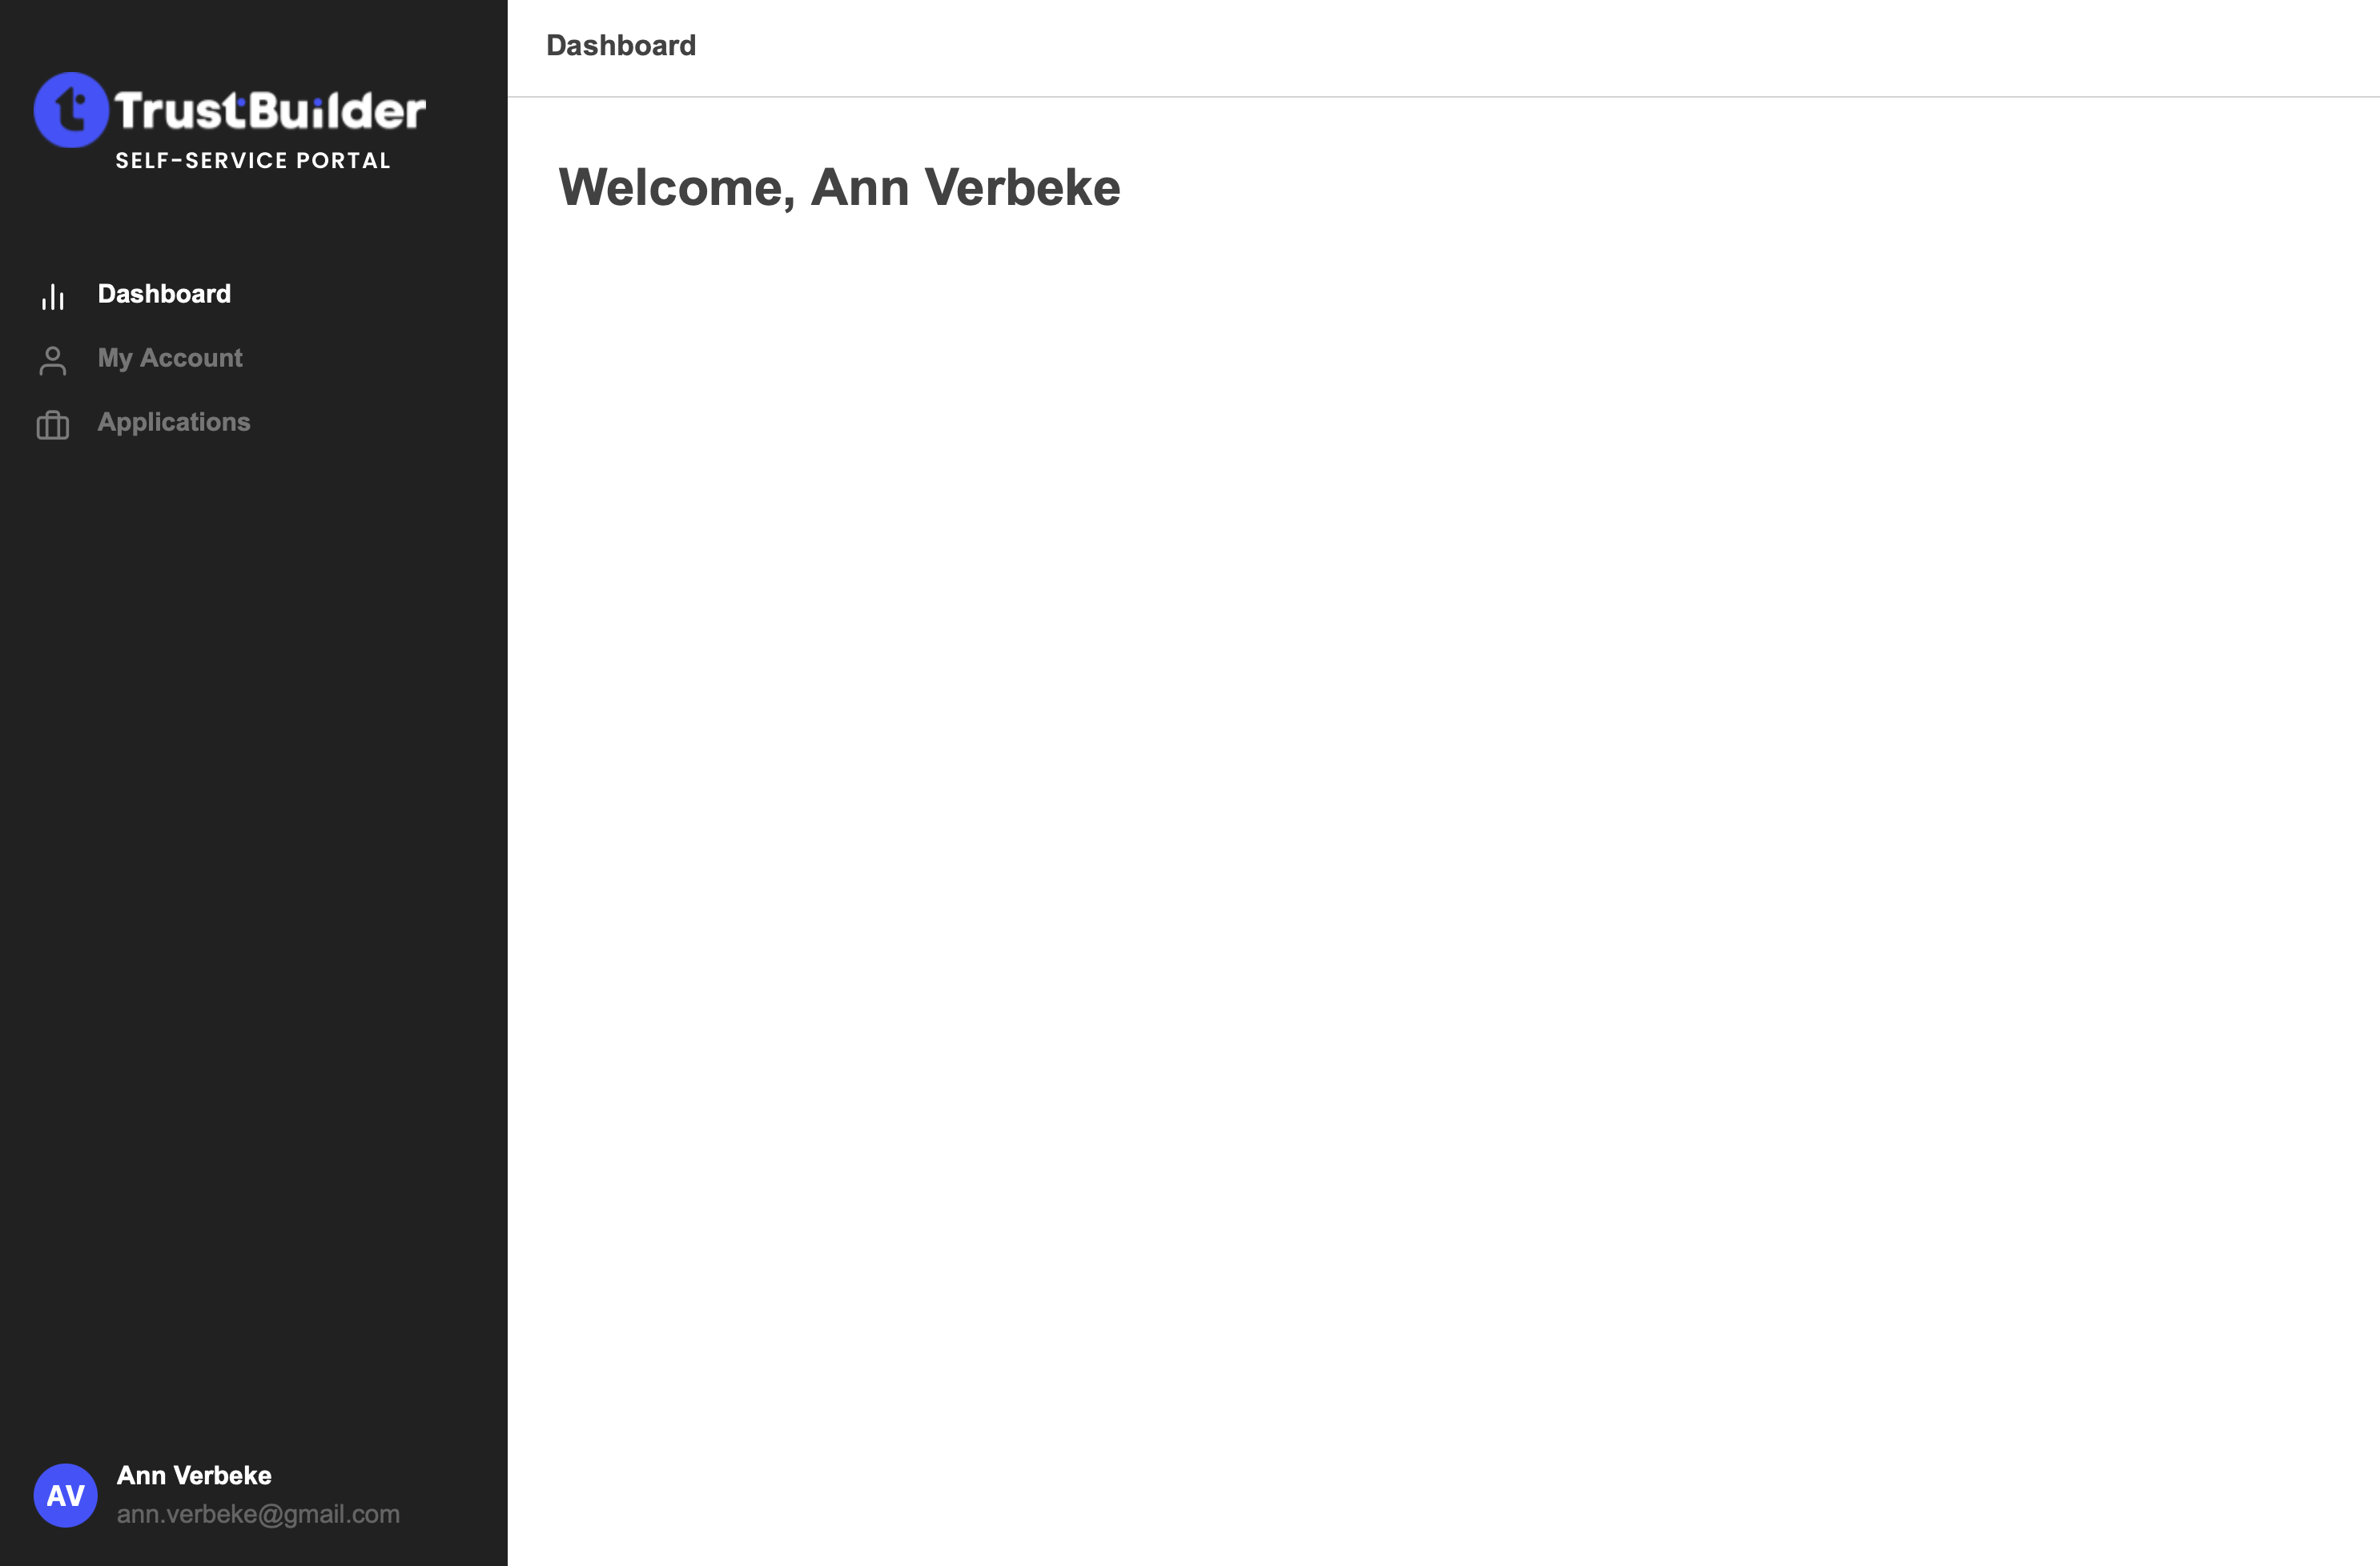
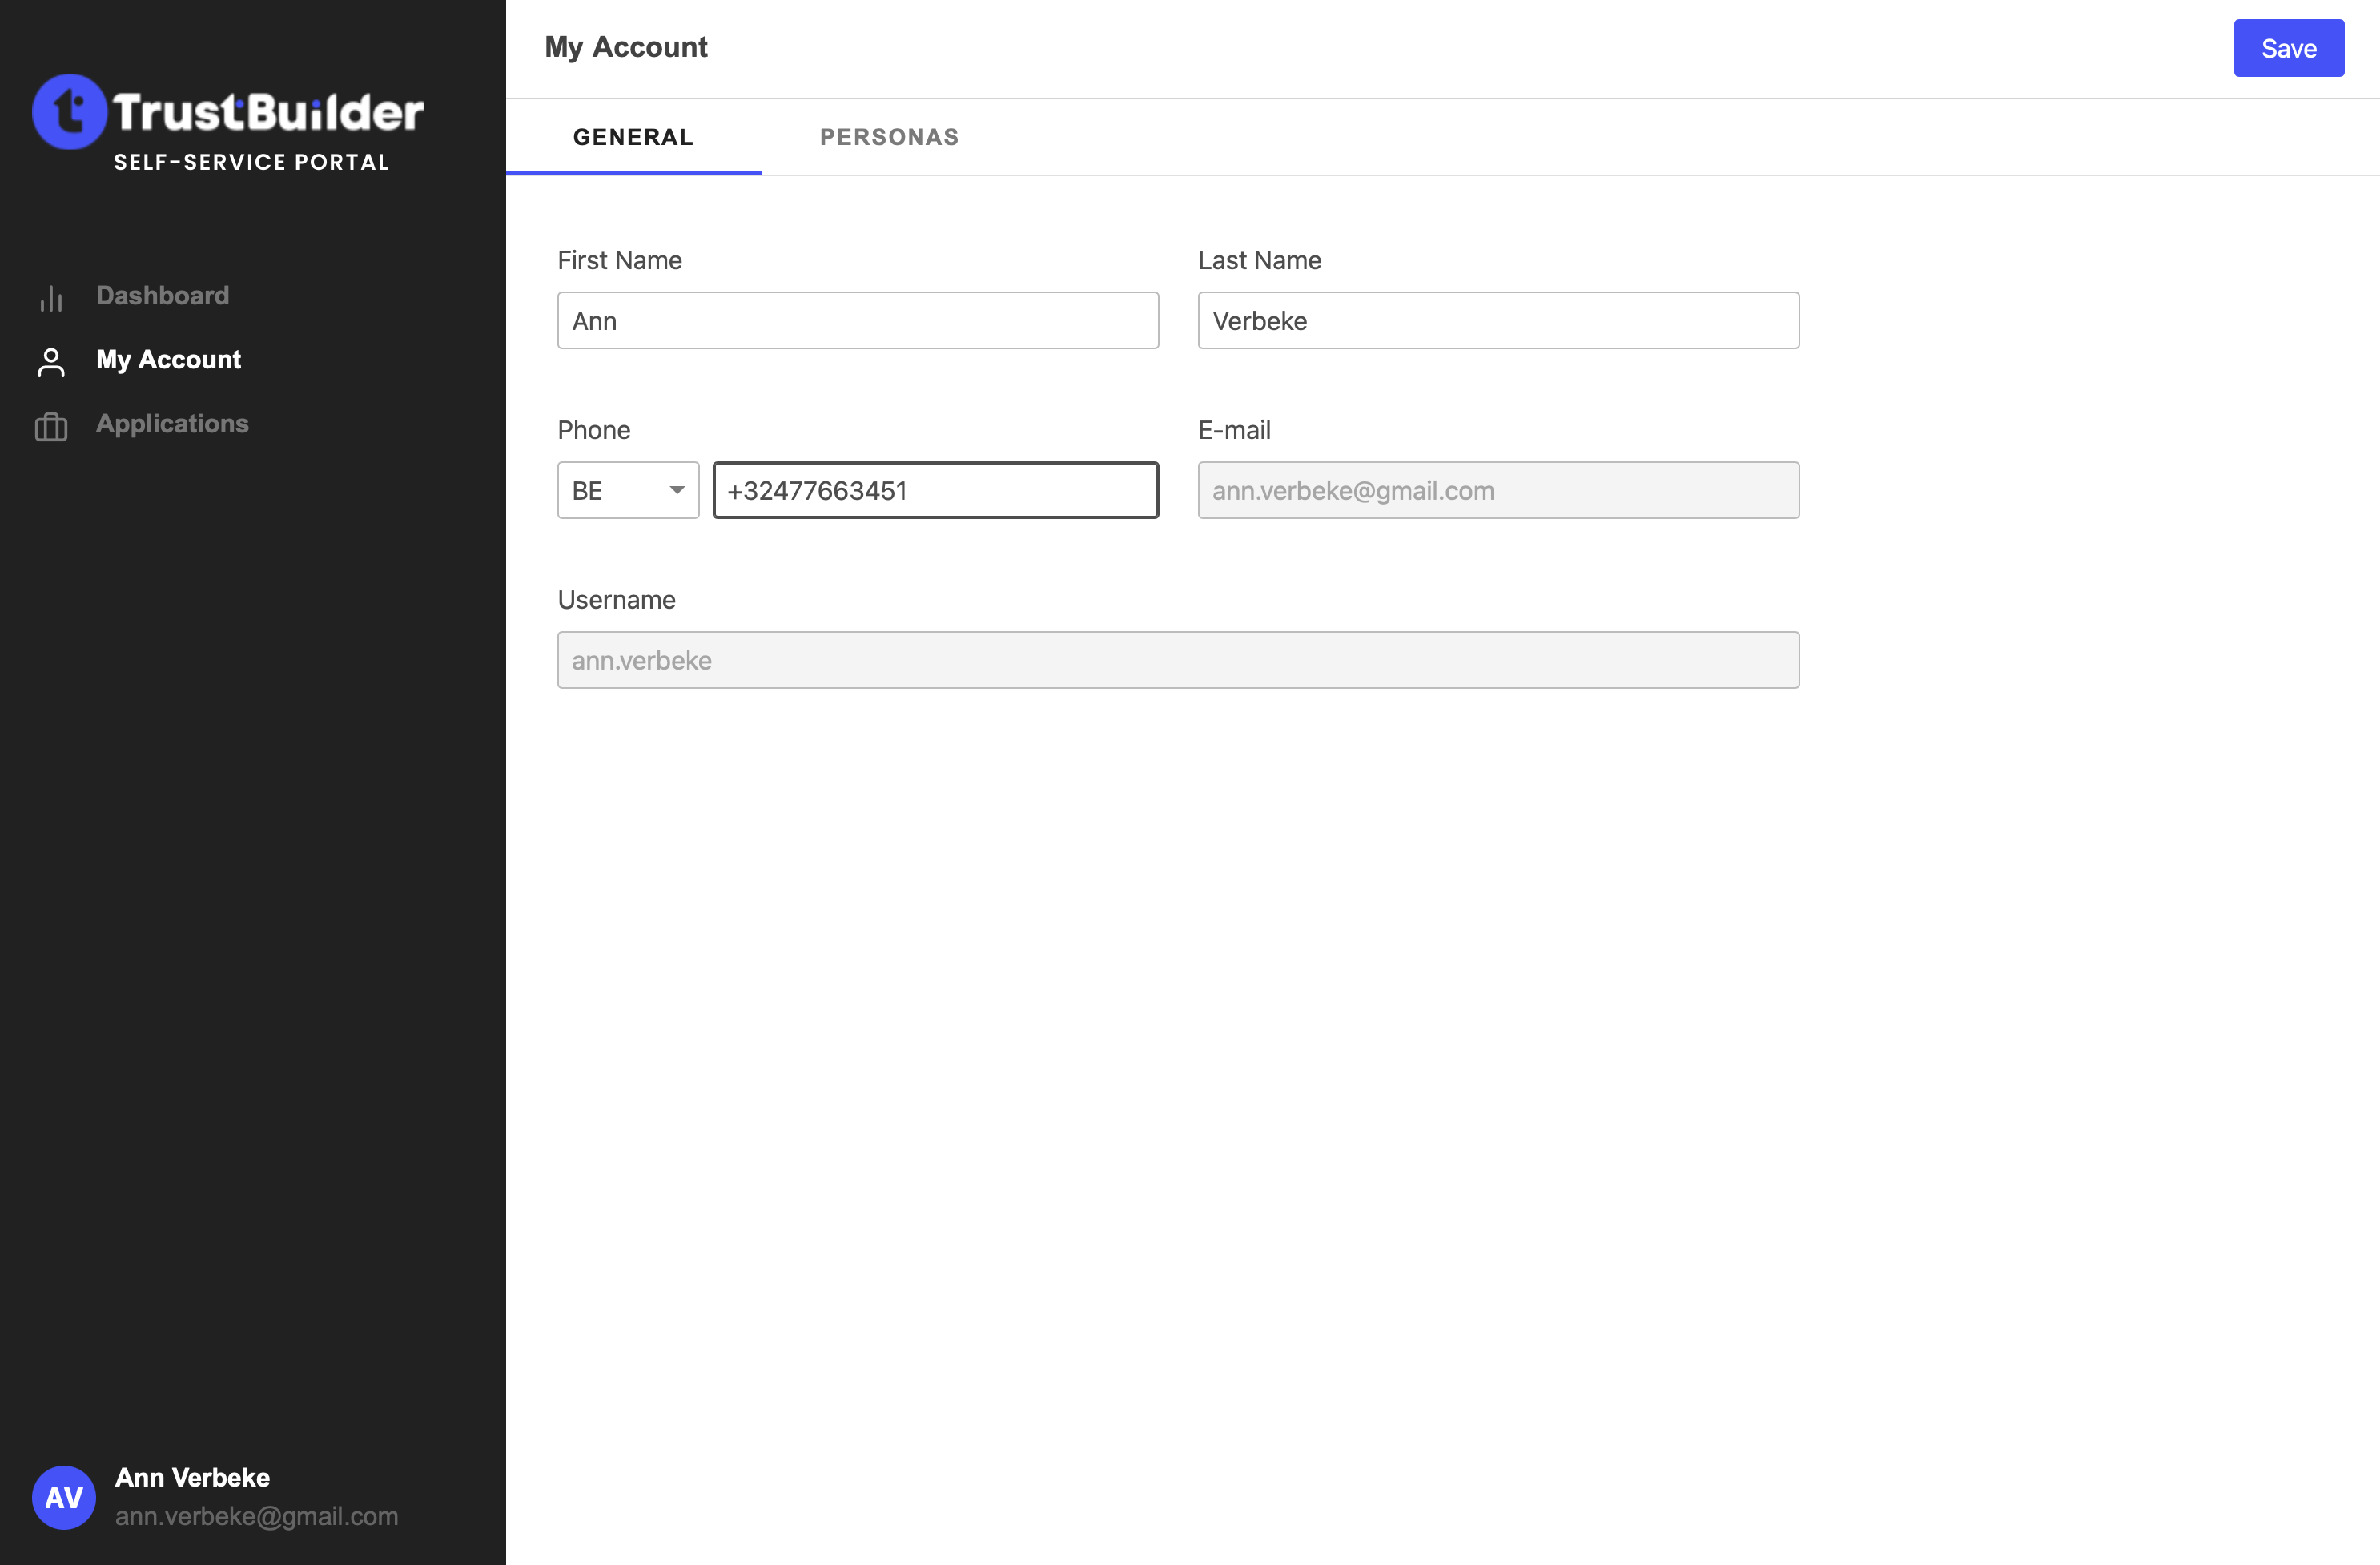
You can edit some profile details by going to the My Account tab.
You can also review the assigned personas by using the Personas tab.
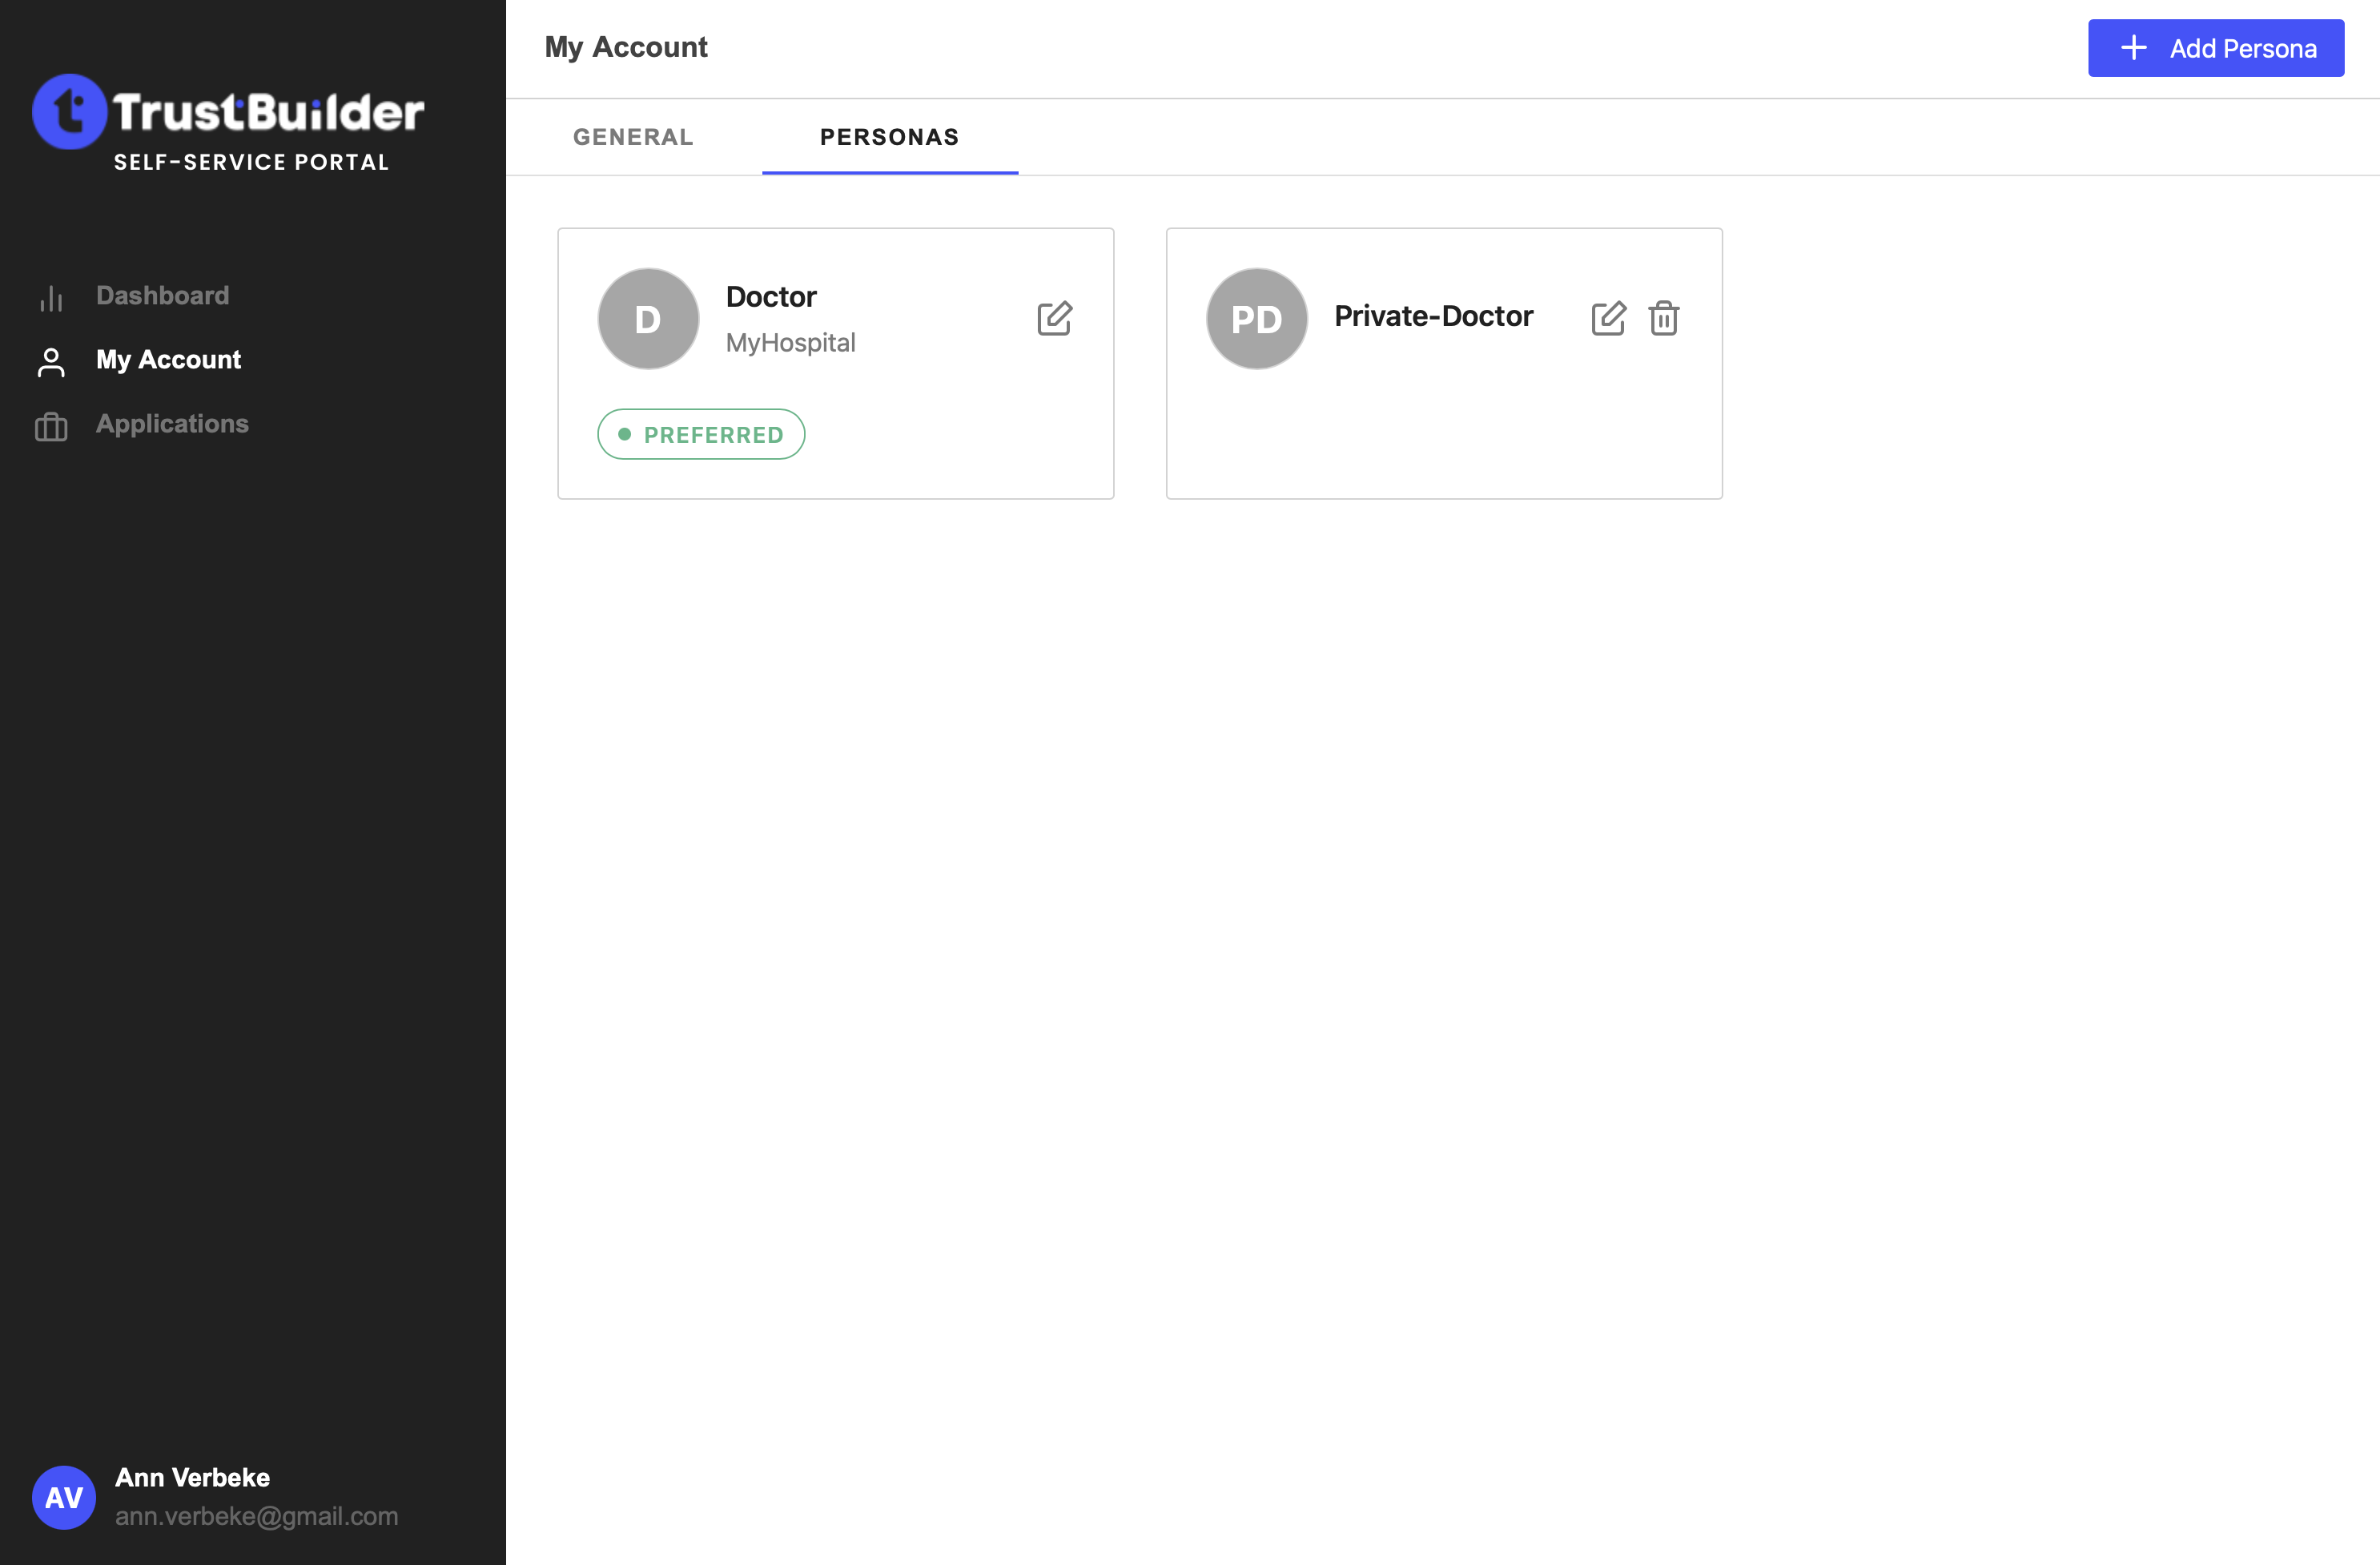
You can for example set the preferred persona to another one and add a scope.