Salesforce - OIDC
This documentation explain how to use your TrustBuilder as an IdP provider to your Salesforce organization.
Prerequisites
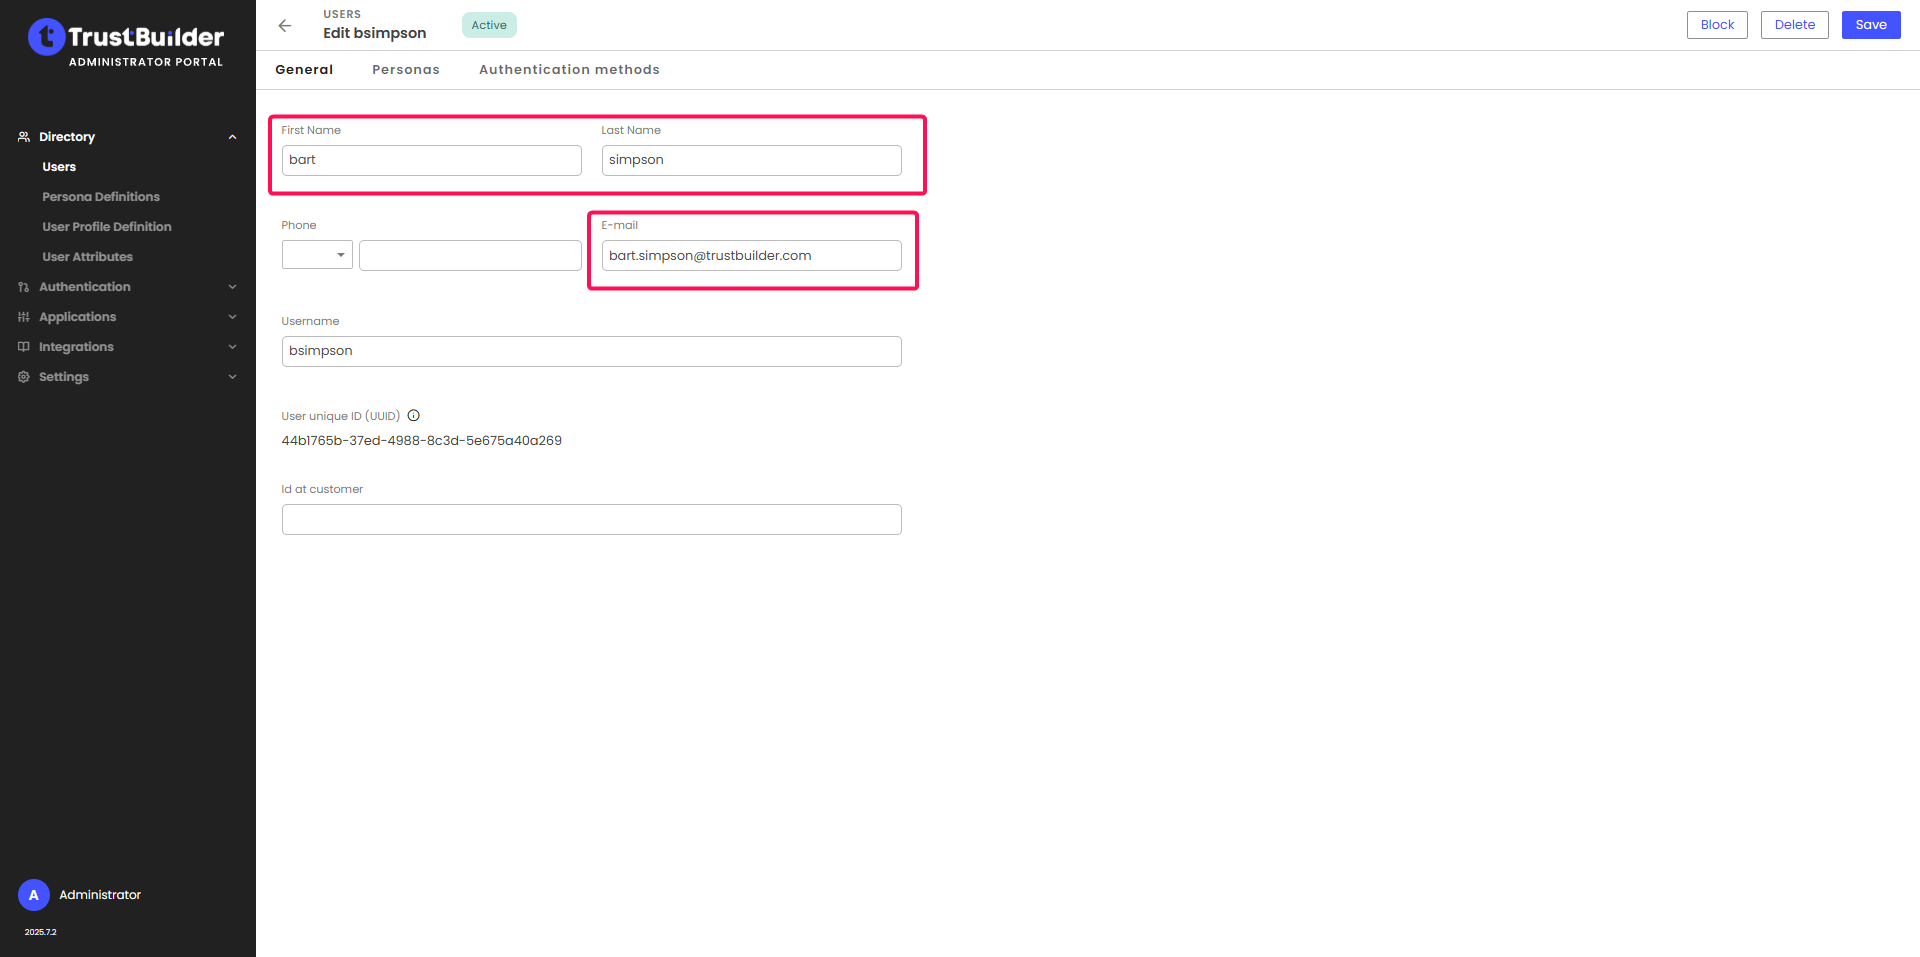
A TrustBuilder tenant with users containing at least the following attributes: firstname, lastname, and email and a valid authentication method.
A Salesforce tenant. For testing, you can use a developer Salesforce tenant: https://www.salesforce.com/form/developer-signup/
The following Salesforce APEX Script : OIDCTrustBuilder.cls (see Configuring APEX Script below)
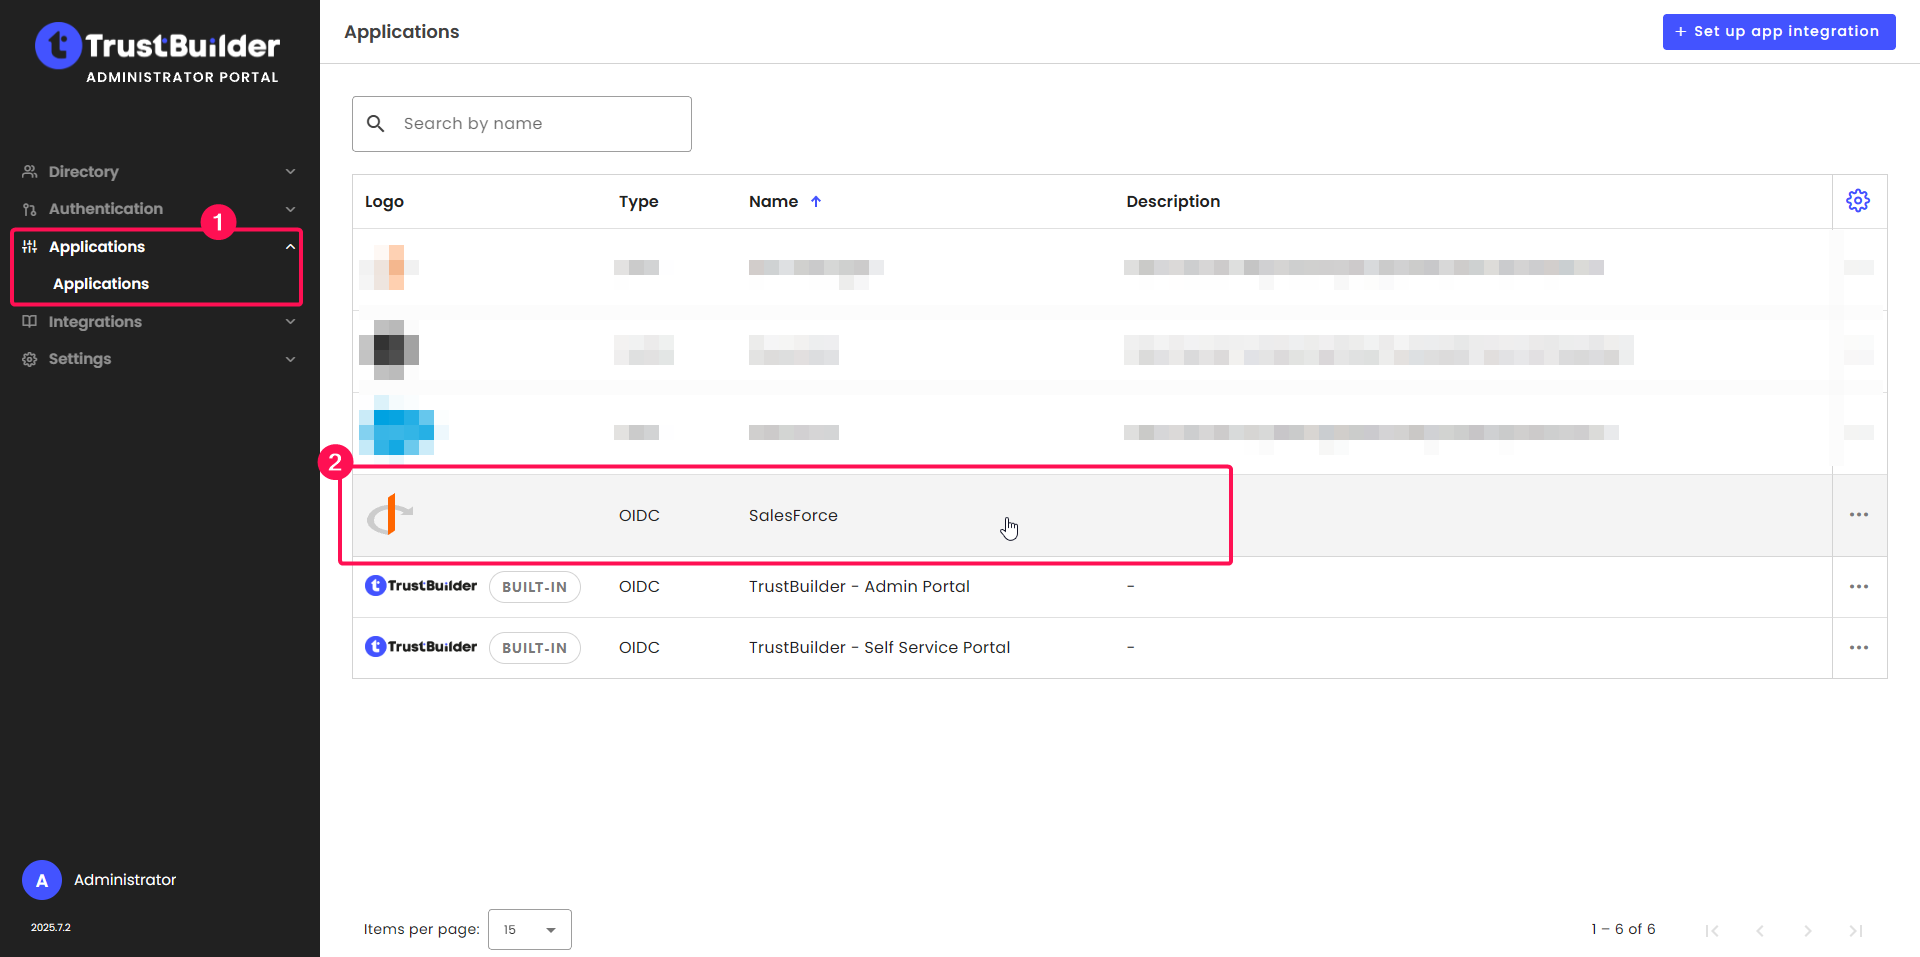
Configuring an application in TrustBuilder
Log in to your TrustBuilder administration console.
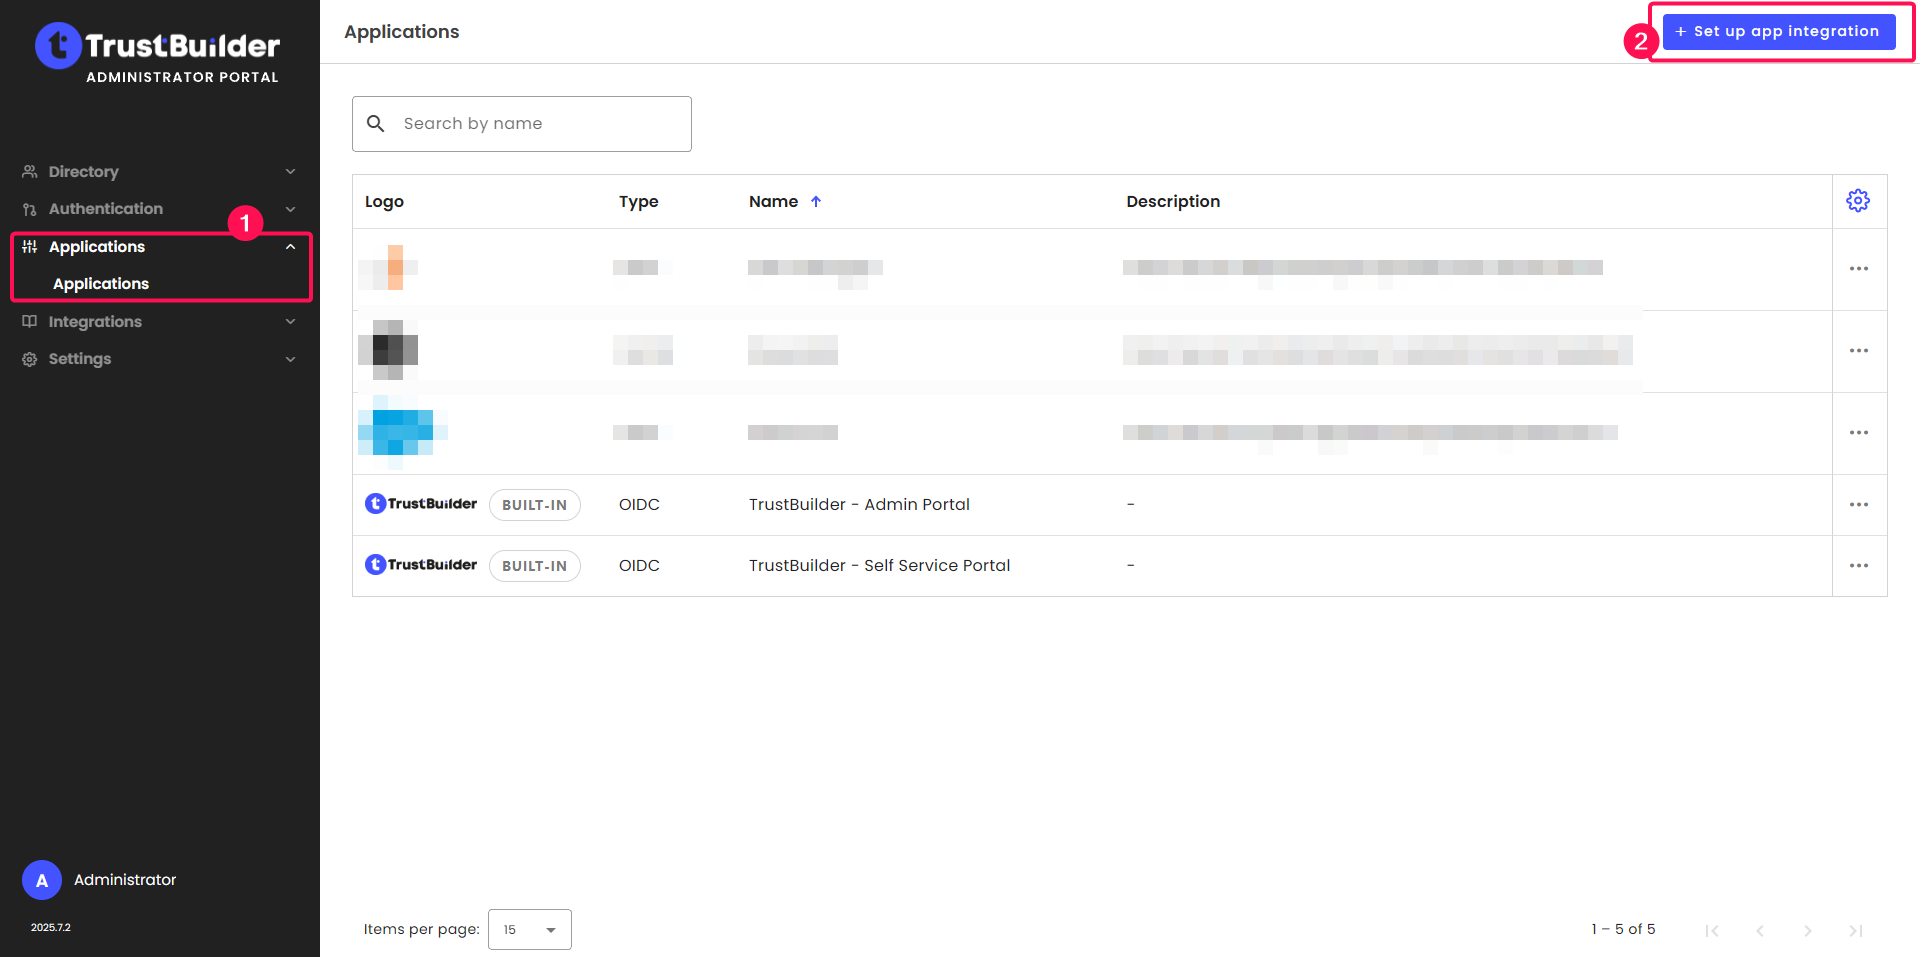
Go to Applications > Applications.
Click + Set up app integration.
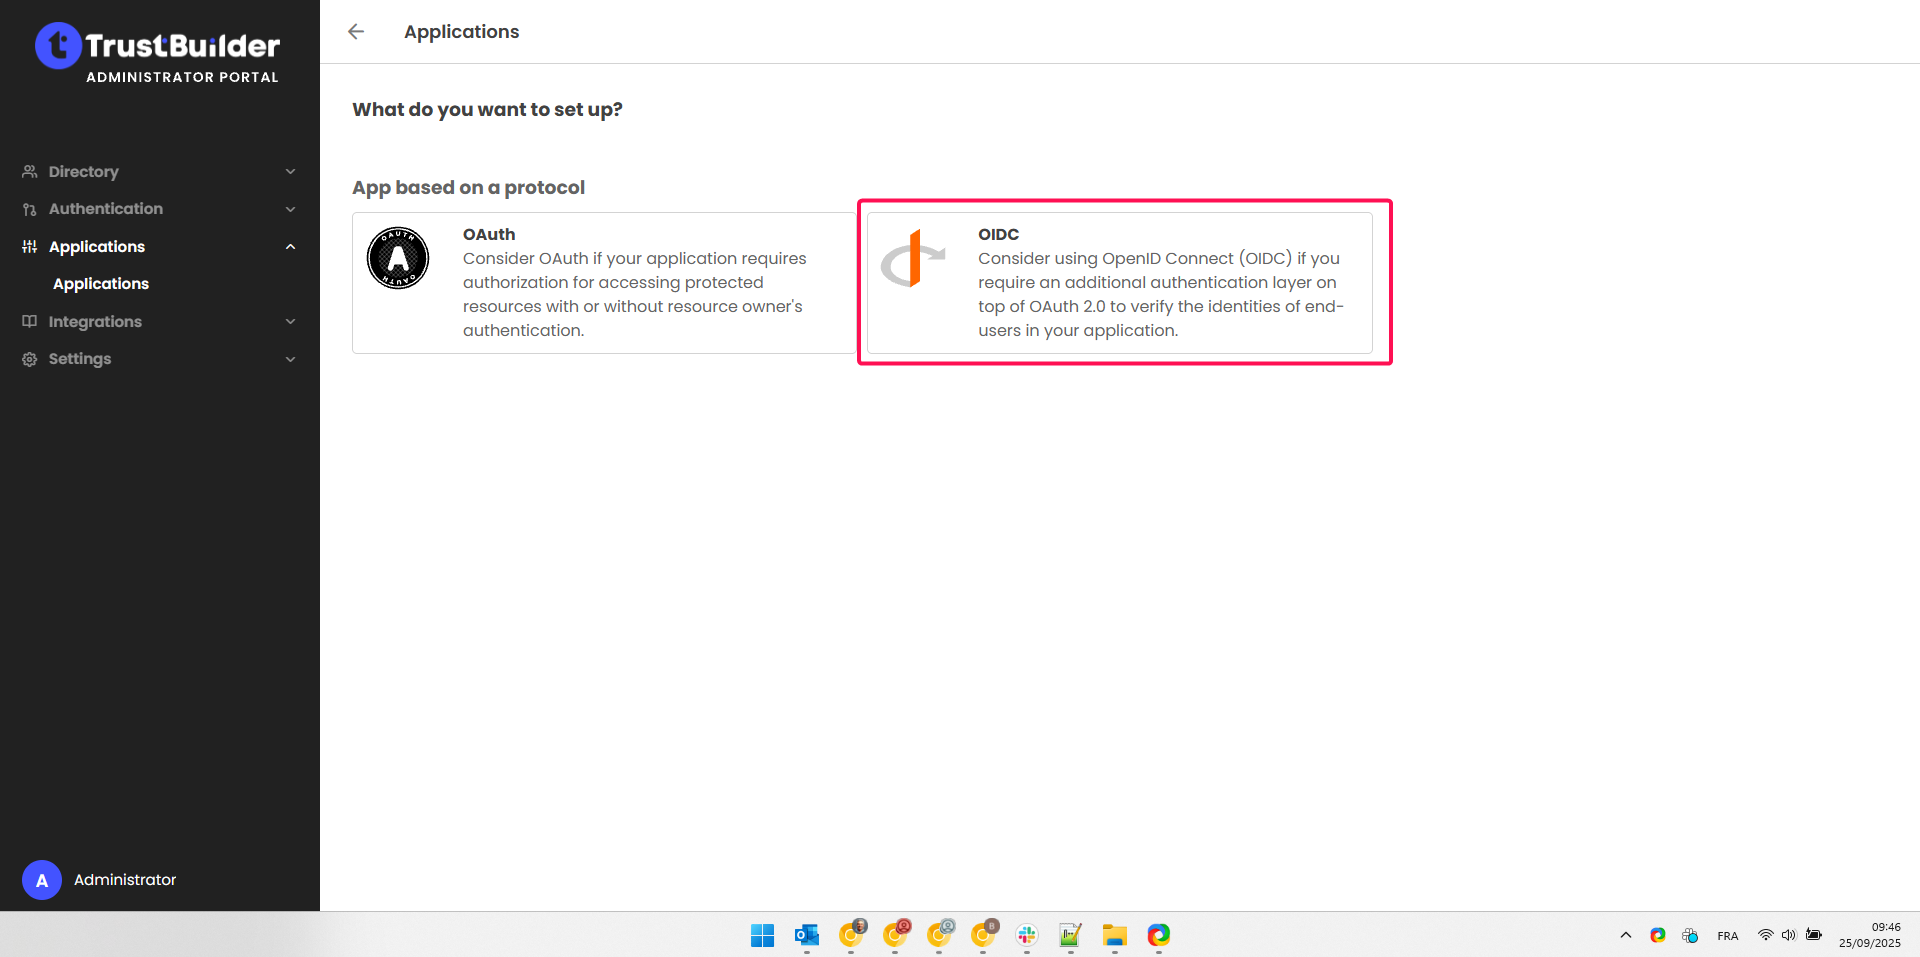
Select OIDC.
Enter a name for the application and select Regular Web App for the application type.
Click on Next.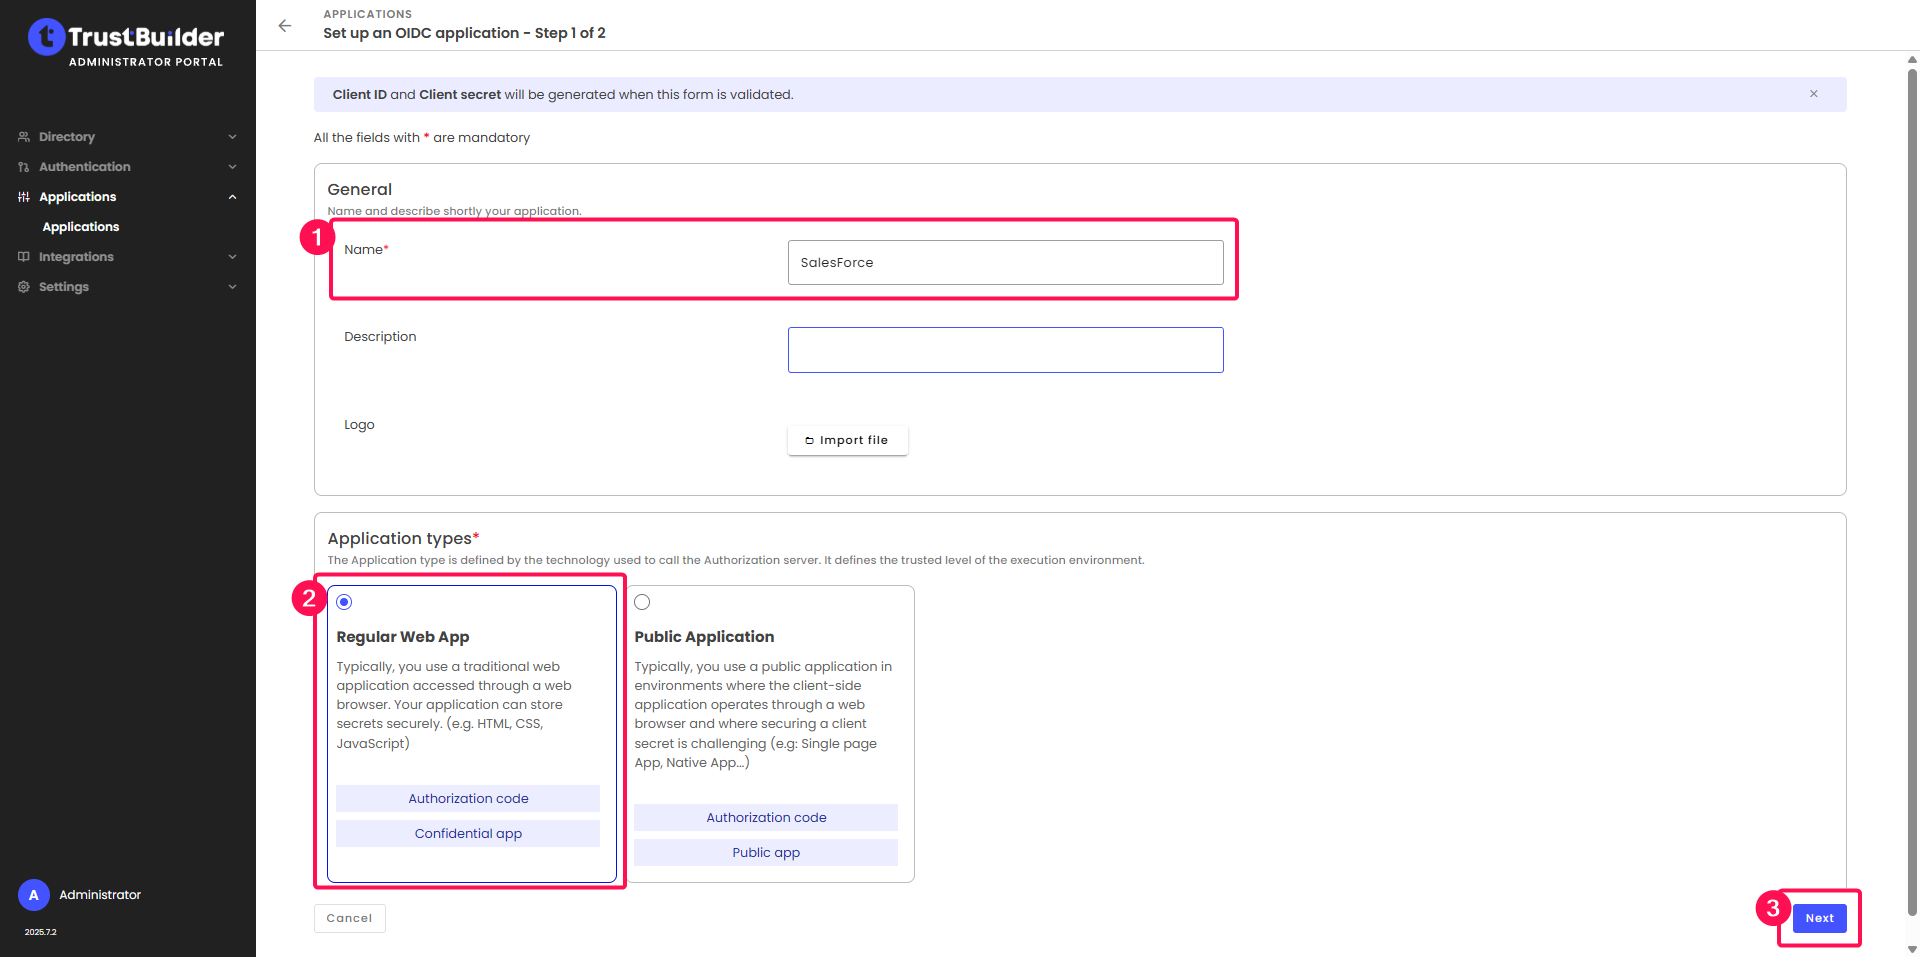
Configure the application:
In the Subject Management section, select Email as Subject.
⚠️ The subject is used by the APEX script provided. If you wish to use another value, you must adapt the provided APEX script (see Configuring APEX Script below).In the API & Scopes section, check Internal API.
In the Authentication method section, leave Client secret POST.
In the Redirect URLs section, enter
https://localhost(we will modify this later).Click Submit.
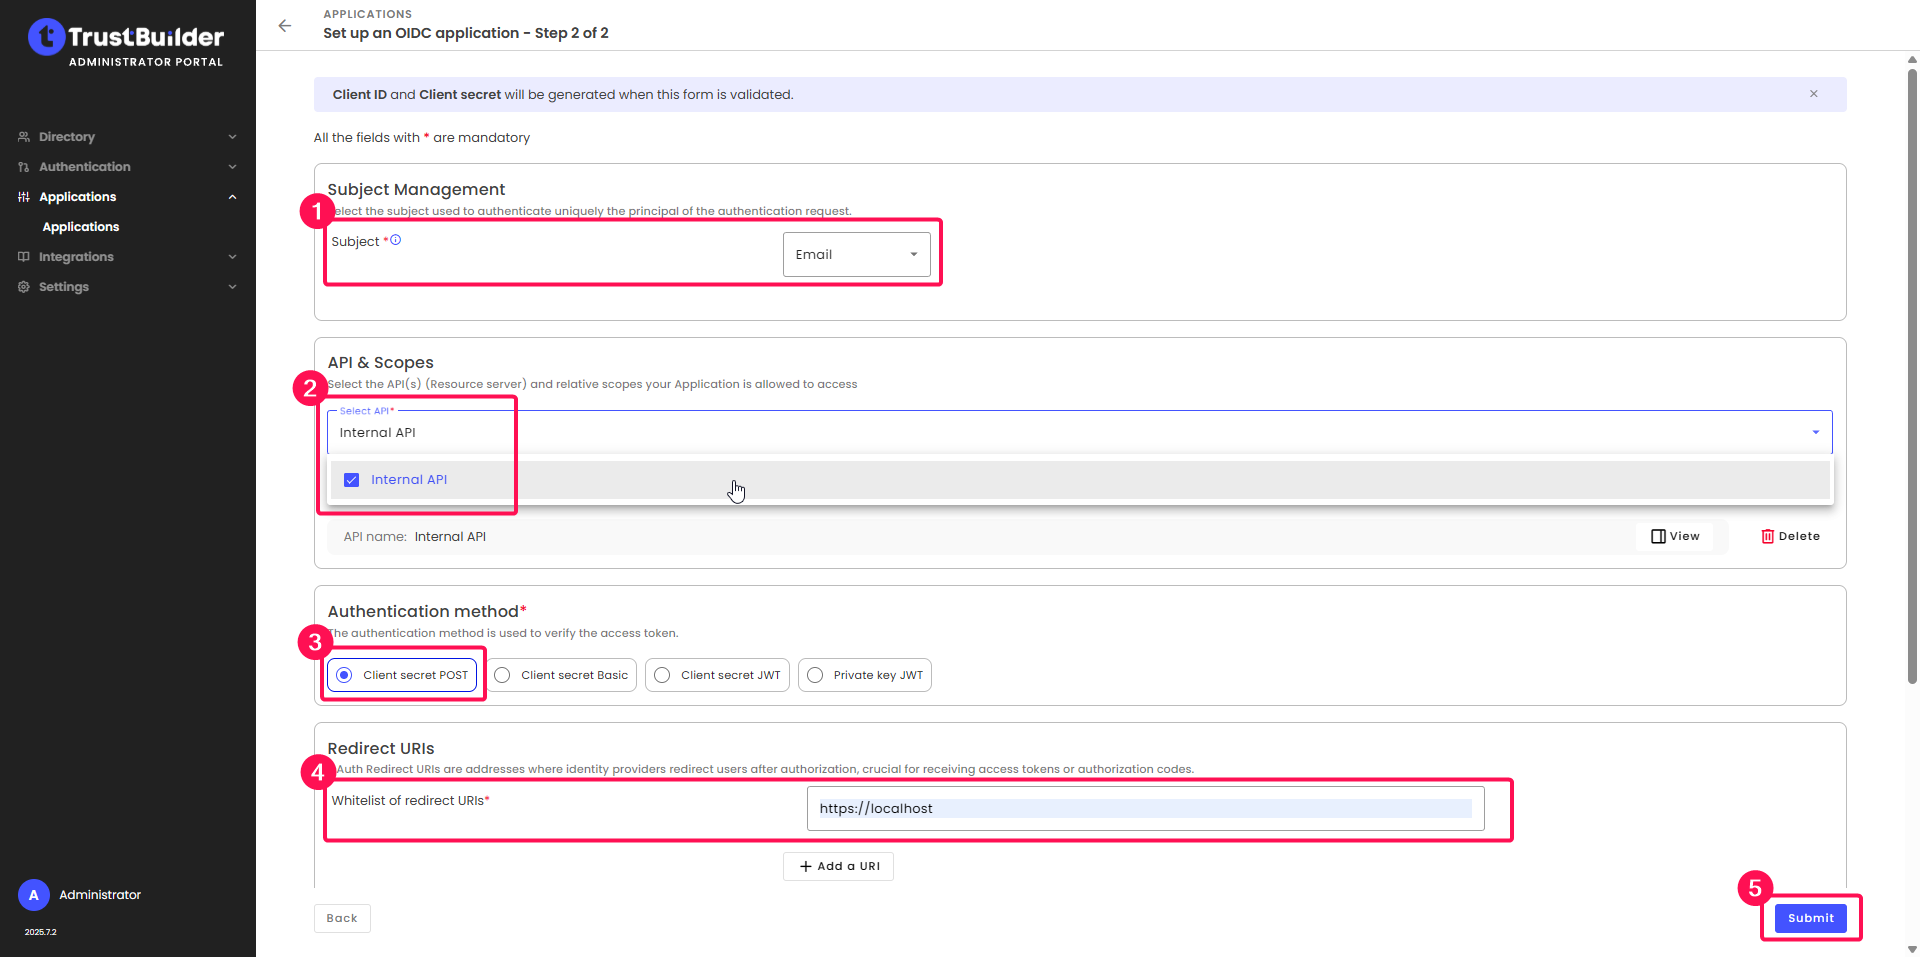
Copy and save the Client ID and Client Secret.
⚠️ Be sure to note down the Client secret as it will not be displayed again.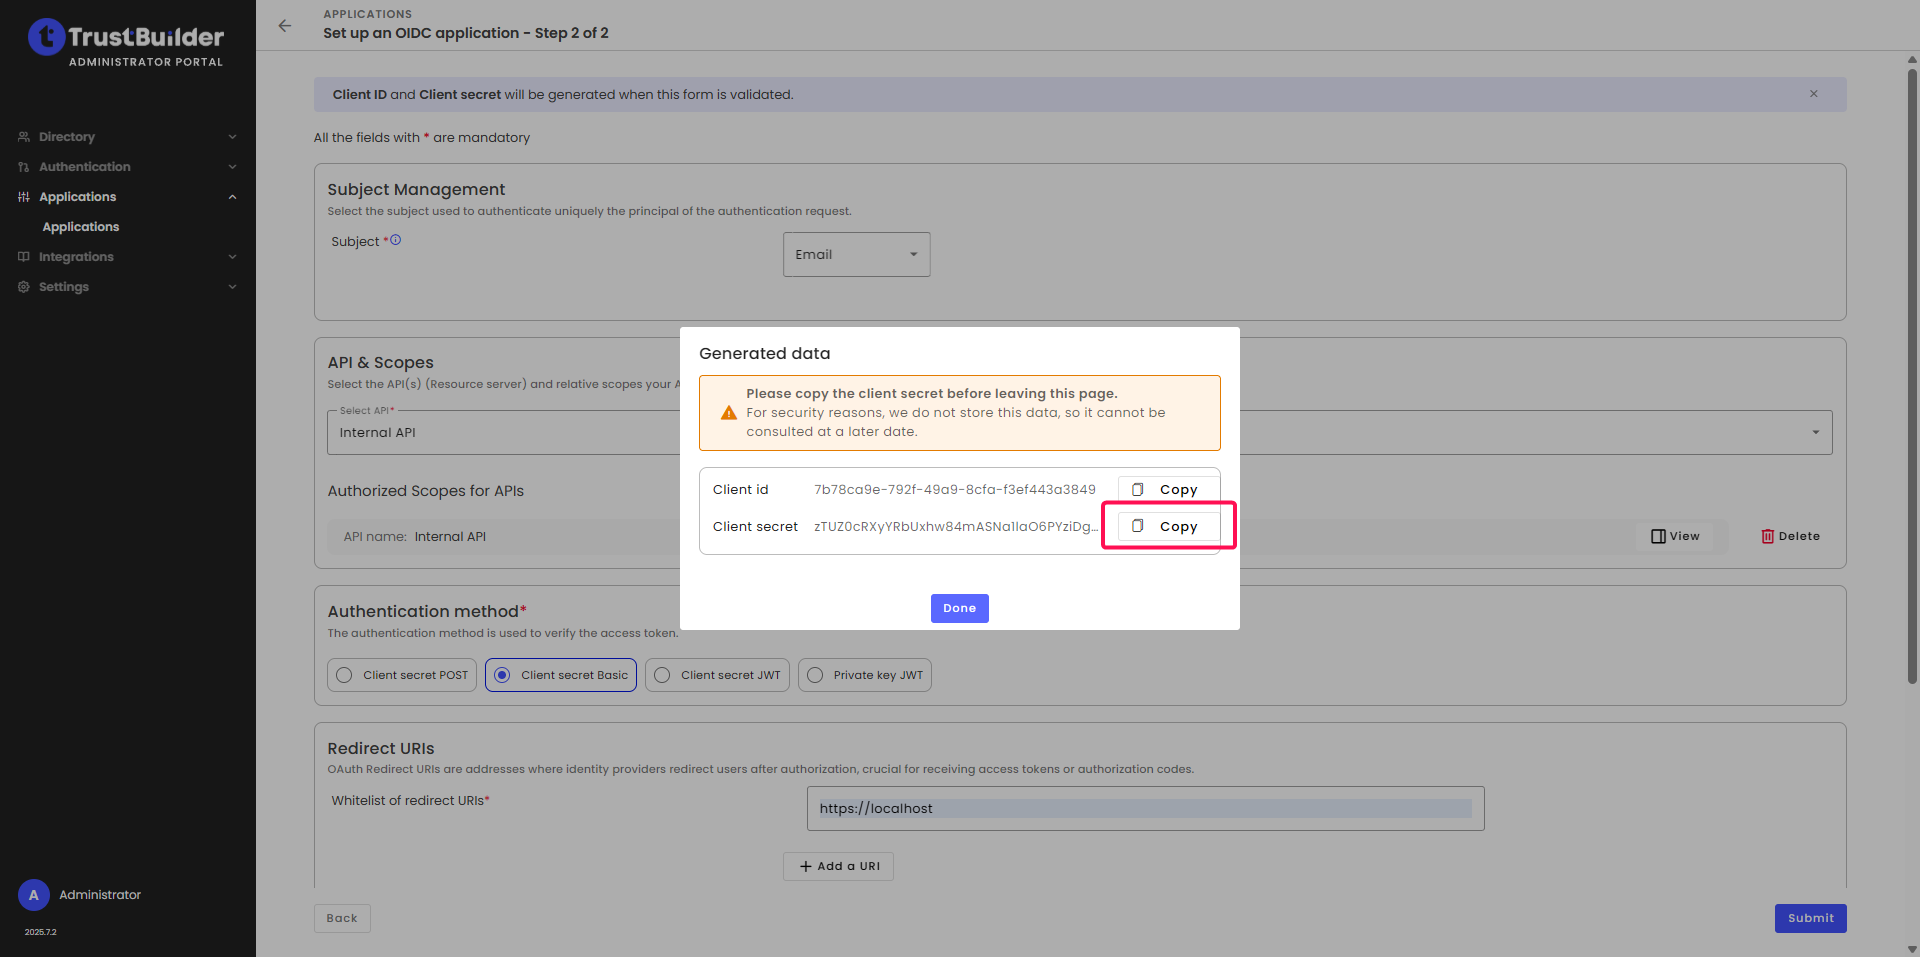
Click Save.
Keep the window open as you will have to copy endpoints from the Endpoints tab later.
Configuring an Auth Provider in Salesforce
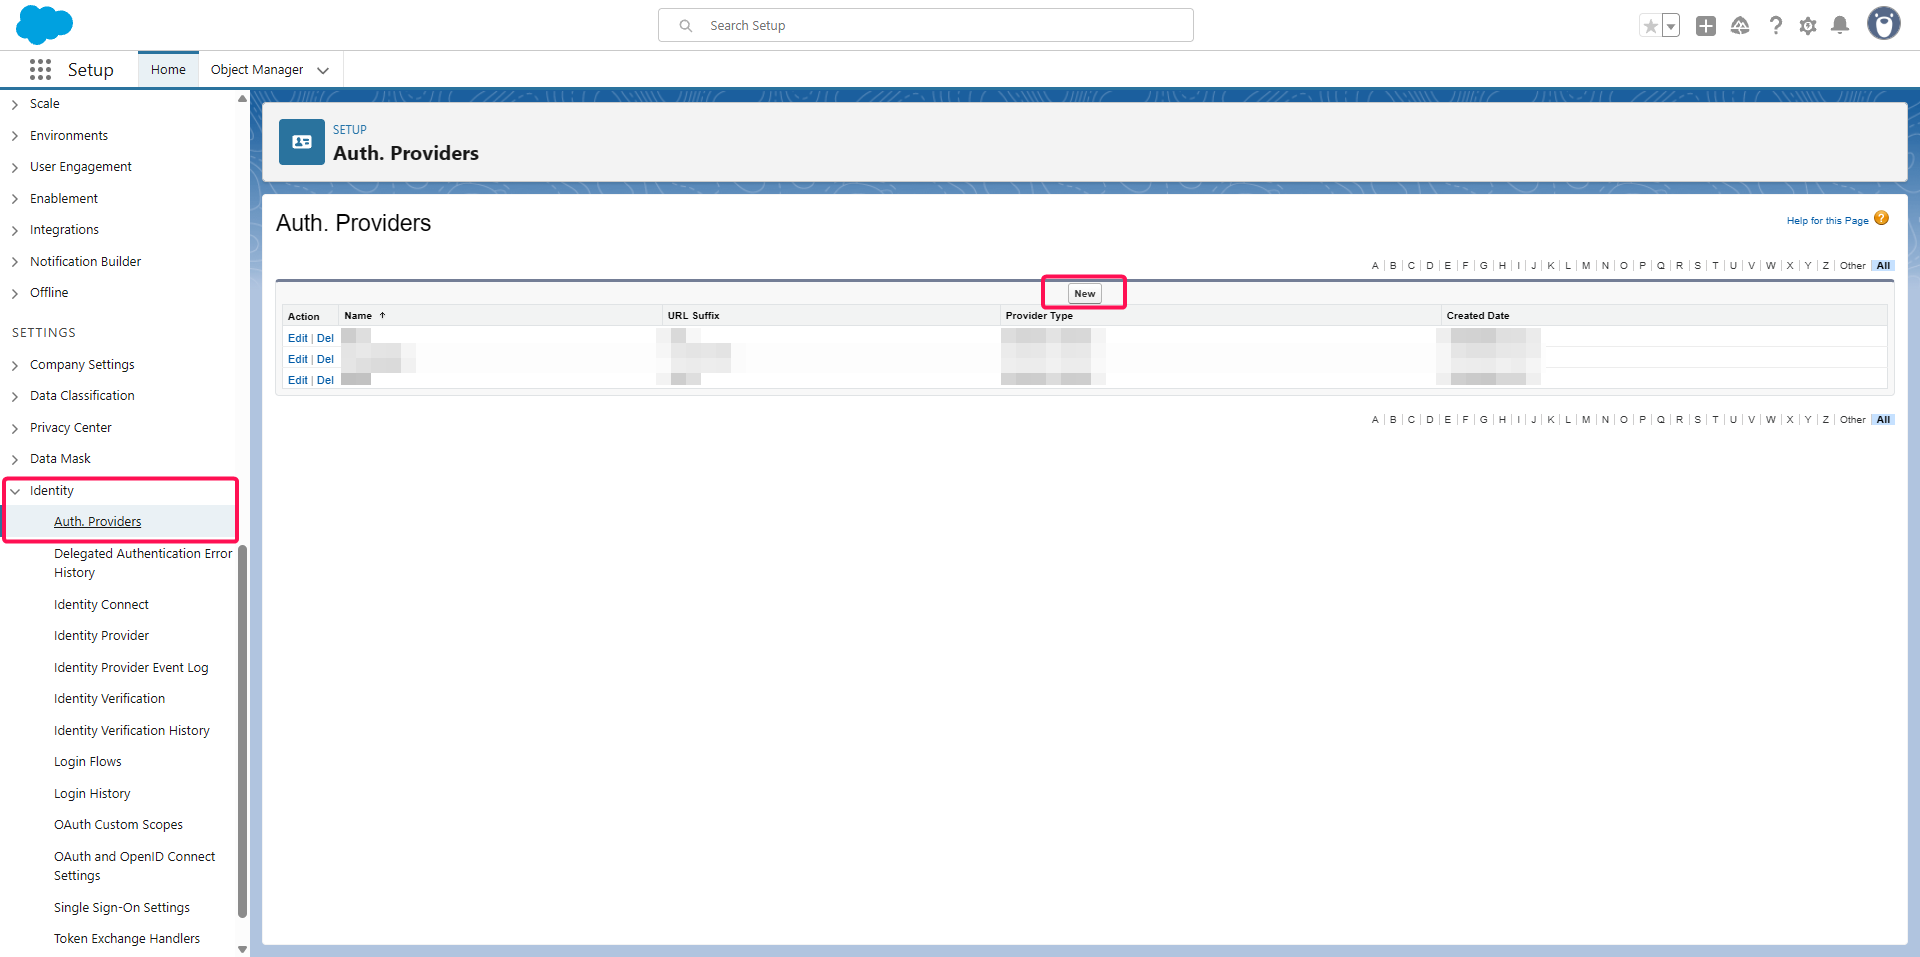
Log in to your Salesforce organization setup console.
Go to Settings > Identity > Auth. Providers.
Click on New.
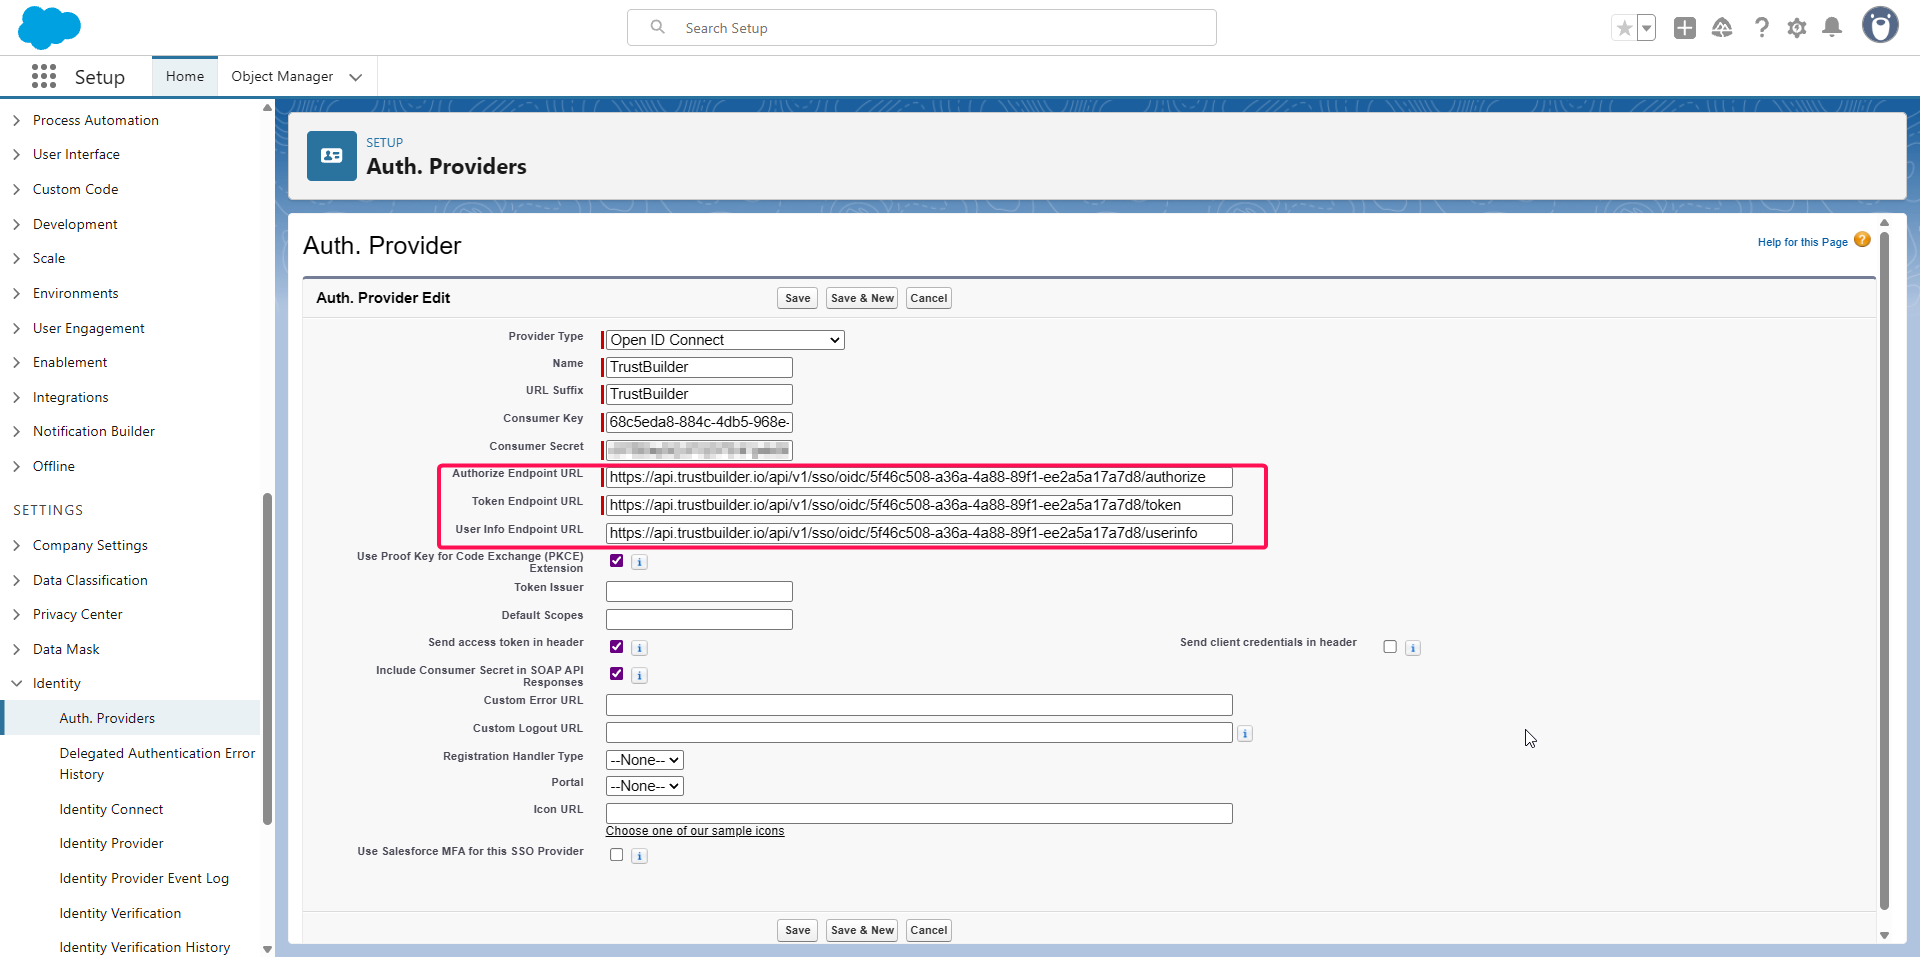
Configure the Auth Provider:
Select OpenID Connect as the provider type.
Enter a Name and URL Suffix (used by Salesforce to identify this “auth provider”).
Paste the saved Client ID (copied from Trustbuilder) as Consumer Key.
Paste the Client Secret (copied from Trustbuilder) as Consumer Secret.
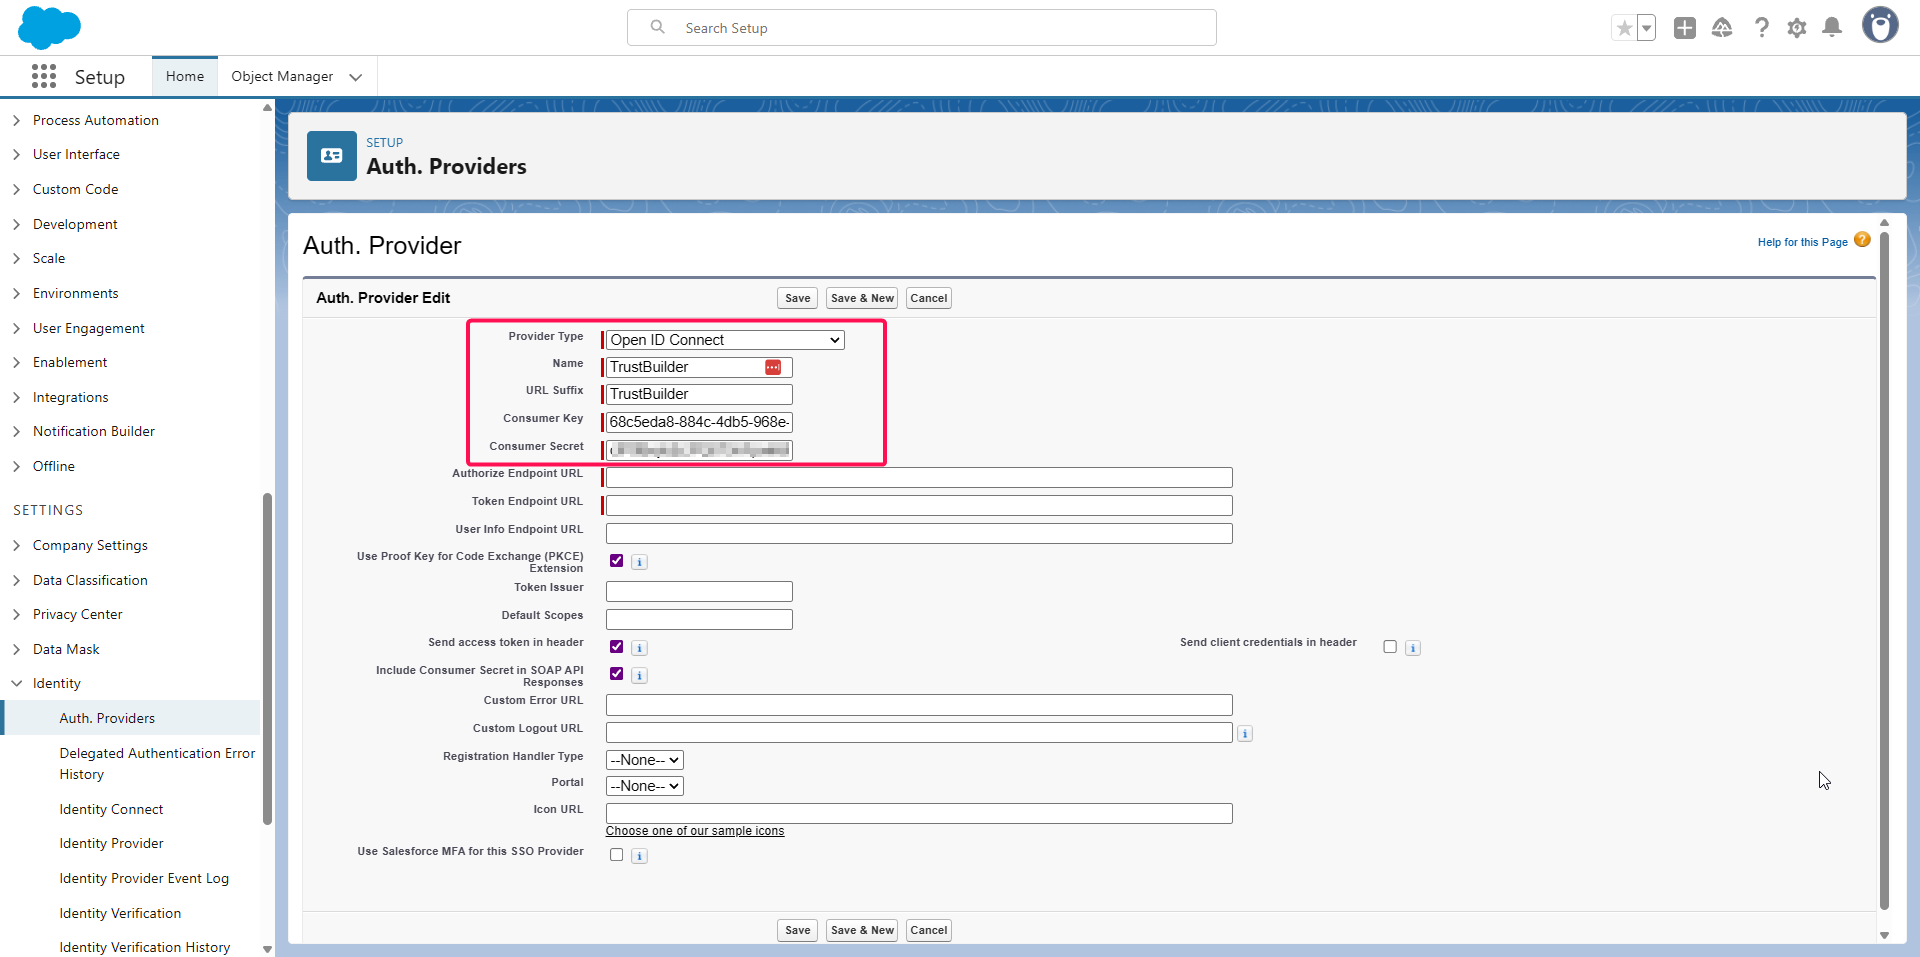
Copy the following URLs from Trustbuilder (in your Salesforce application, in the Endpoints tab) and paste them into Salesforce:
copy the
OAuth Authorizationendpoint and paste it in Authorize Endpoint URL in Salesforce.copy the
OAuth Tokenendpoint and paste it in Token Endpoint URL in Salesforce.copy the
OIDC User infoendpoint and paste it in User Info Endpoint URL in Salesforce.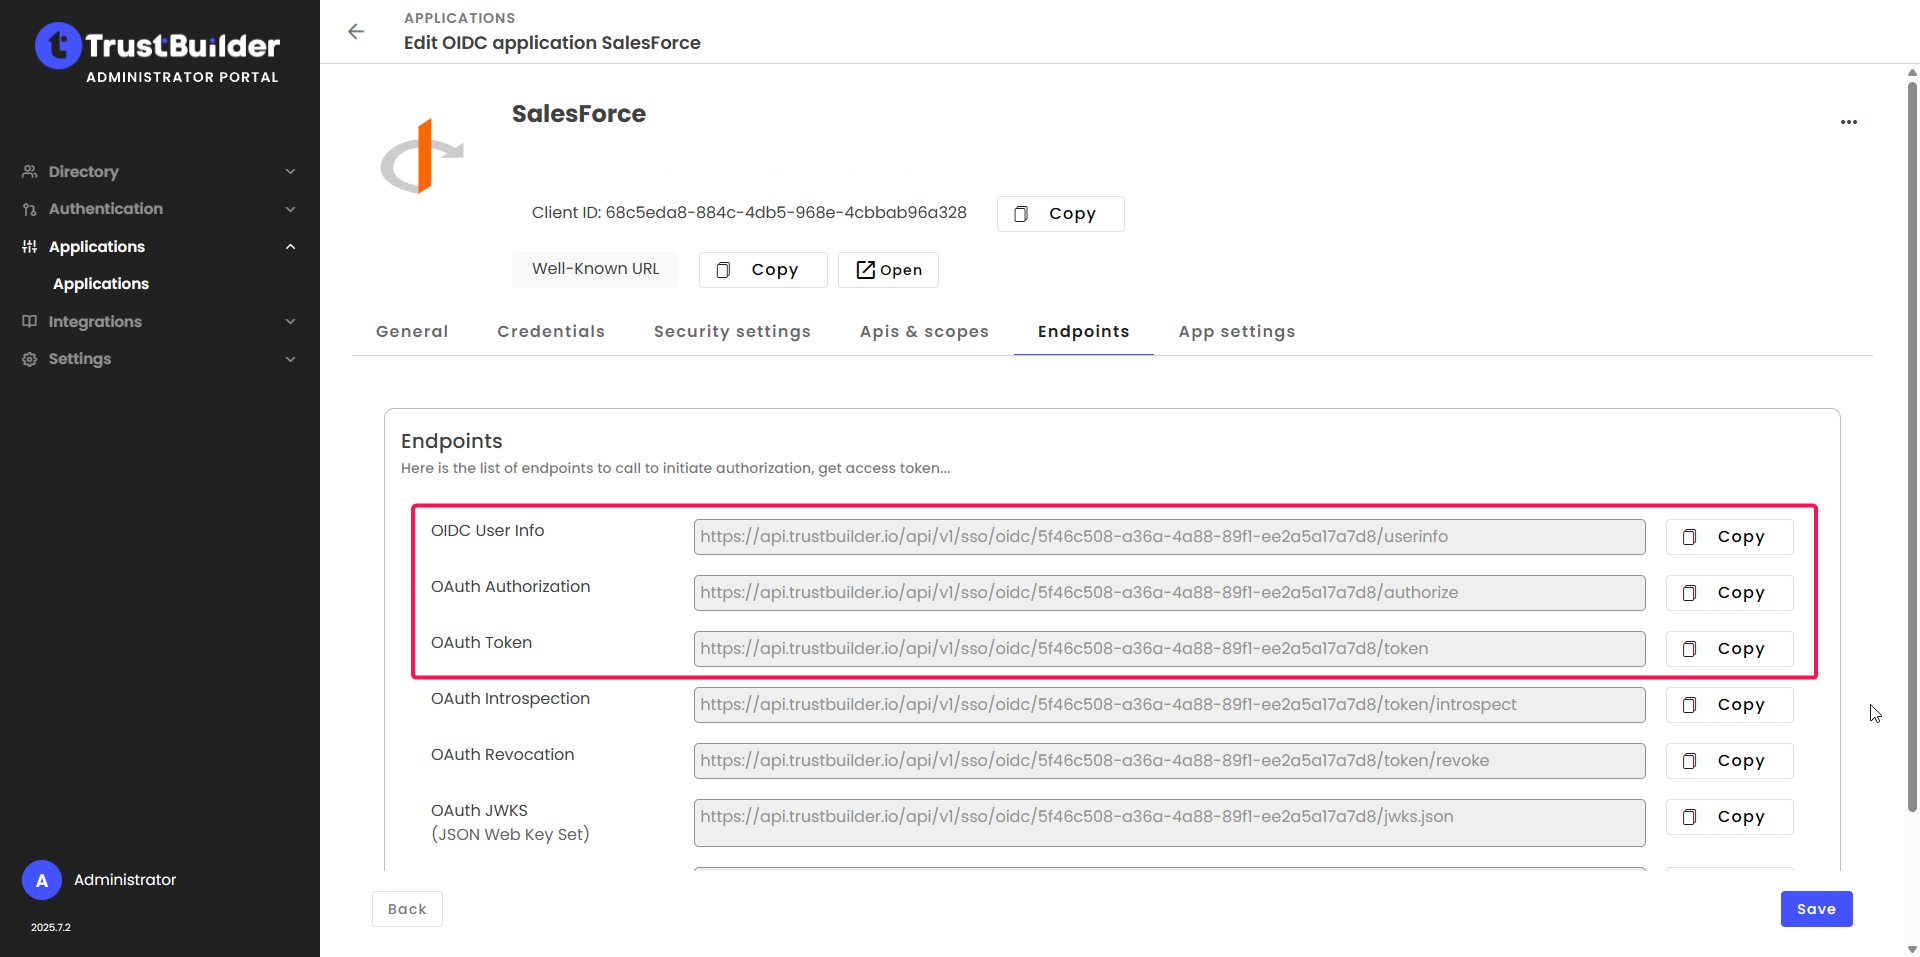
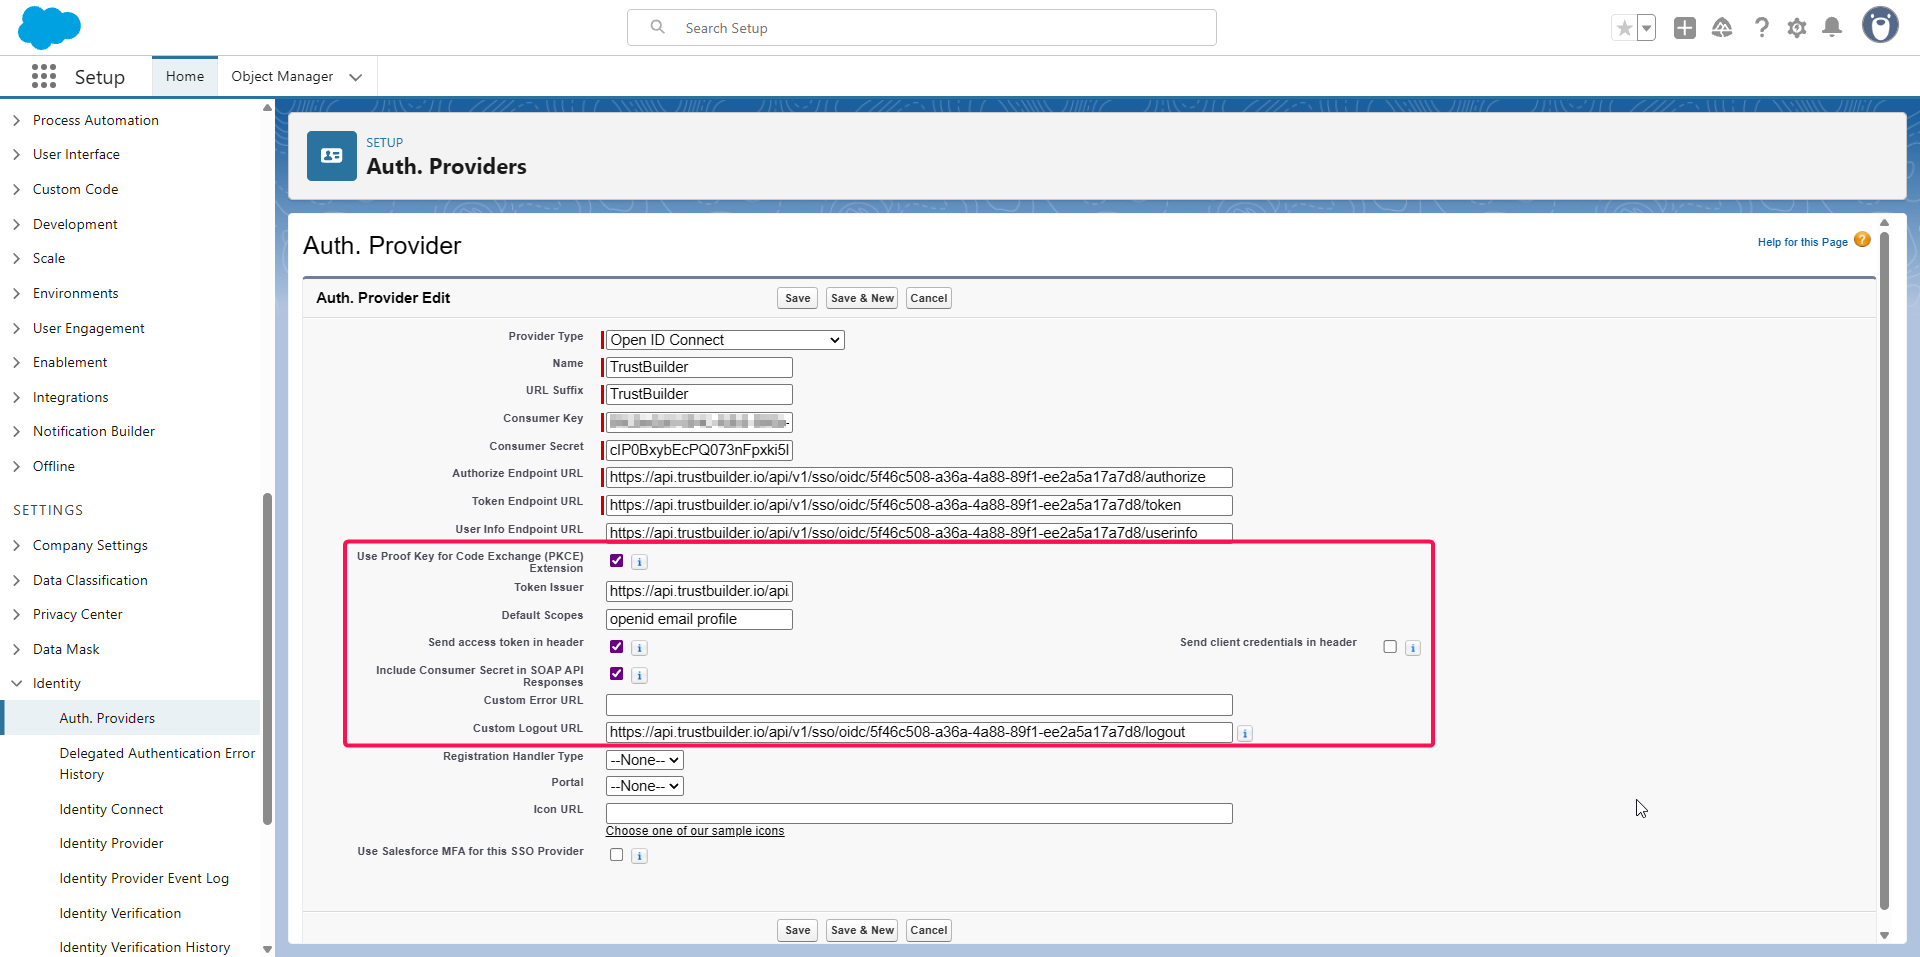
Continue the Auth Provider configuration:
In Token Issuer, enter the Authorize Endpoint URL without
/authorize.In Default Scopes, enter:
openid email profile.In Custom Logout URL, replace
/authorizewith/logoutfrom the Authorize URL.Leave other fields as default.
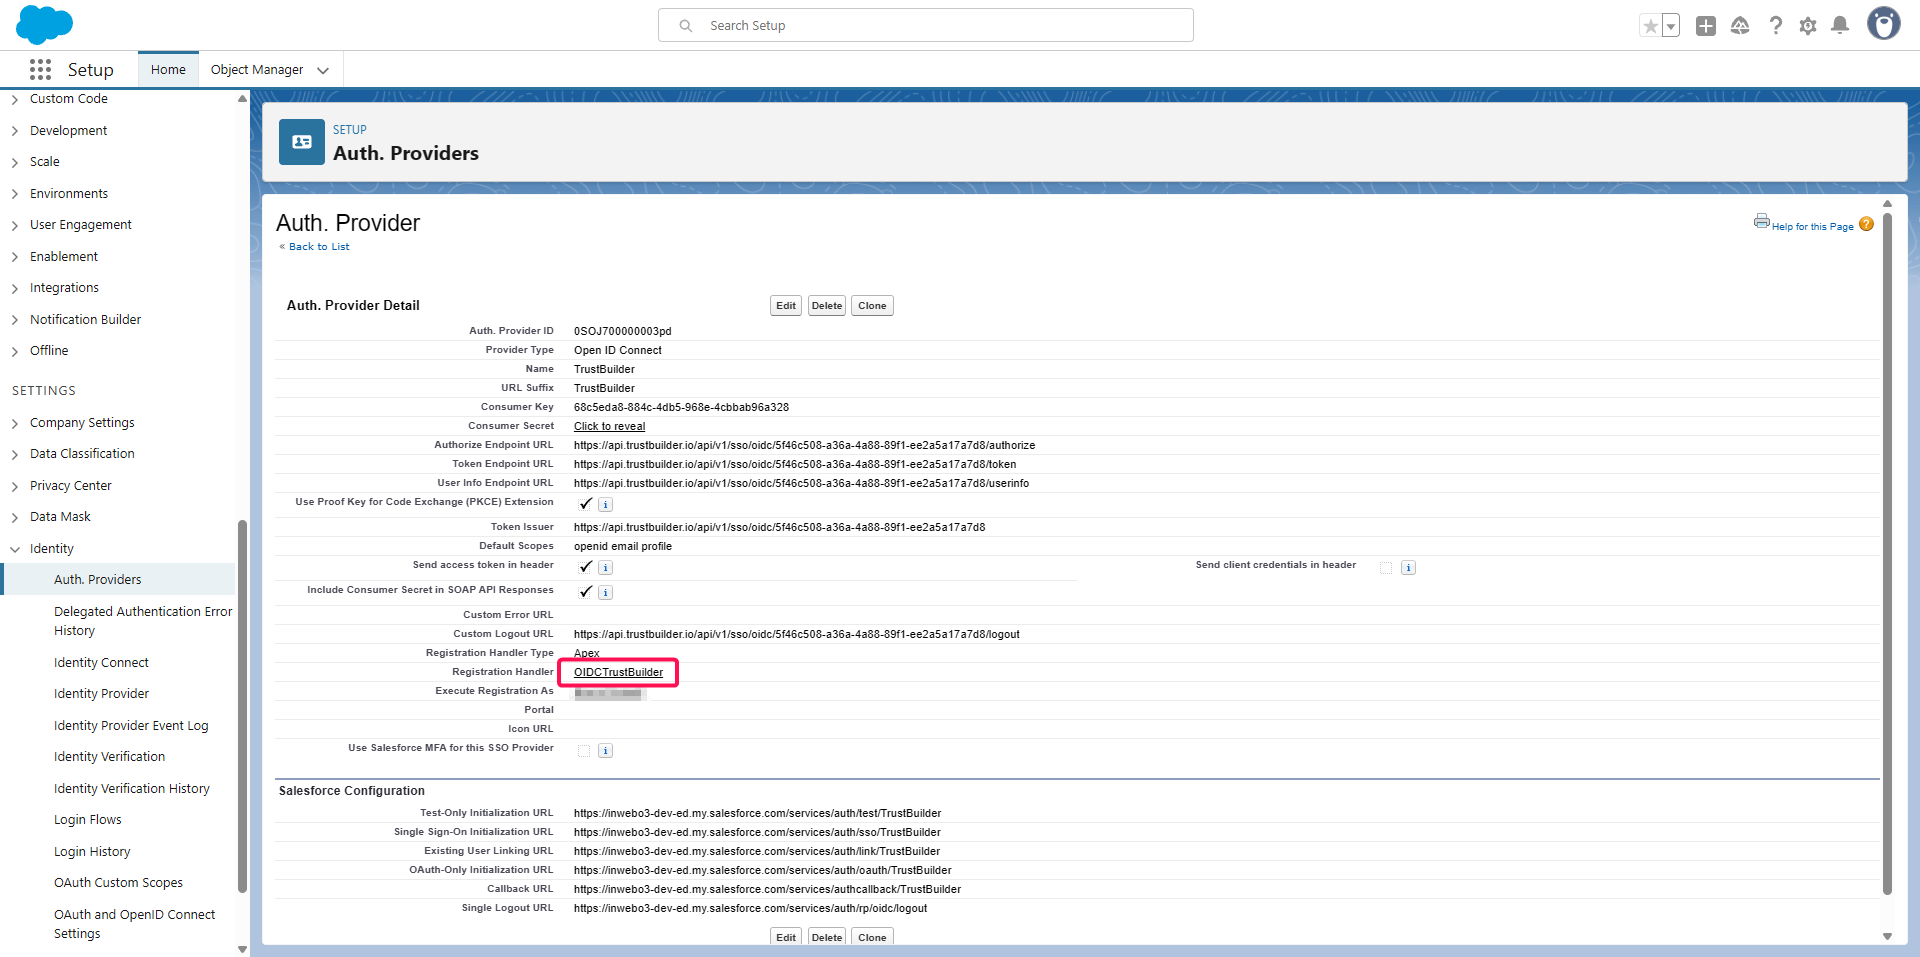
For Registration Handler Type:
select Apex.
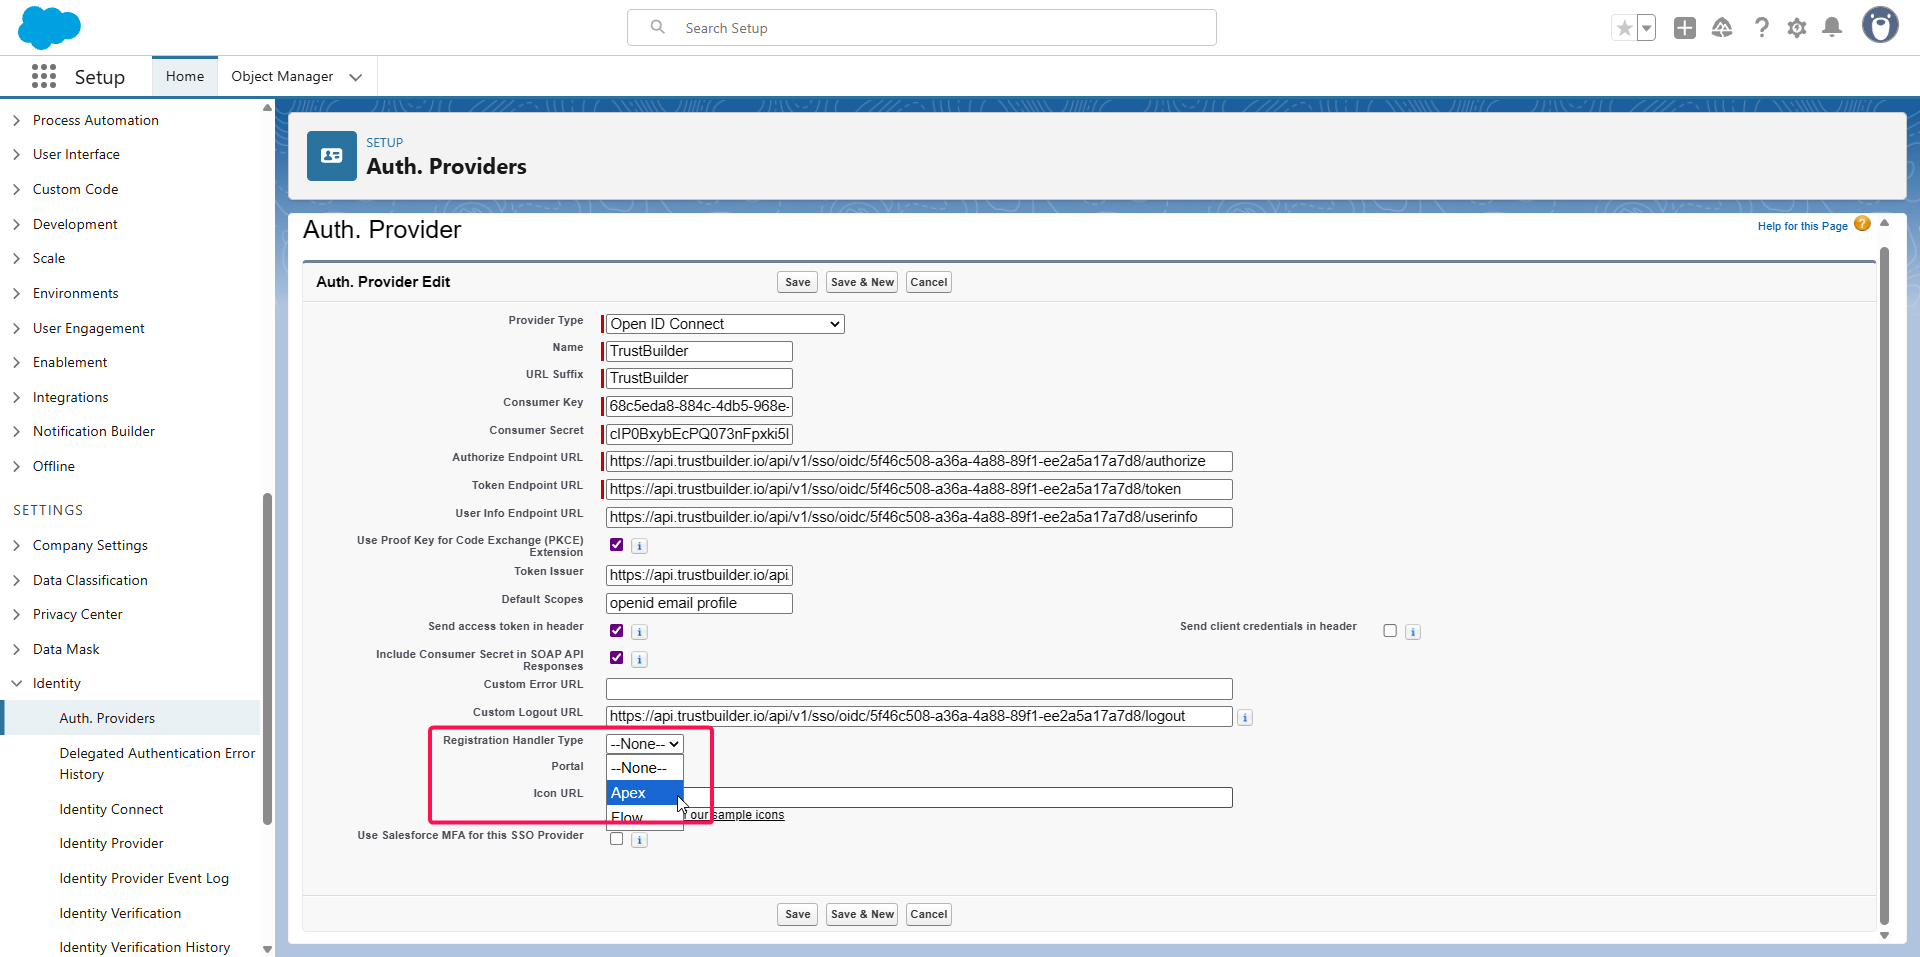
click Automatically create a registration handler template.
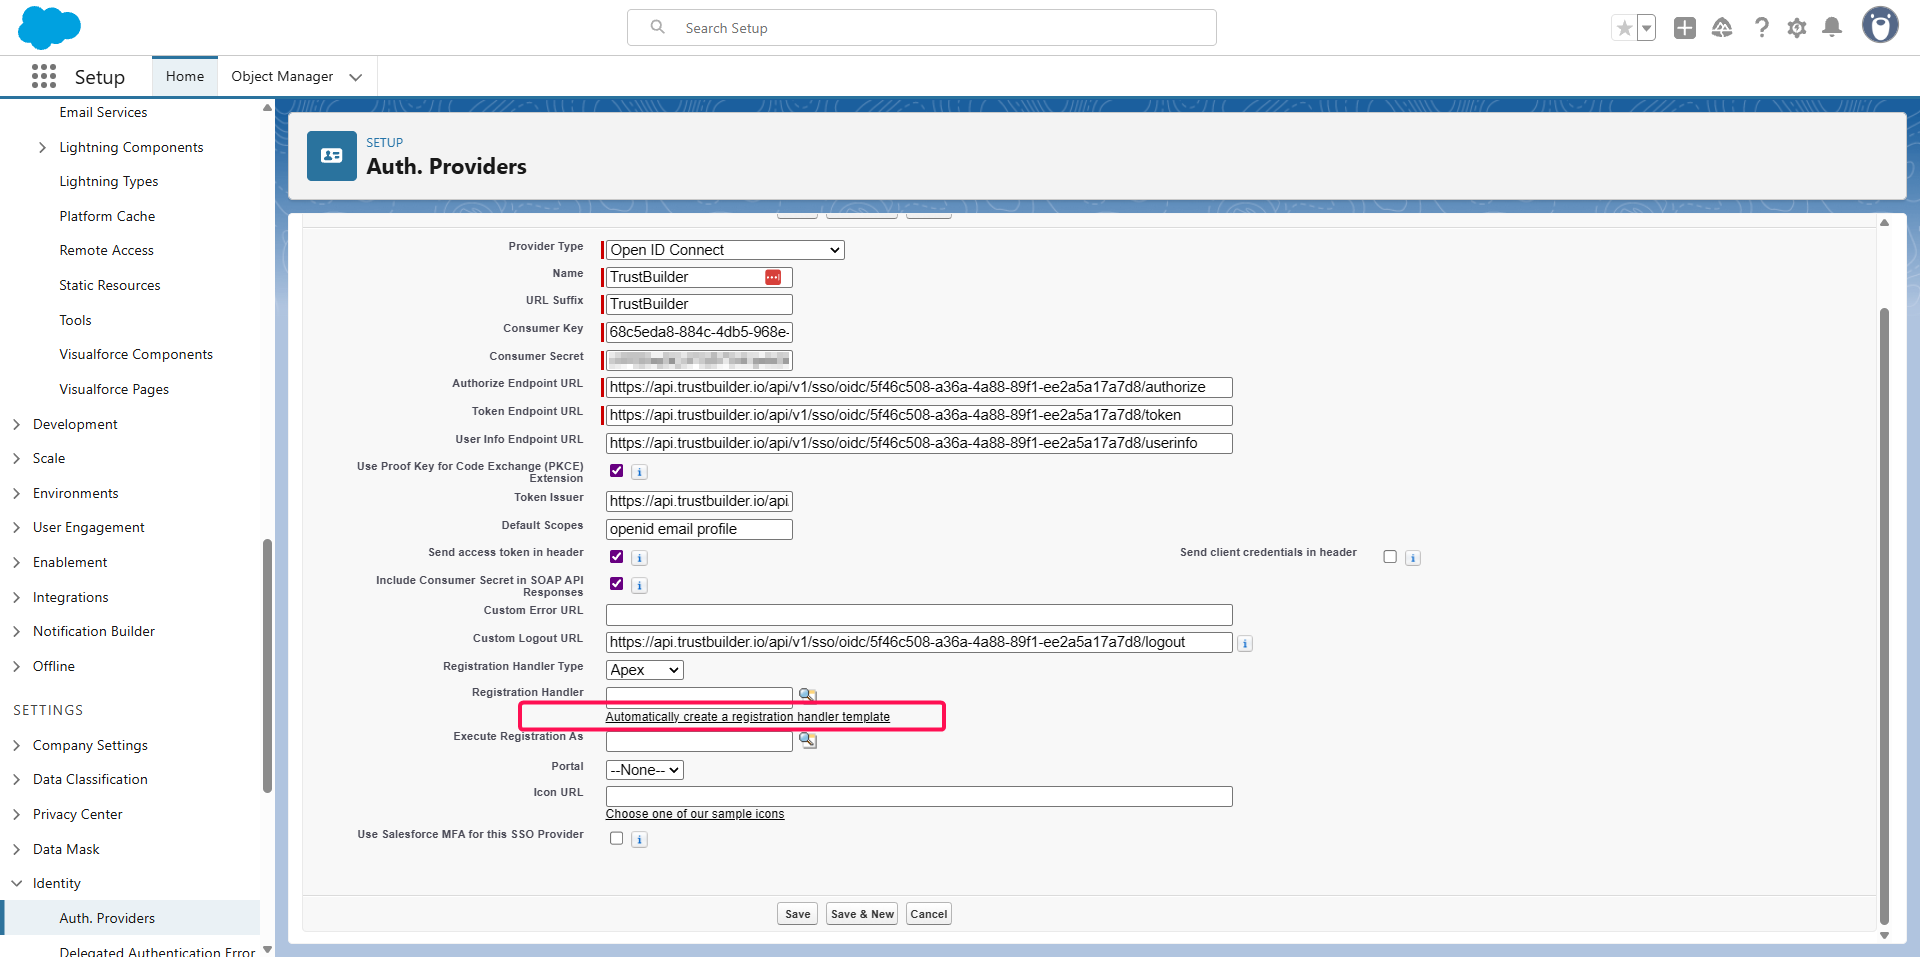
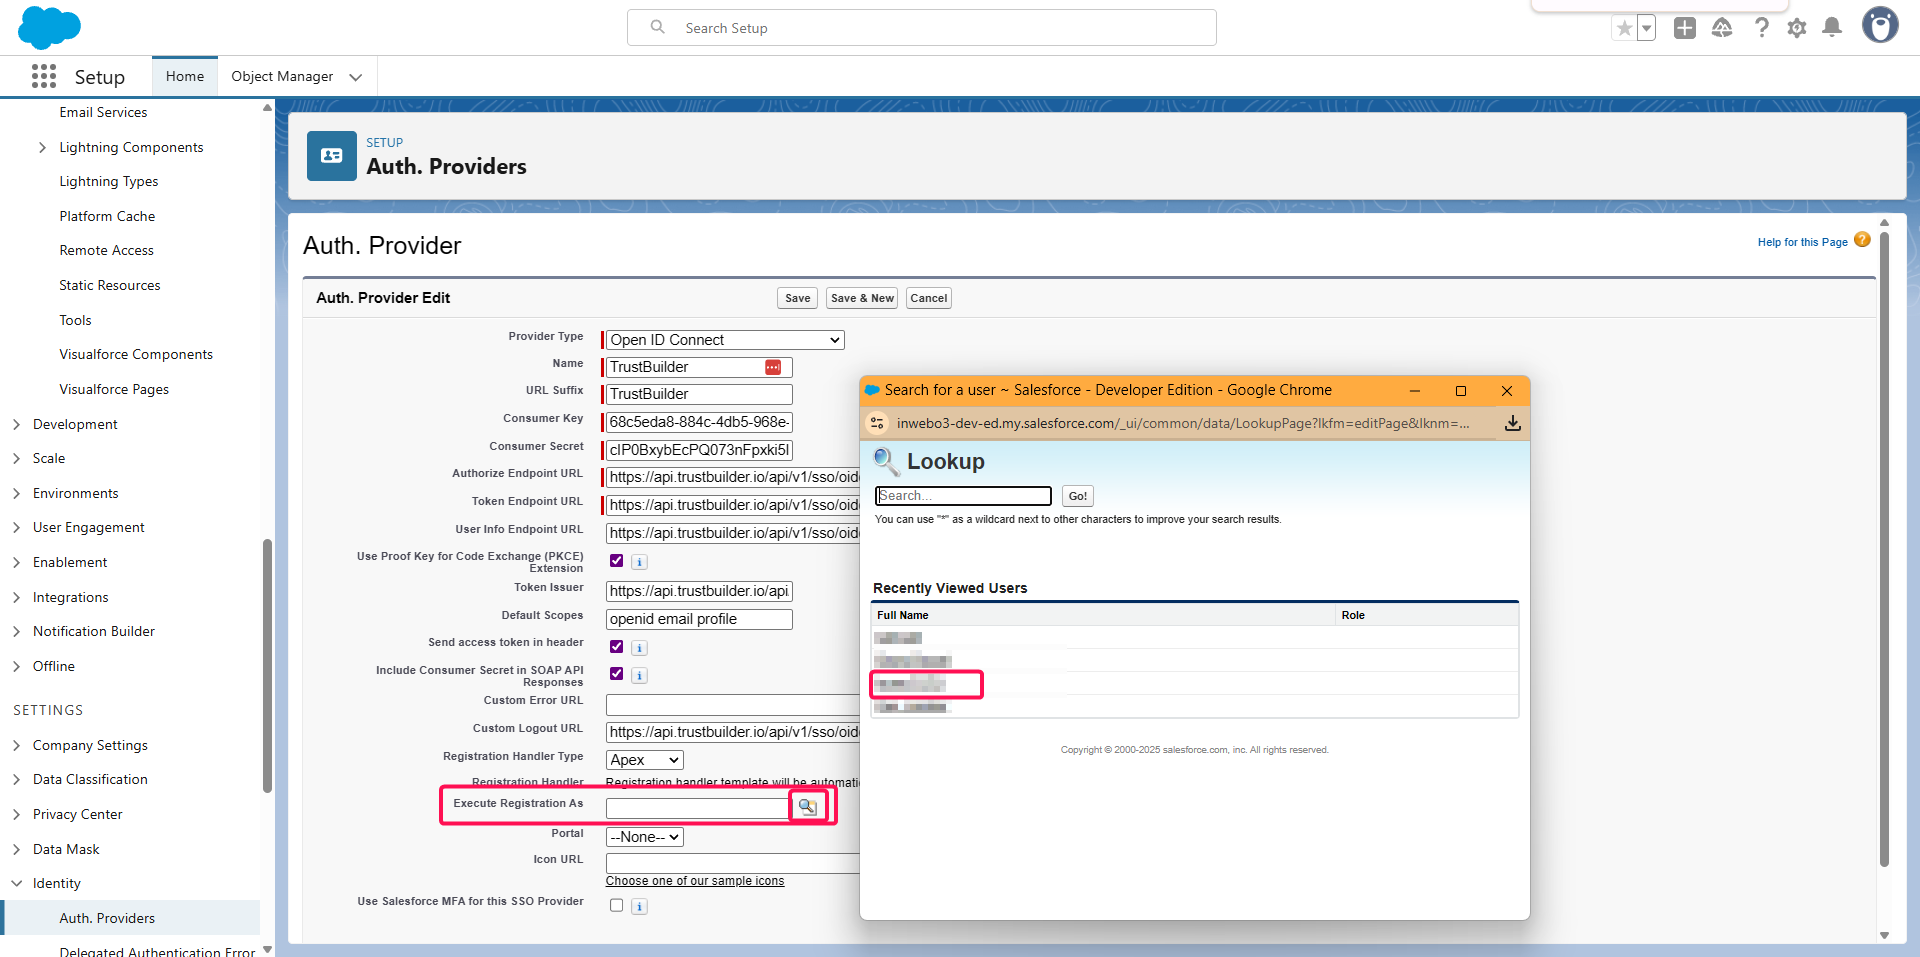
In Execute Registration As, click on Find and select a user with administration rights.
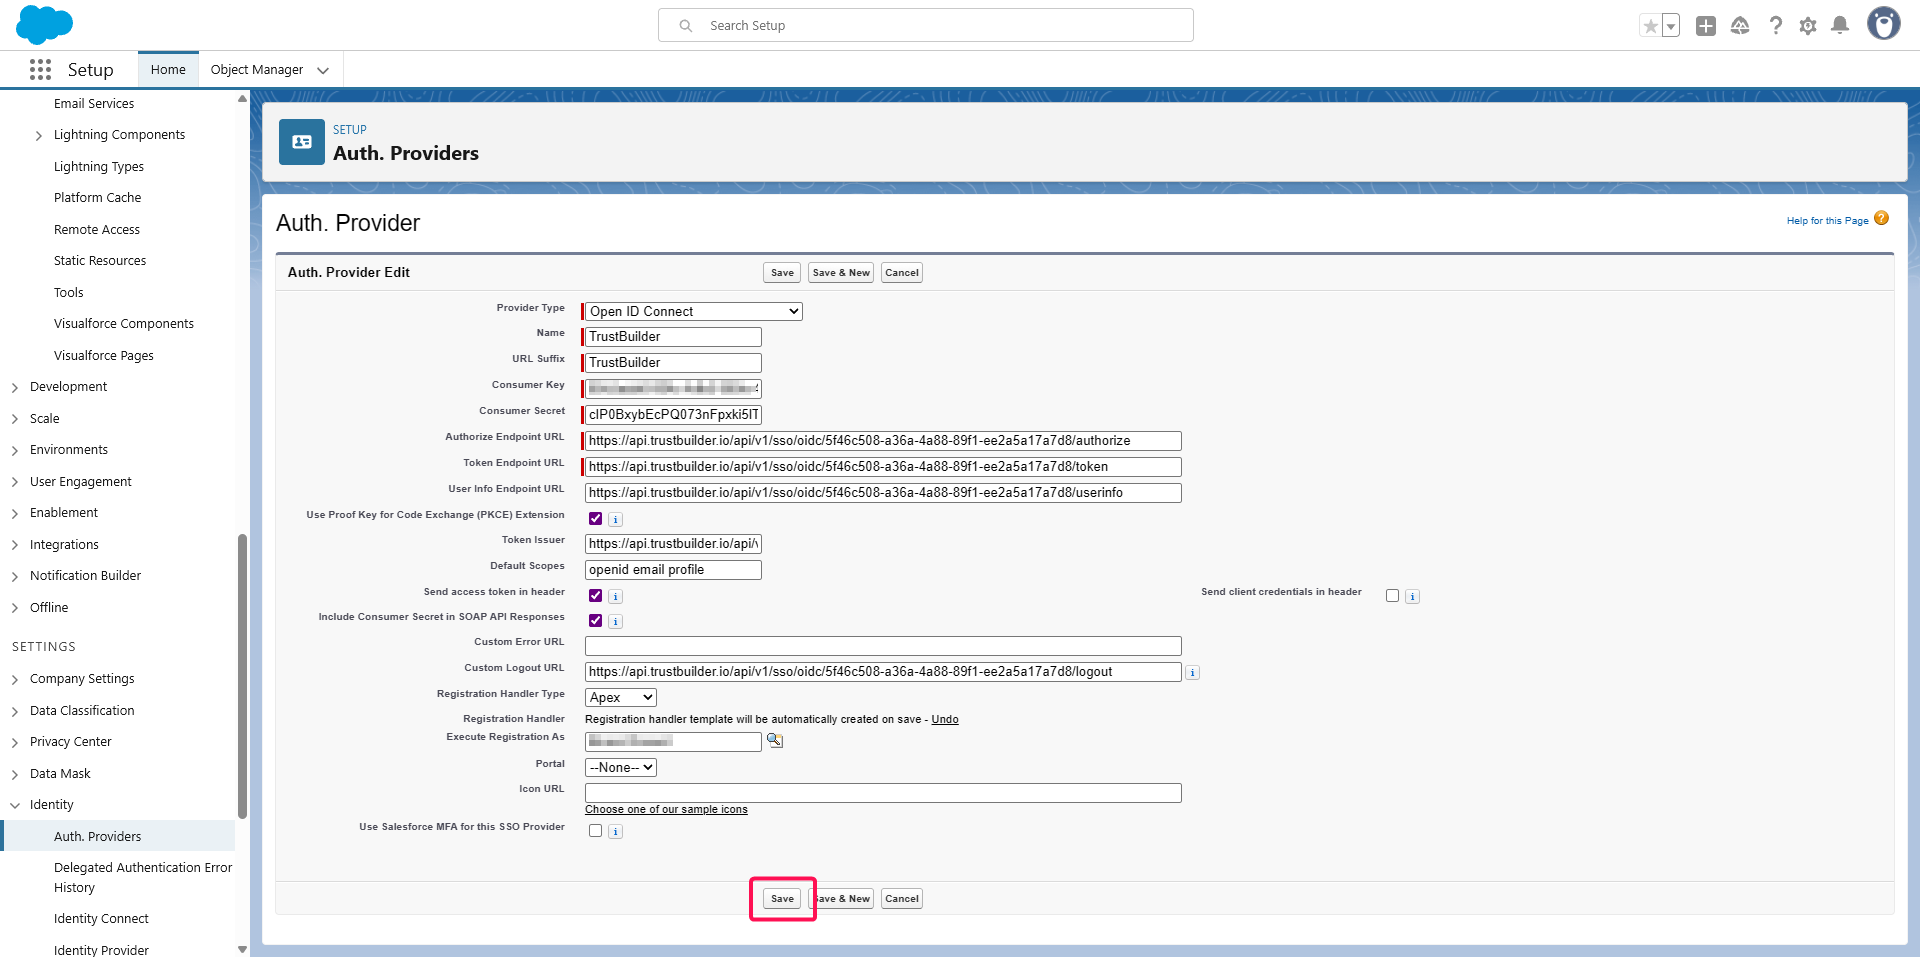
Click Save.
Change the default created APEX script:
Click on the Registration Handler link (e.g.,
AutocreatedRegHandlerXXXXXXXX).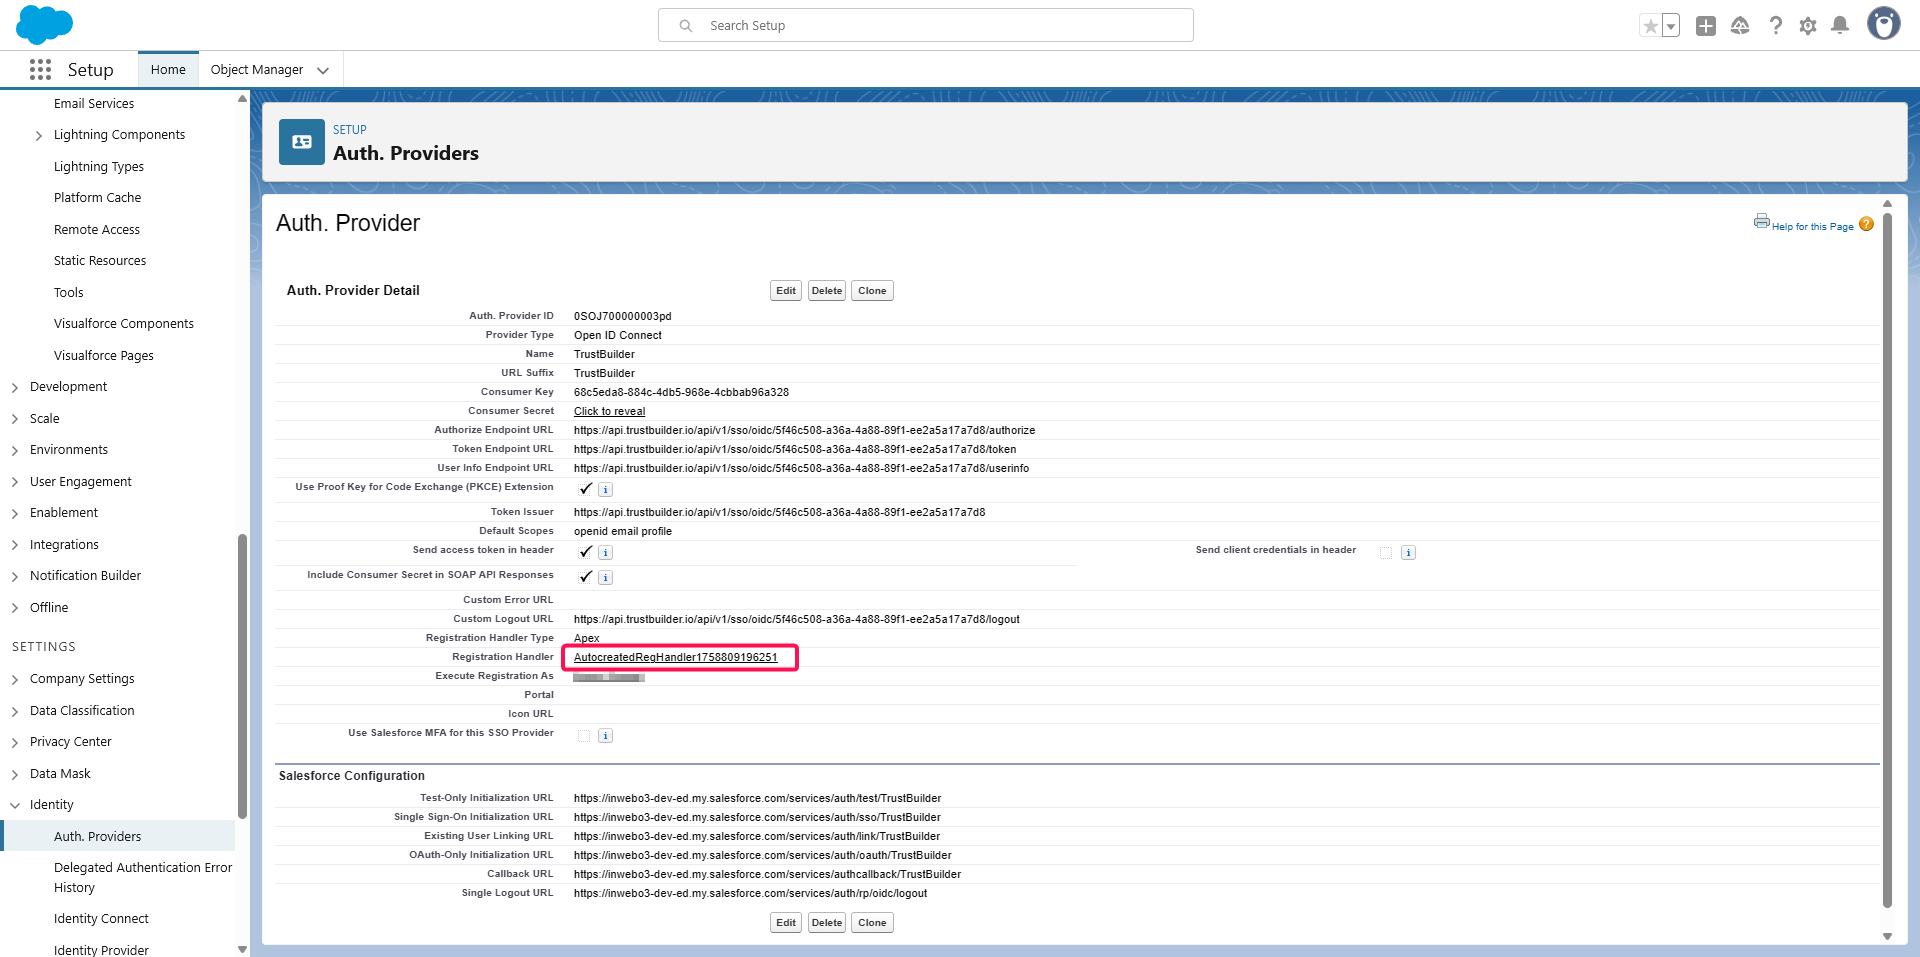
Click on Edit.
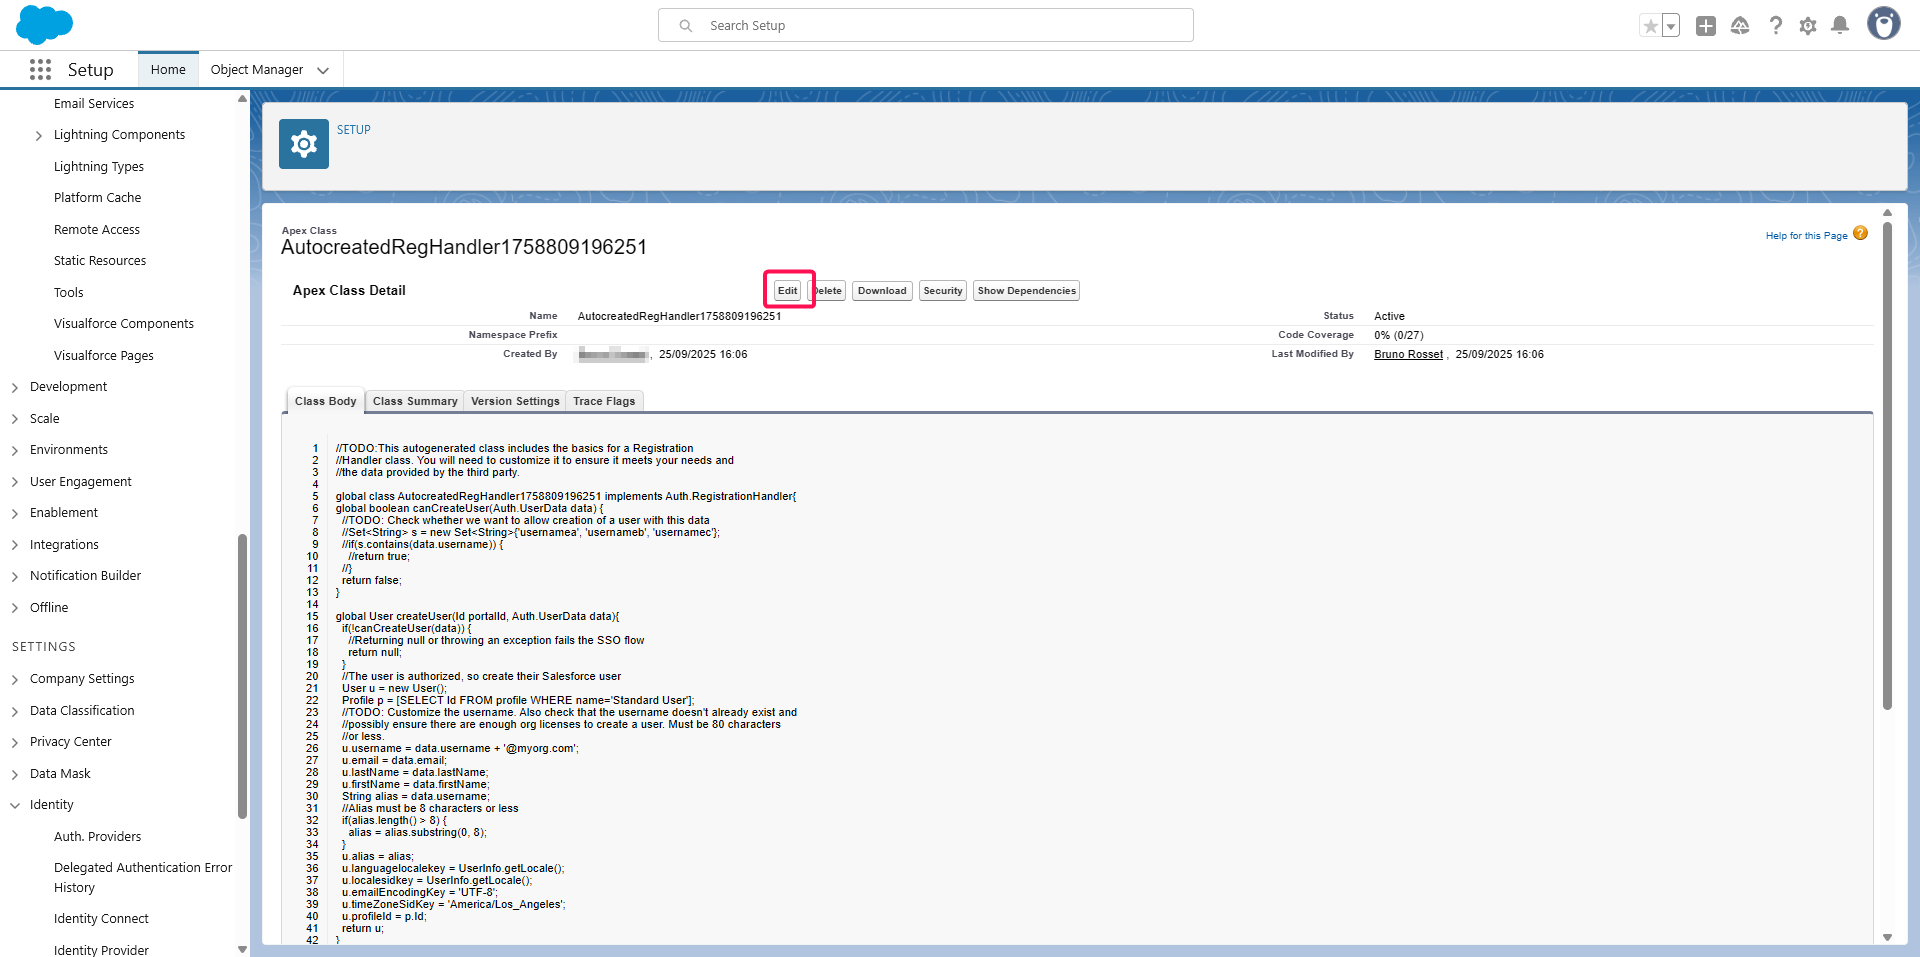
Copy/Paste the content of the provided APEX script (See Prerequisites above).
Then click Save.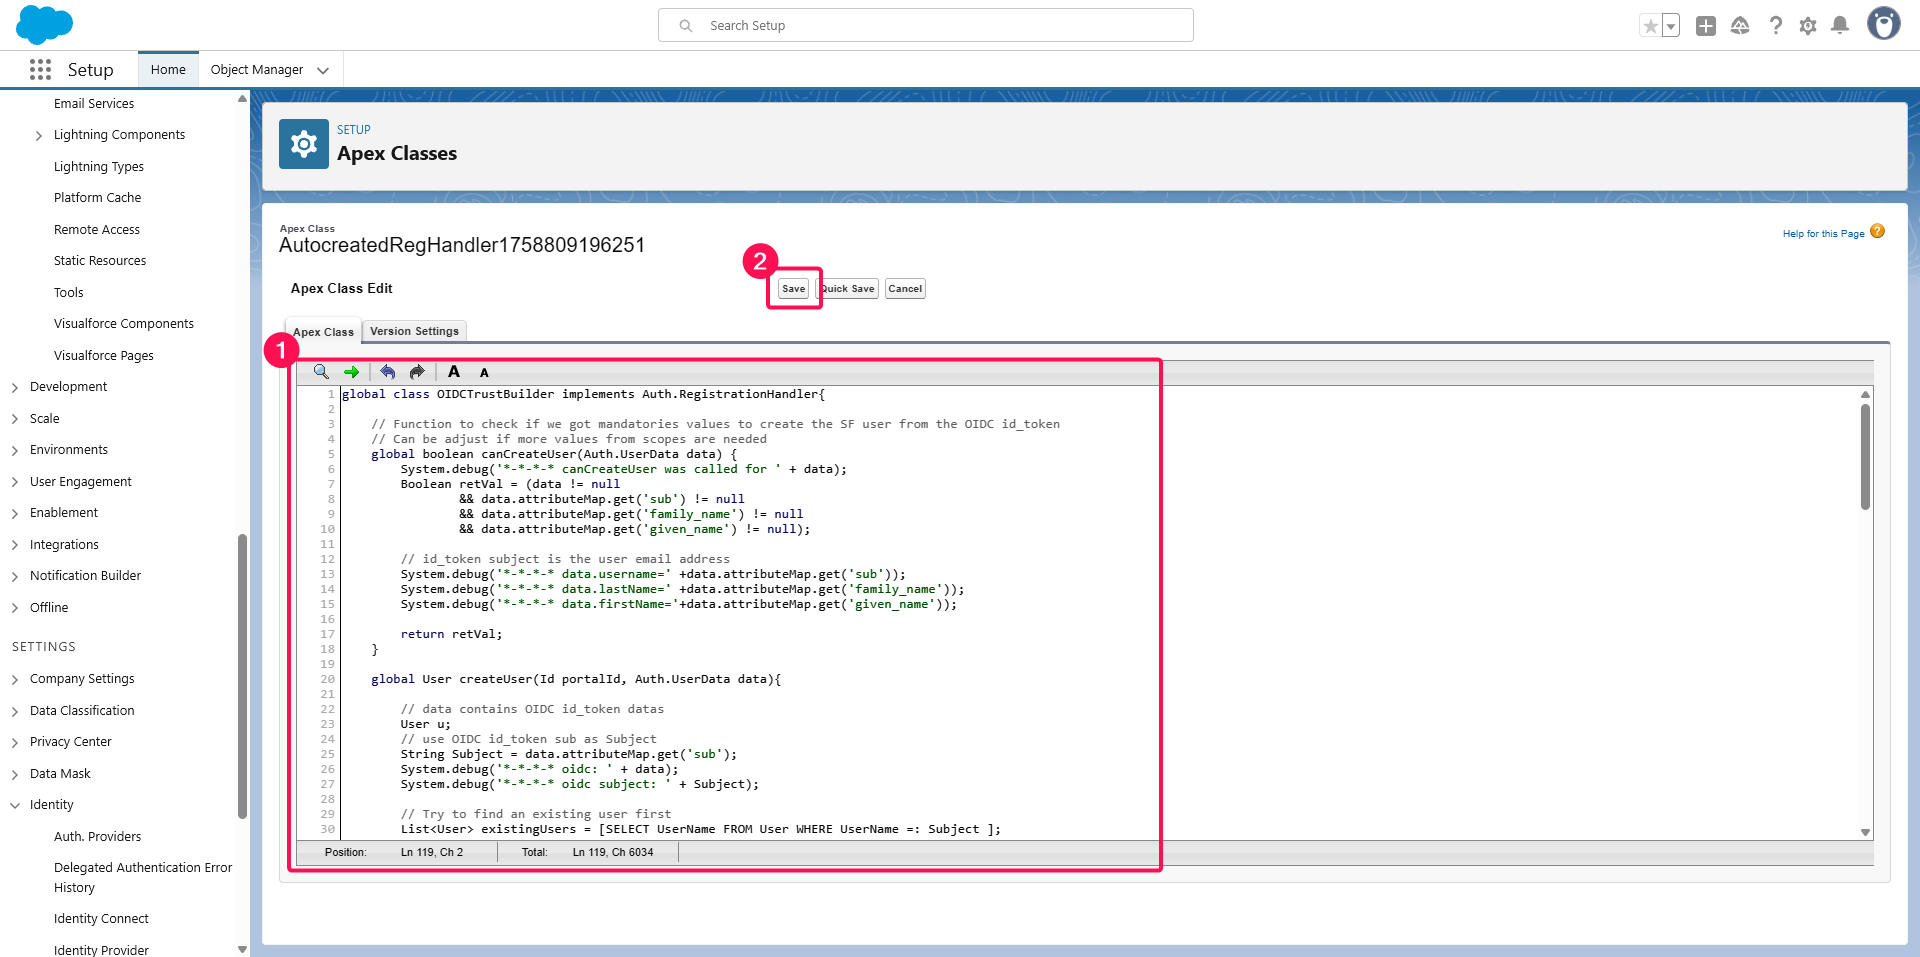
Come back to the Identity > Auth. Providers menu. Click on the newly created one.
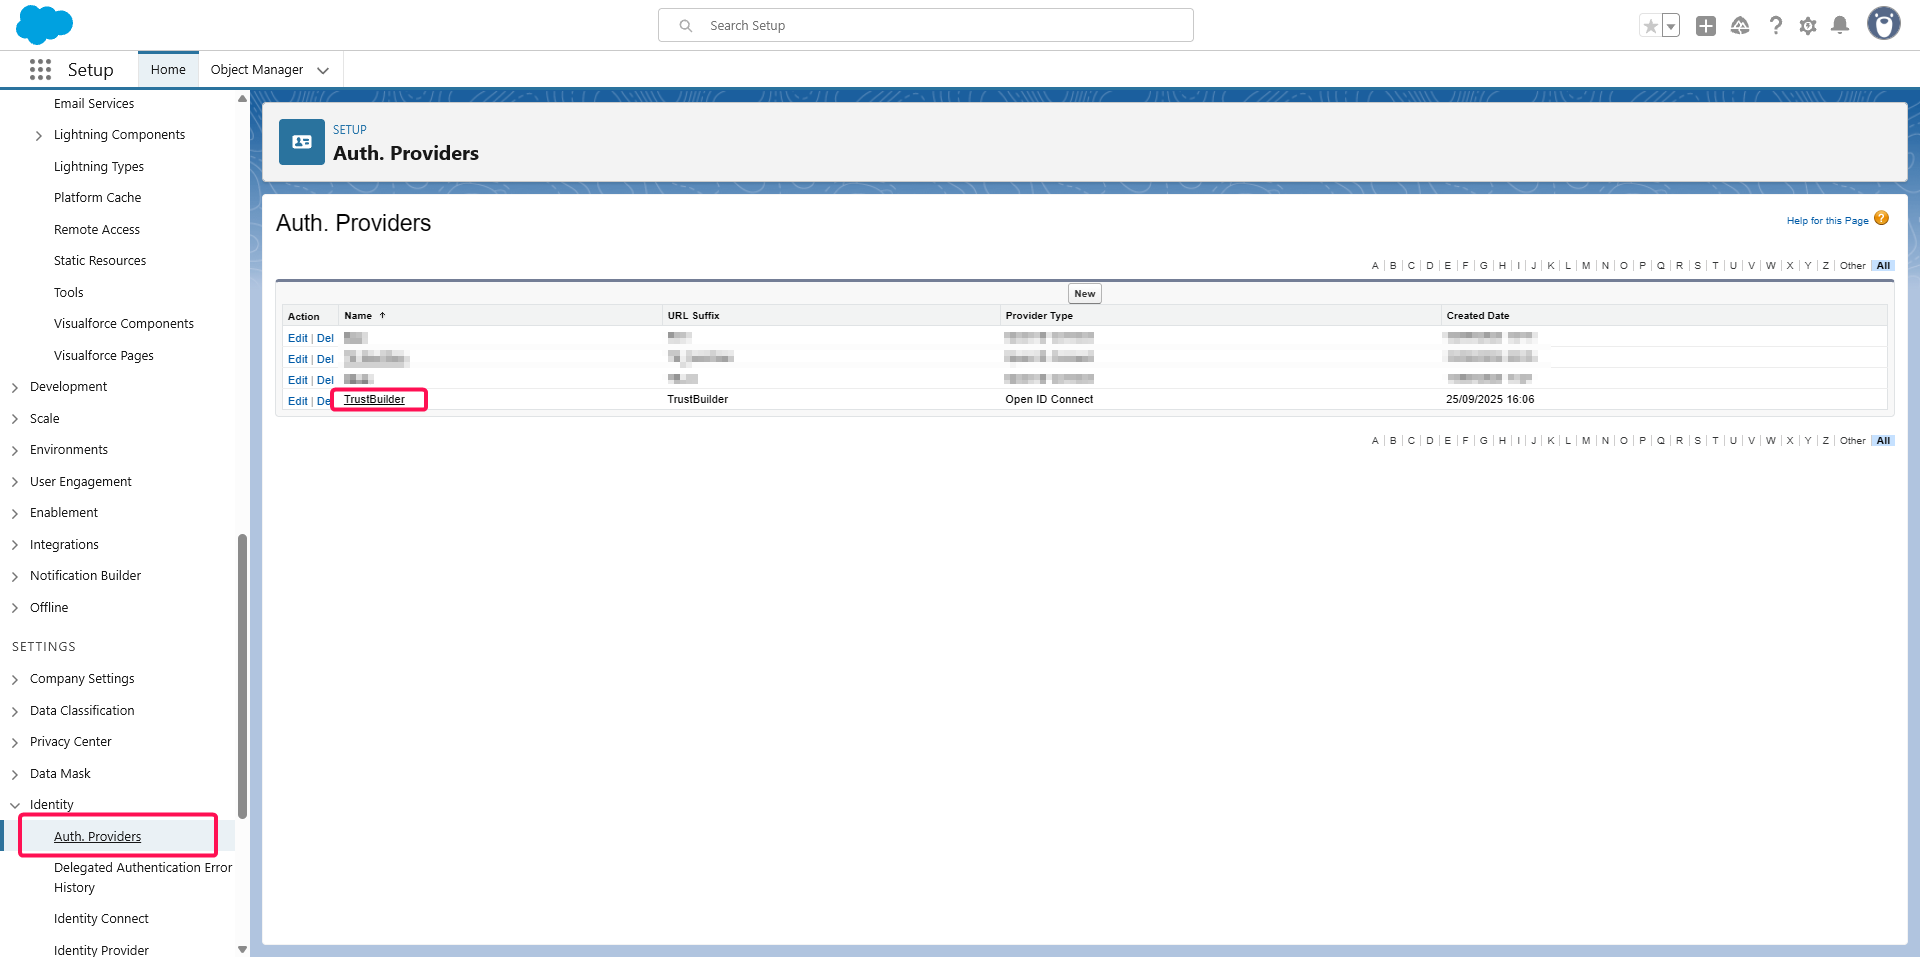
Verify the change of the Registration Handler and copy the Callback URL.
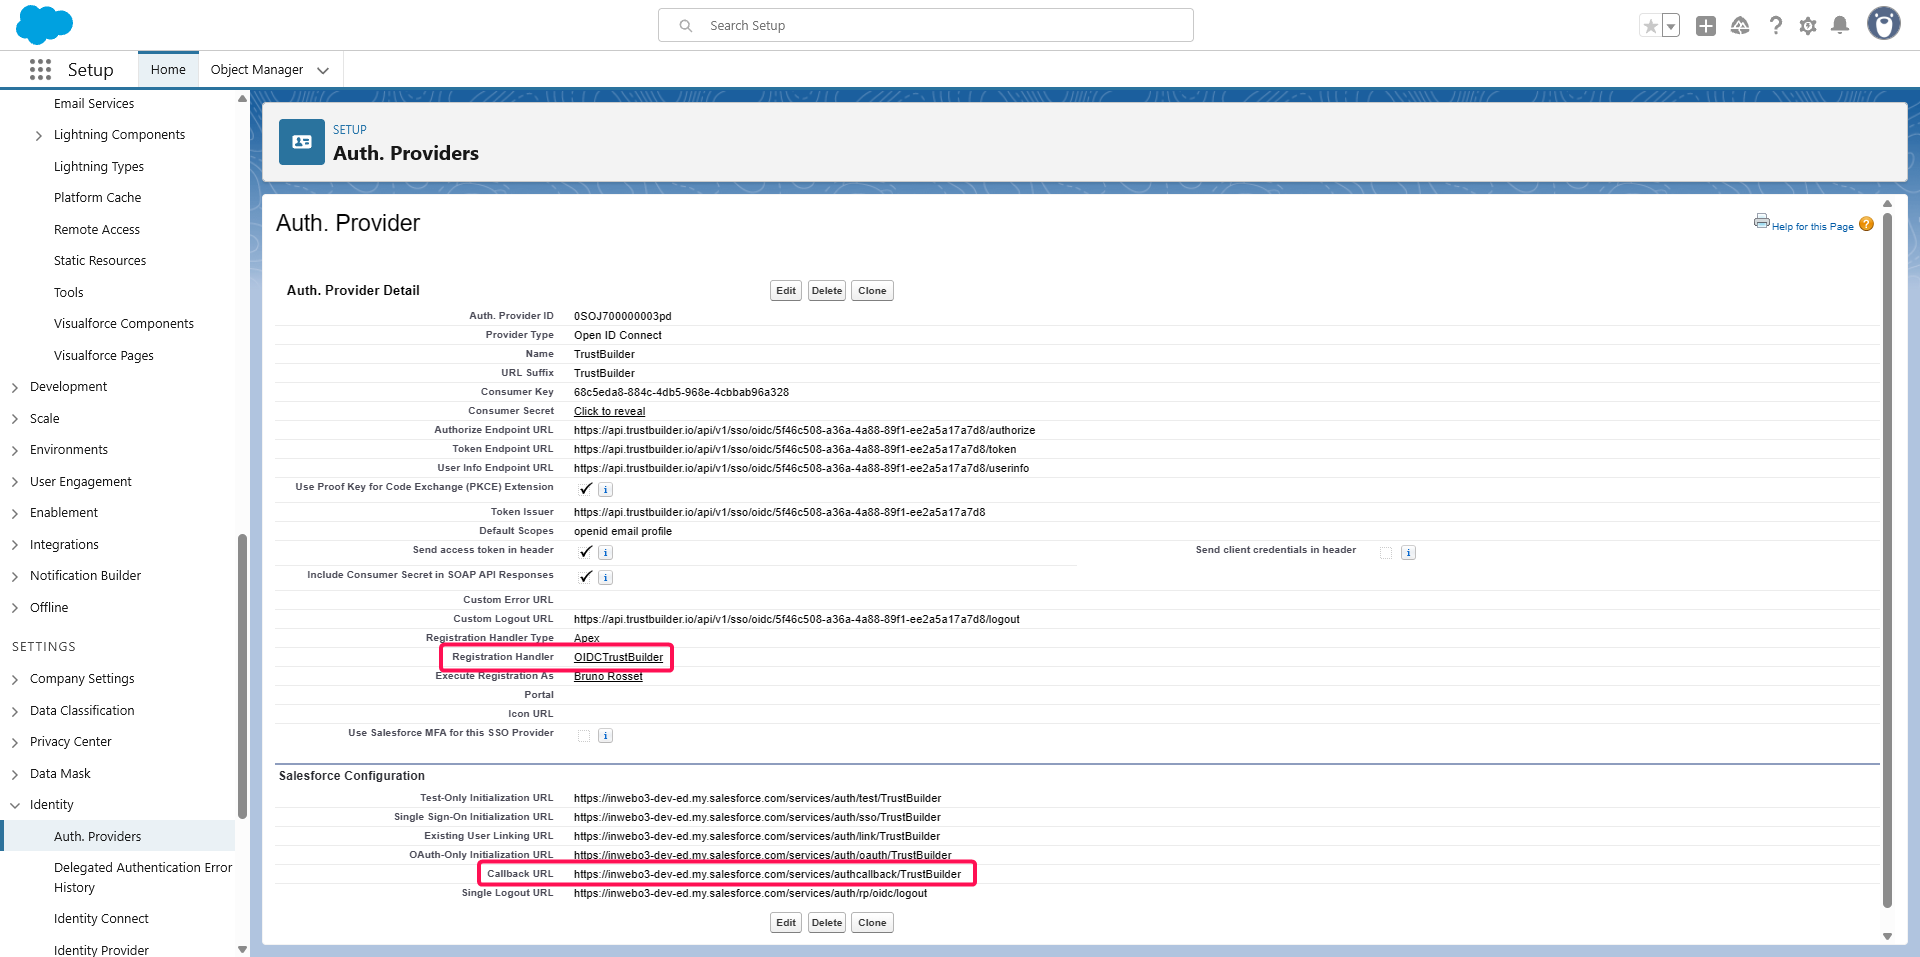
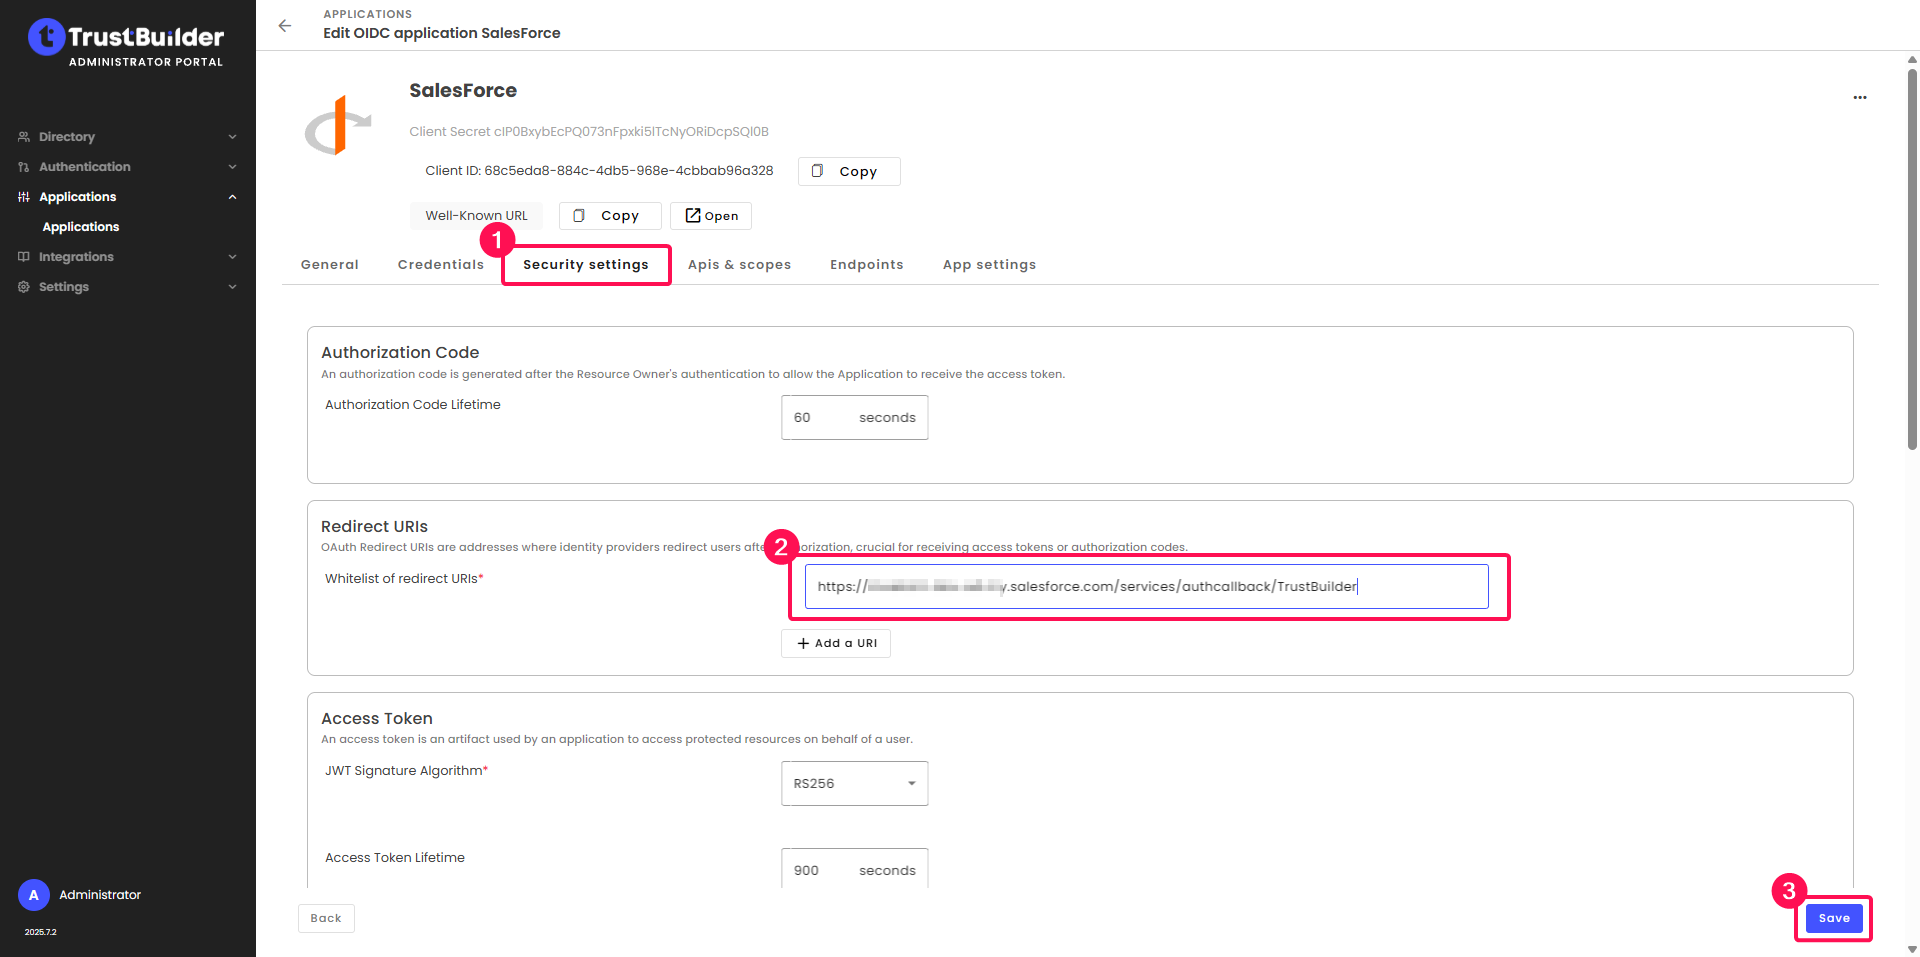
Go back to TrustBuilder administration console > Applications > Applications. Click on the previously created Salesforce application.
In Security settings tab, paste the copied Callback URL in the Whitelist of redirect URLs field. Then click Save.
Now, enable the newly created authentication provider to be available for users to connect:
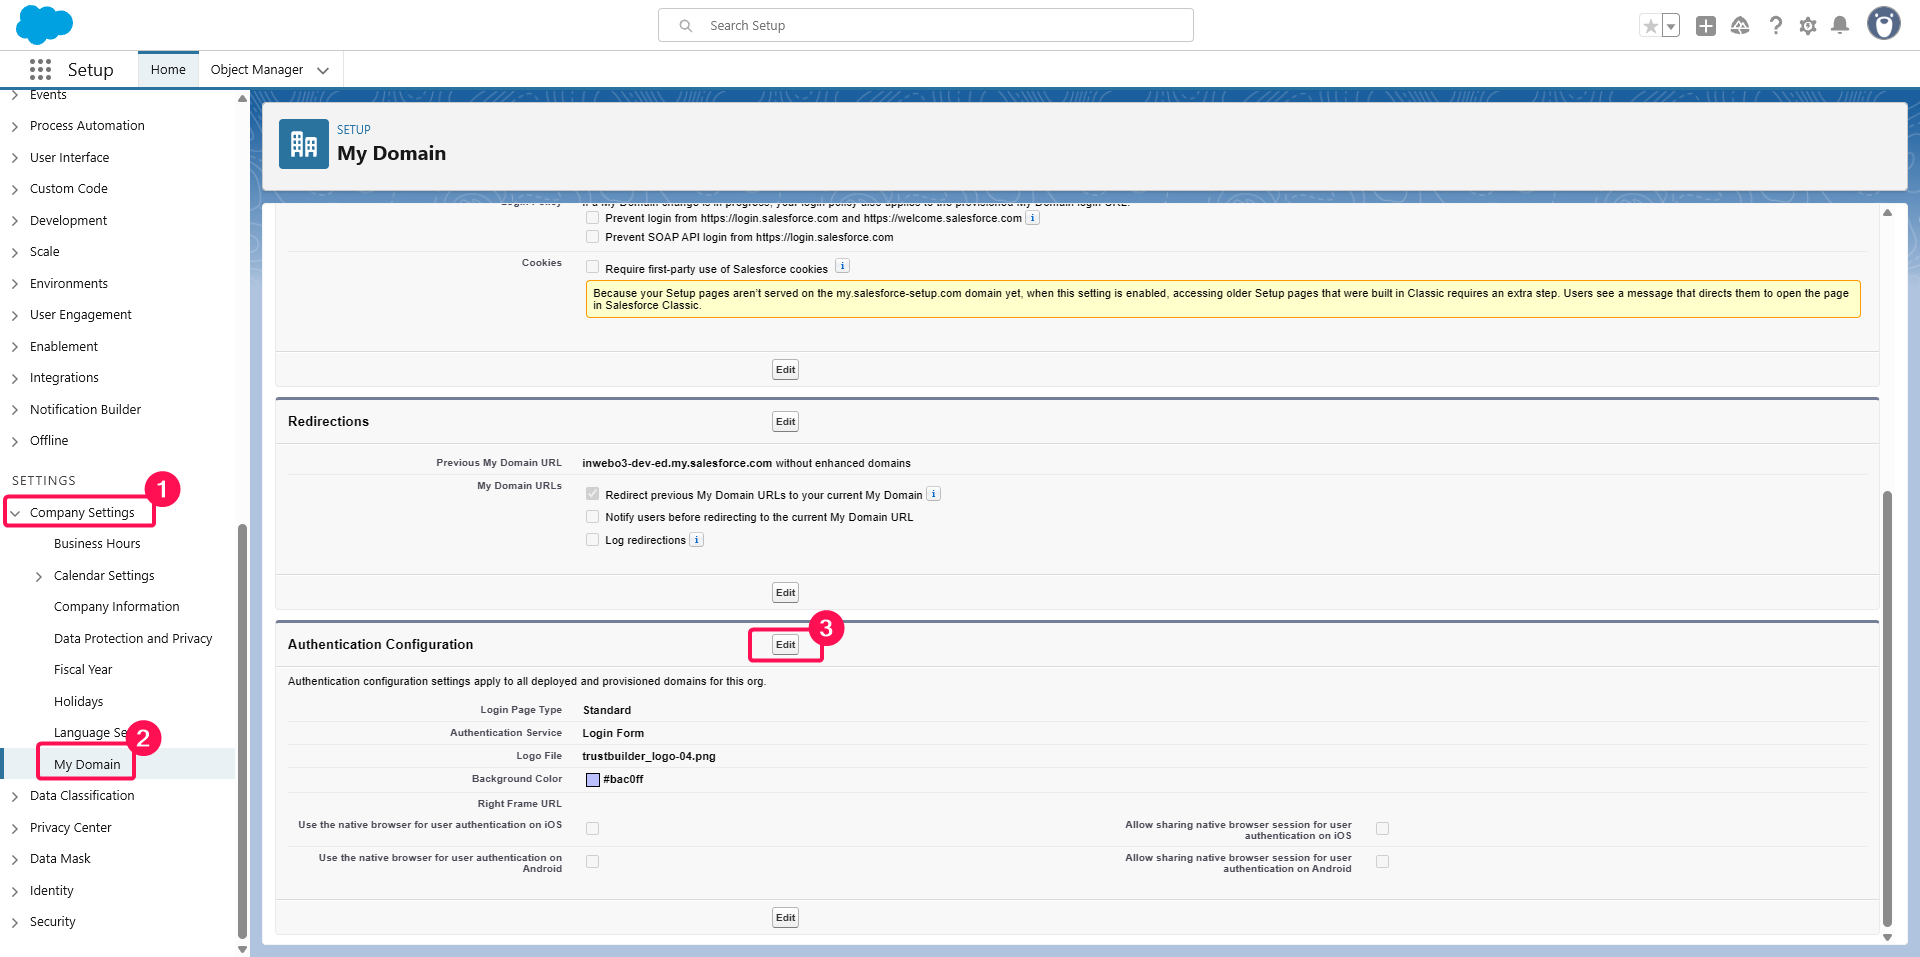
Go back to your Salesforce organization setup console > Settings > Company Settings > My Domain menu. In Authentication Configuration section, click the Edit button.
Check the newly created Authentication Service (here TrustBuilder).
⚠️ Keep Login Form checked for admin access to your Salesforce organization setup until other authentication methods are valid for administrator access.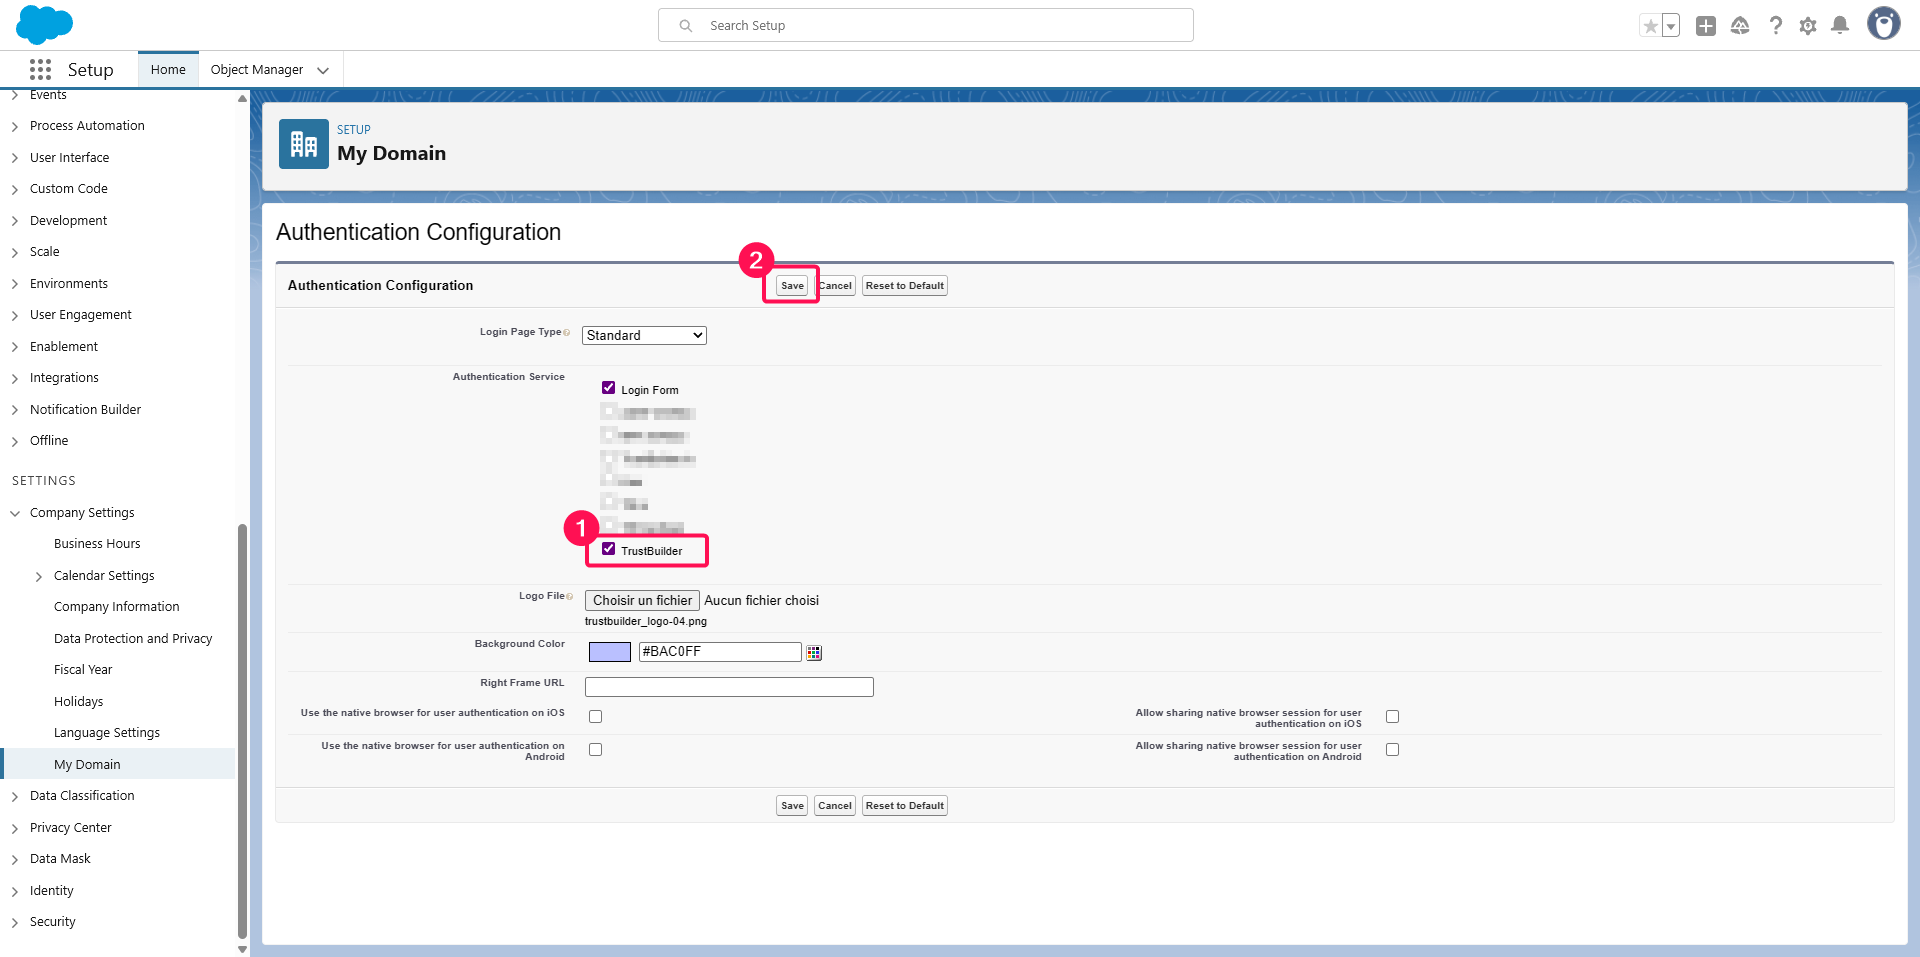
Click Save.
Testing
Be sure to have a TrustBuilder user:
with at least firstname, lastname and email attributes,
with at least one authentication method activated.
Head up to your Saleforce URL,
Select Log in with TrustBuilder.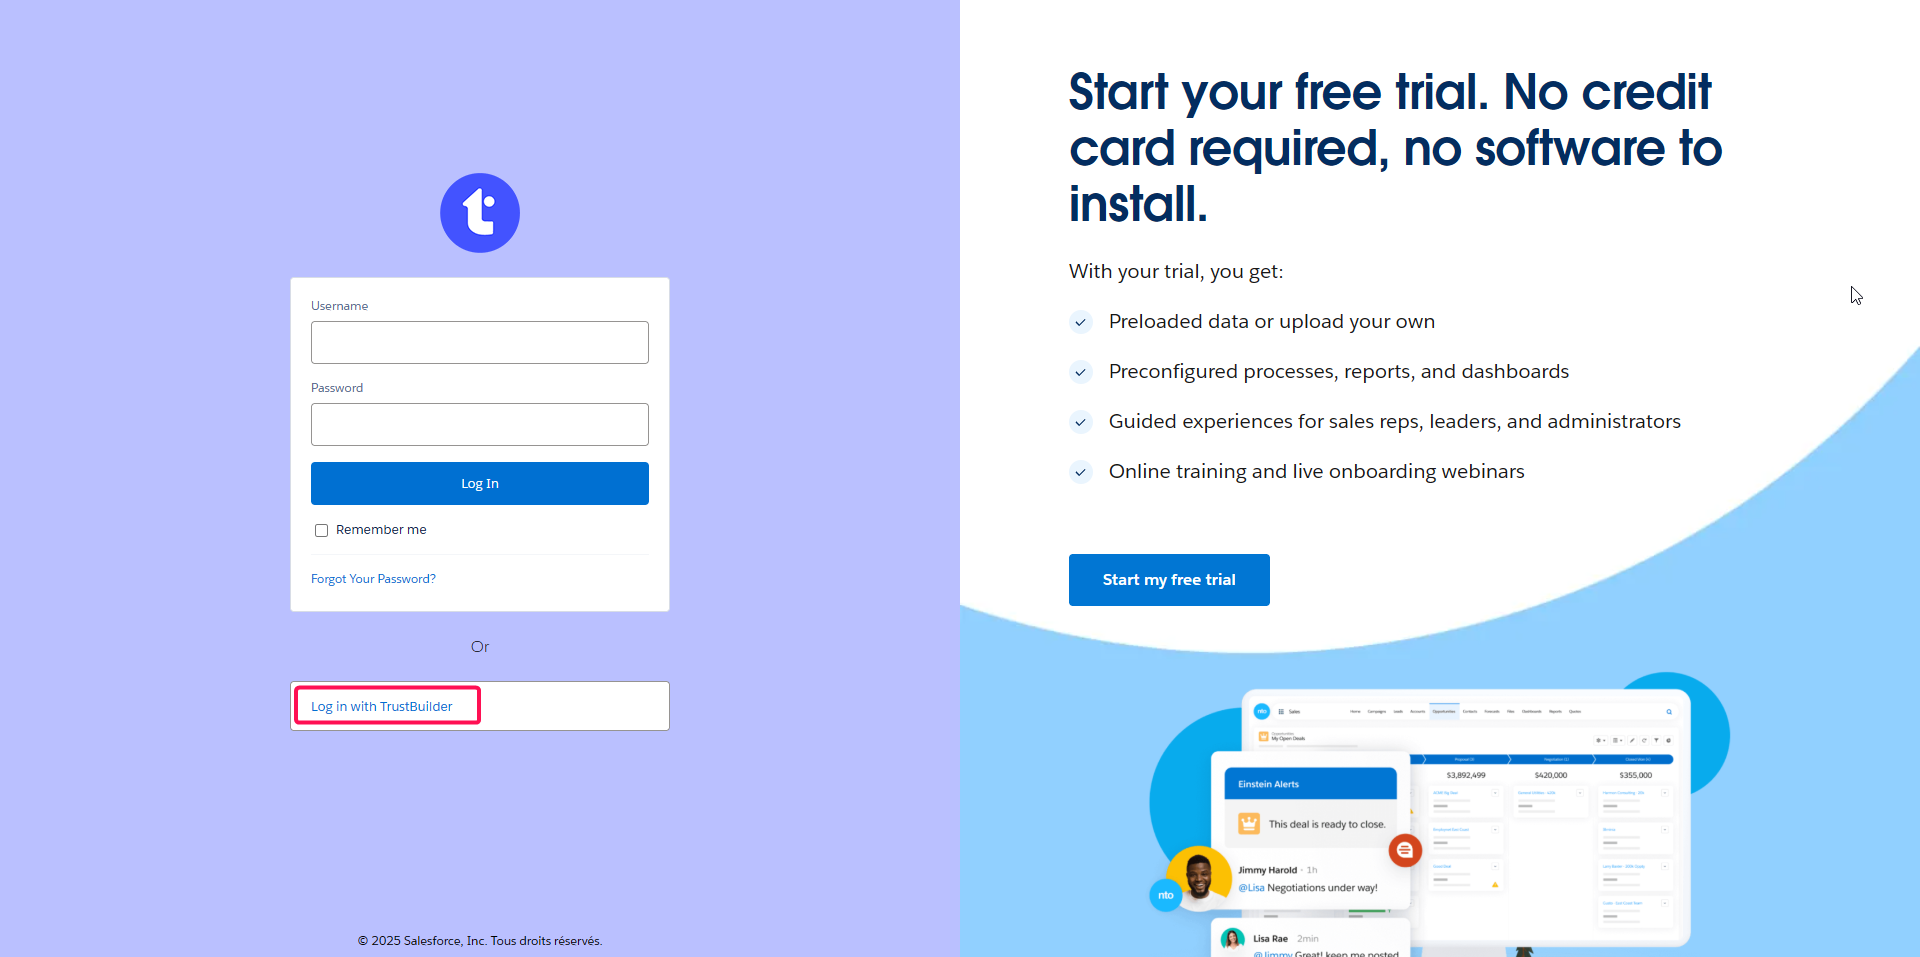
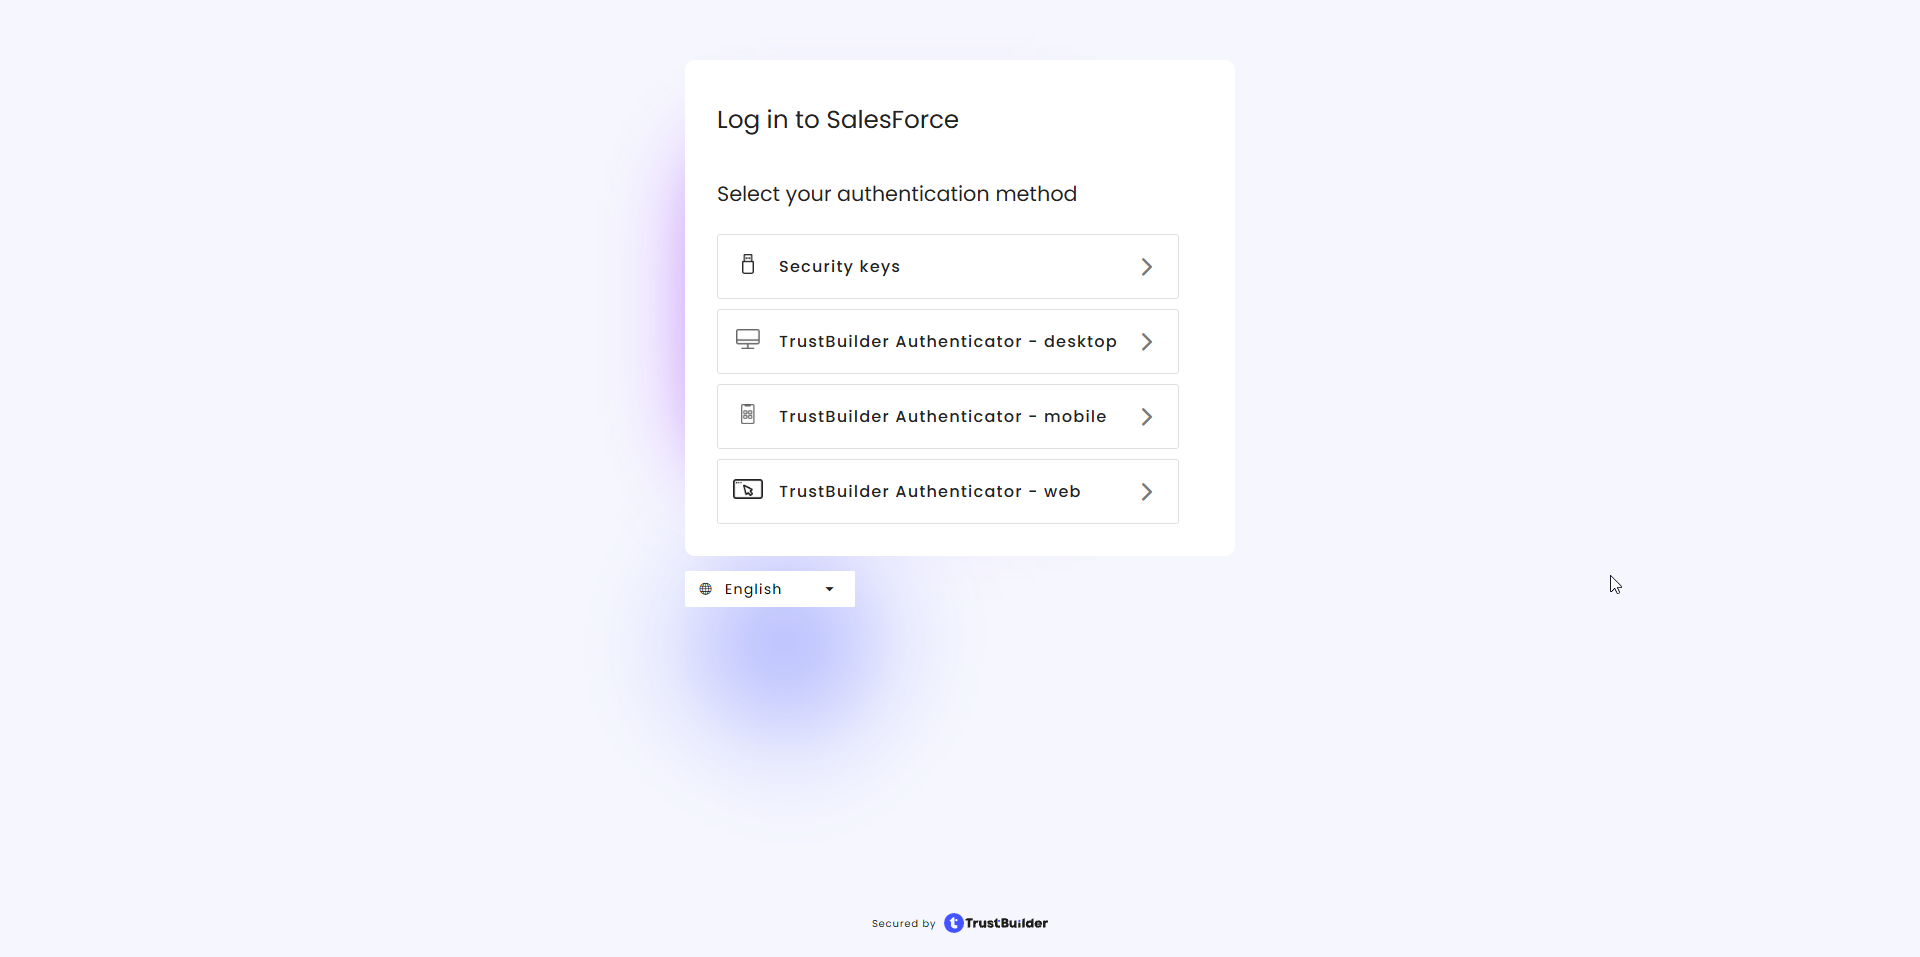
Choose an authentication method activated for the user.
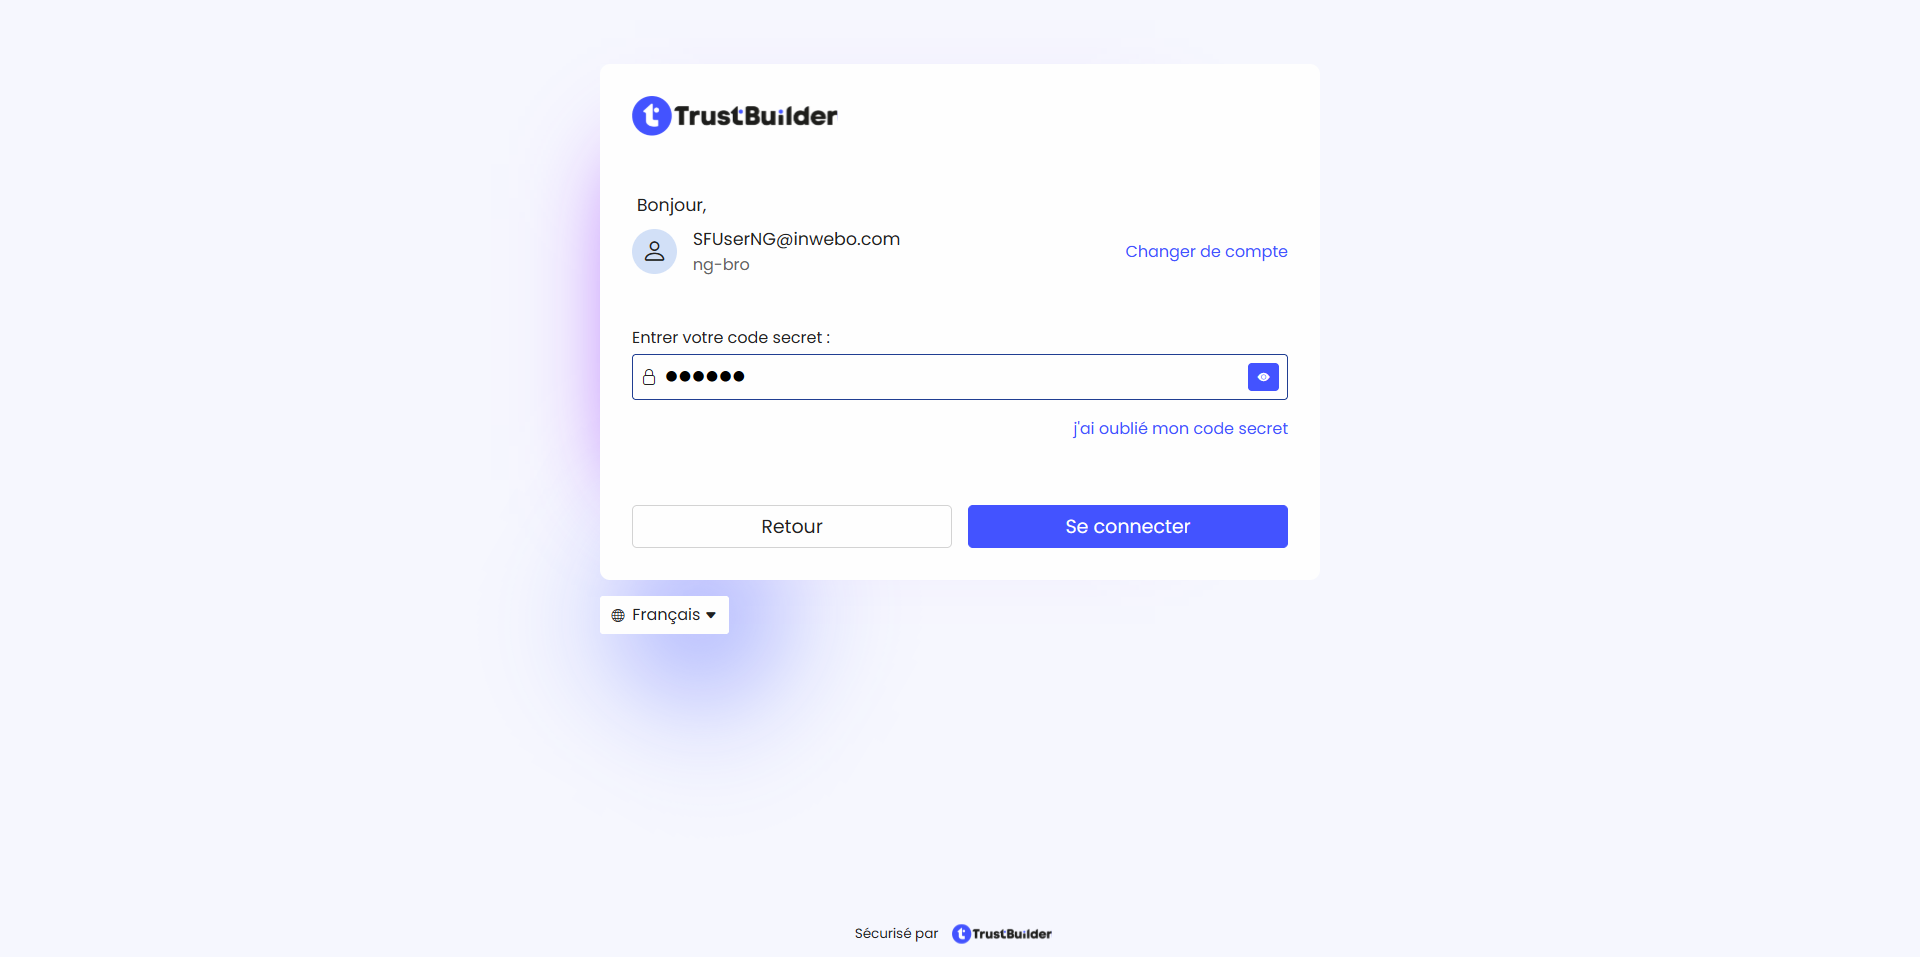
Authenticate.
Grant Access on the showed consent.
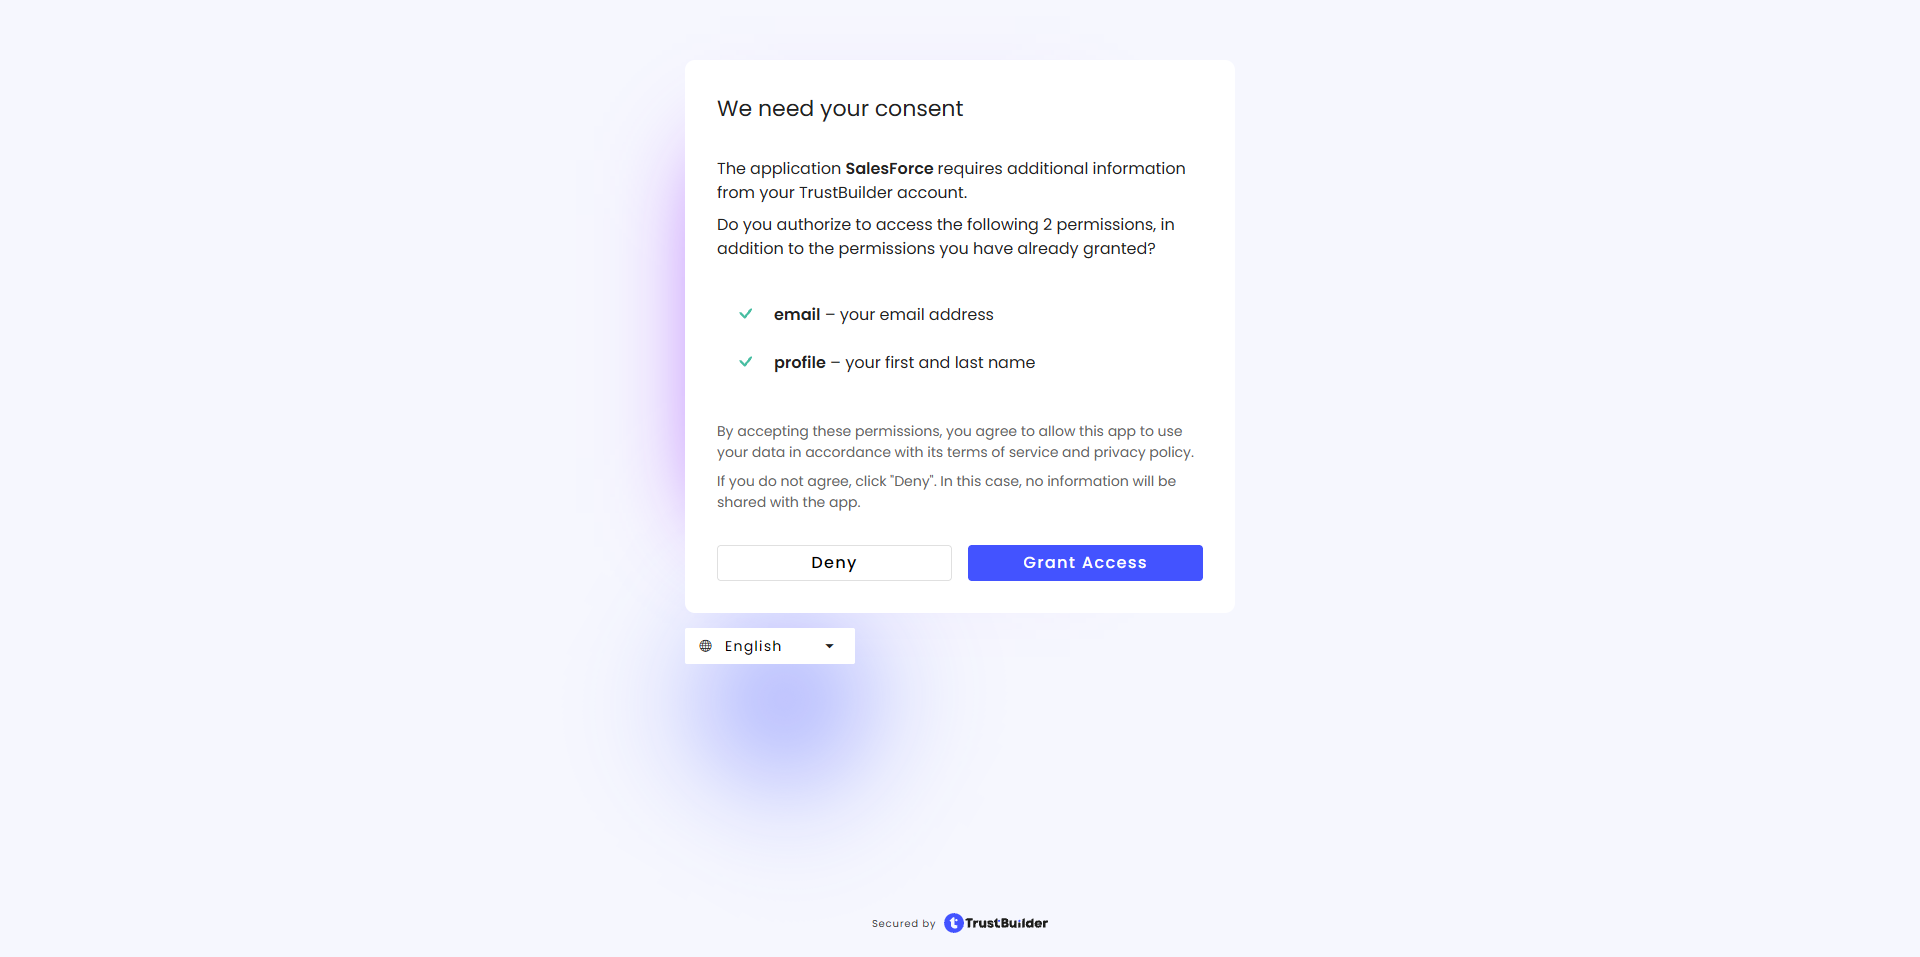
You should be connected to Salesforce with your user.
If the user email address was not an already existing username, the user was created in Salesforce, otherwise the existing Salesforce user is used.
Configuring the APEX Script
User mapping
User mapping between TrustBuilder (the Identity Provider) and Salesforce (the Service Provider) is managed by the Apex script.
The script provided (see Prerequisites above) maps the TrustBuilder user to the Salesforce username using the email address from the TrustBuilder user’s email attribute. This mapping is based on the Subject value in the OIDC ID Token.
If you want to use a different identifier, you must update both:
the OIDC configuration in TrustBuilder (update subect value in the OIDC application configuration)
the Apex script in Salesforce accordingly.
Required attributes
Salesforce requires the following fields for every user: First name, Last name and Email address.
Make sure these attributes are correctly handled in the Apex script, especially when new users are created automatically.
License configuration
The provided script is designed for testing and demo environments.
It creates users with the Chatter Free User license, which is a free Salesforce license.
If you plan to use this setup in production, update the license type in the script (lines 60–63):
// 'Chatter Free User' profile useful for tests and demos as free SF licence
 Profile p = [SELECT Id FROM Profile WHERE Name = 'Chatter Free User' LIMIT 1];

// 'Standard User' profile for production or others, consult SF doc
// Profile p = [SELECT Id FROM Profile WHERE Name = 'Standard User' LIMIT 1];
Extending user attributes
You can extend the script to include or update additional attributes (for example language which is hardcoded in the script). To do this, add additional OIDC scopes and map their corresponding attributes in the Apex script.
Troubleshooting
There is a debug/log system within Salesforce. Once activated you will be able to see the debug of the Salesforce Authentication Framework and the debug of the APEX Script.
The debug will only show APEX script execution NOT OIDC authentication Framework execution.
After enabling debug, if you do not have debug logs this mean that the issue is with OIDC configuration either on TrustBuilder or Salesforce side
This debug logs need to be activated, at 2 different locations at the same time : one in the APEX script itself, and one in the user executing the script.
Both need to be activated to gather debug logs
Connect to your Salesforce organization setup console
Head up to the Settings > Identity > Auth. Providers menu,
Click on the newly created one TrustBuilderClick on the link Registration Handler : OIDCTrustbuilder
Click on Trace Flags tab,
Click on the New button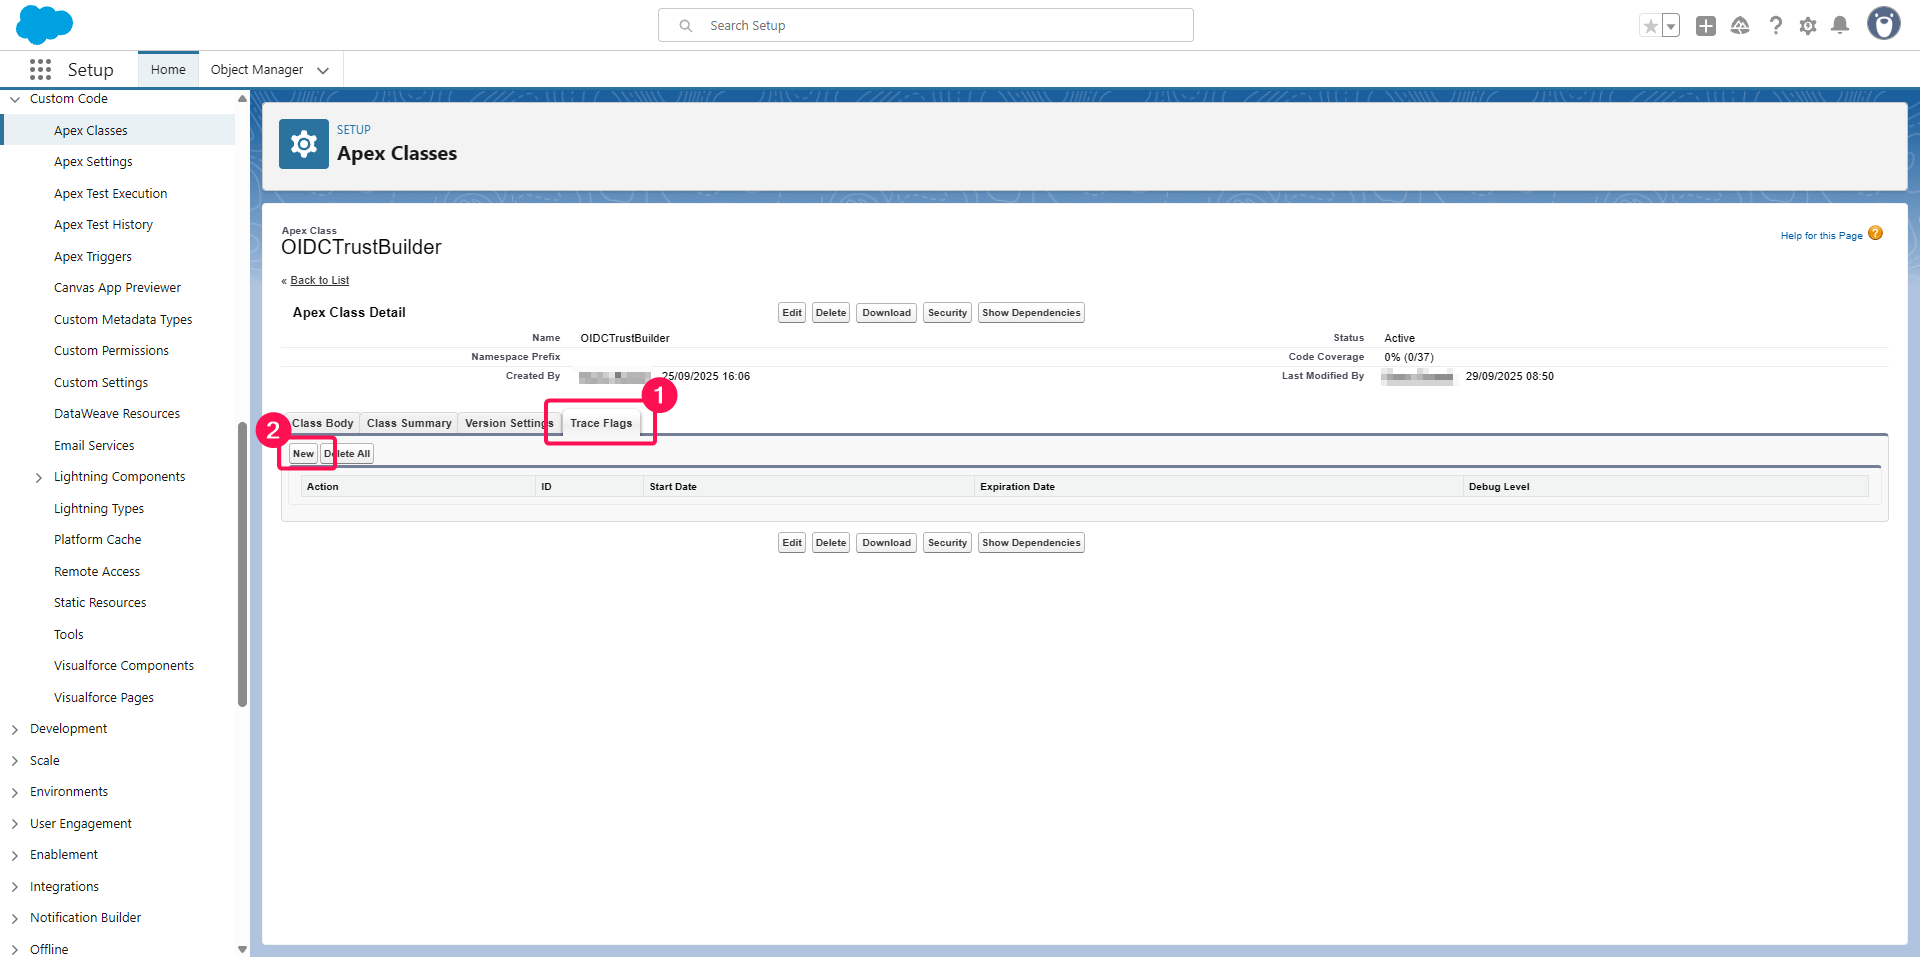
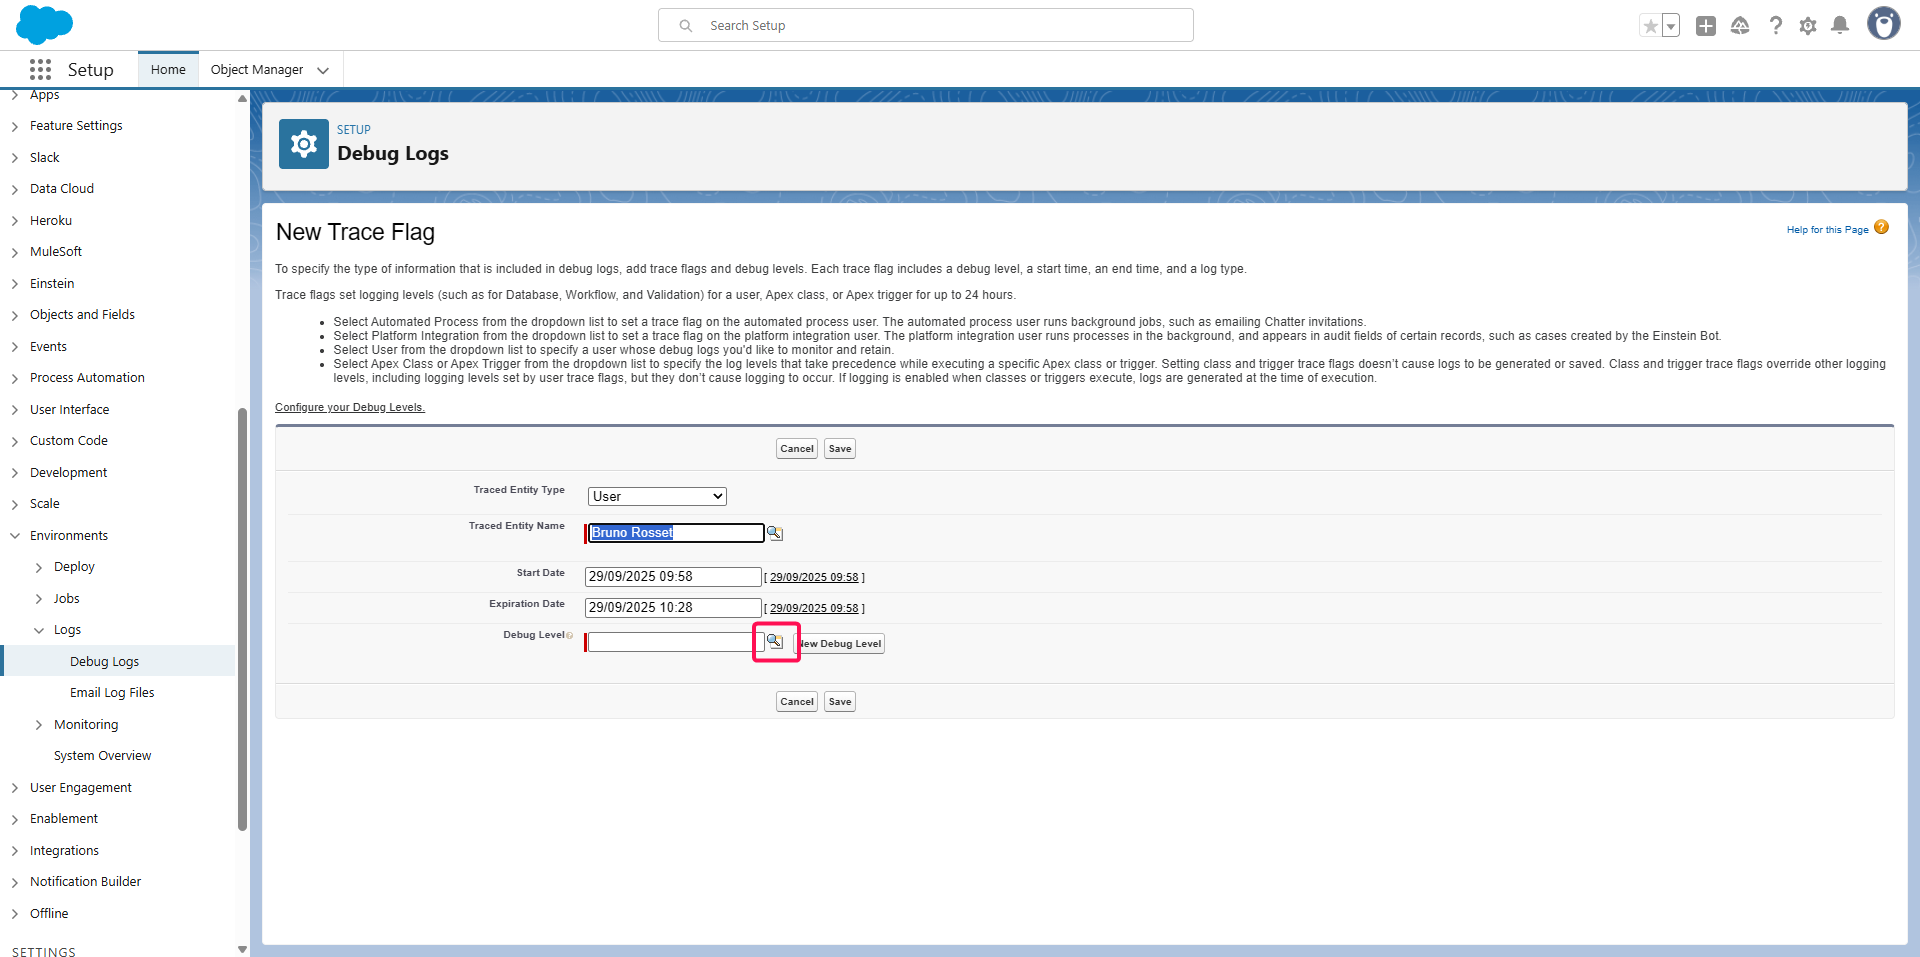
Adjust the time window during which you want to activate debugging with Start Date and Expiration Date,
Click the New Debug Level button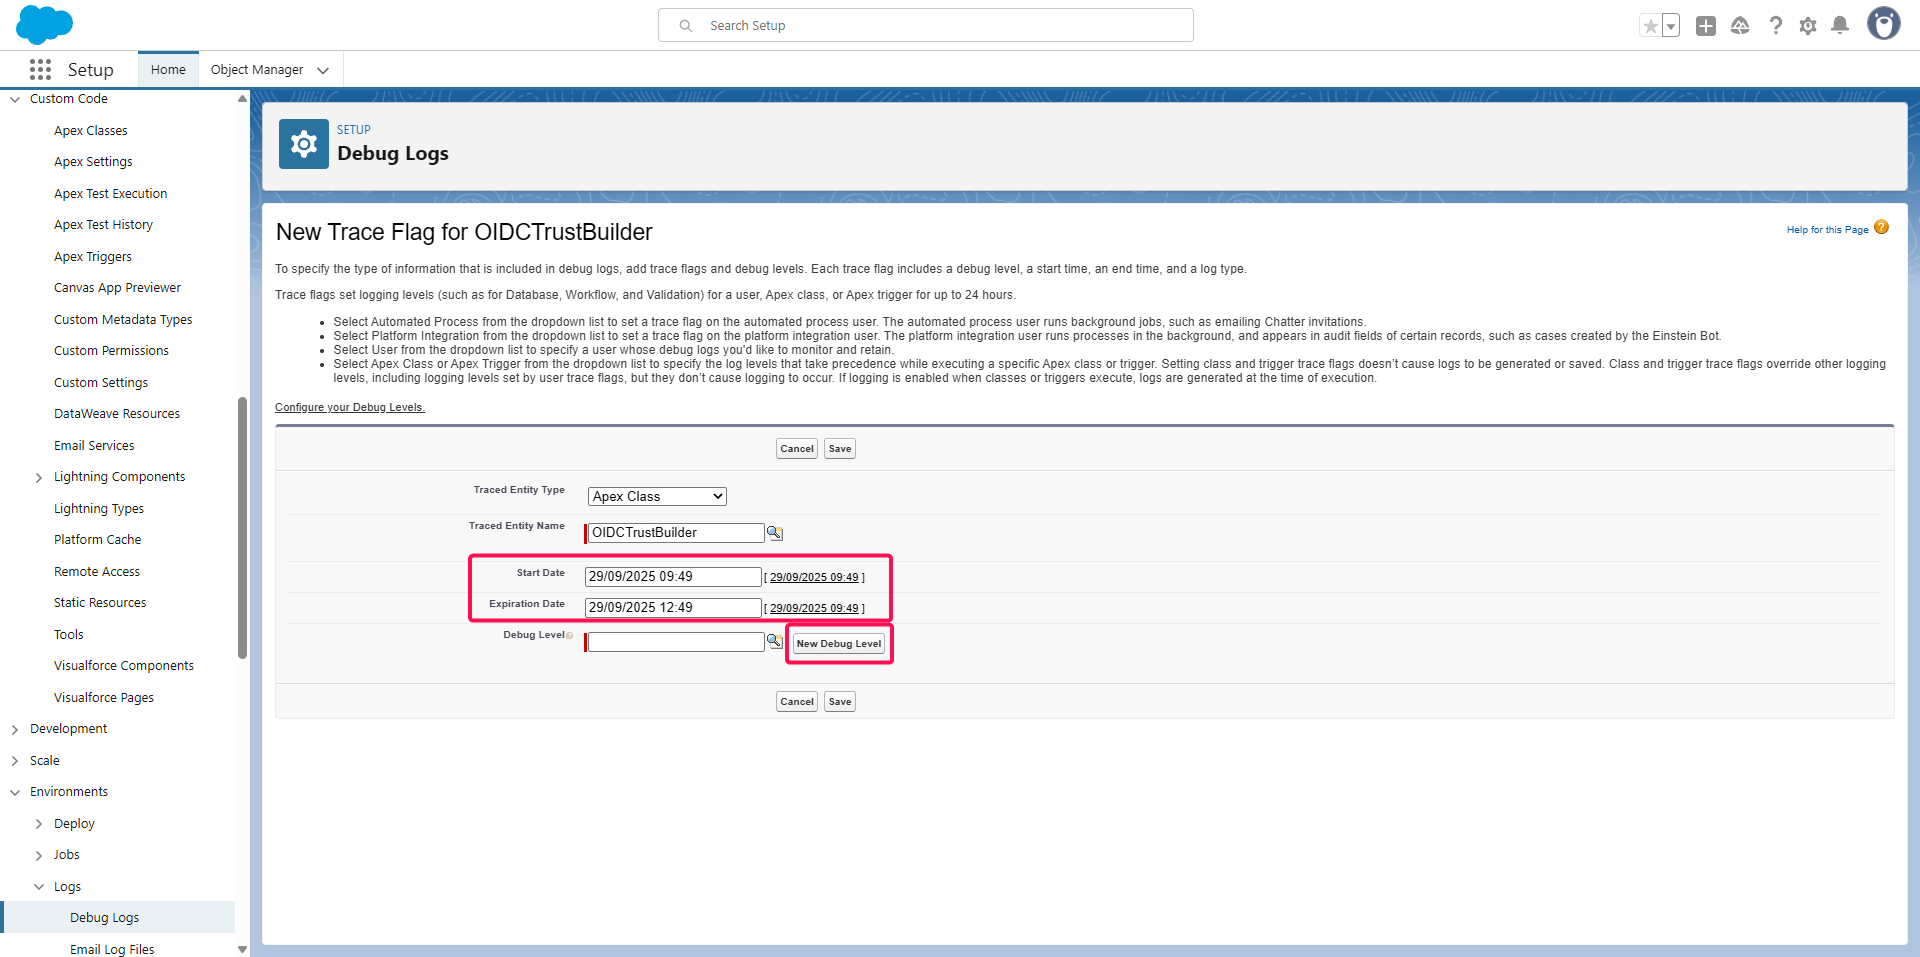
Type a name in the Name field,,
Select Finest in the Apex Code drop-down list,
Click the Save button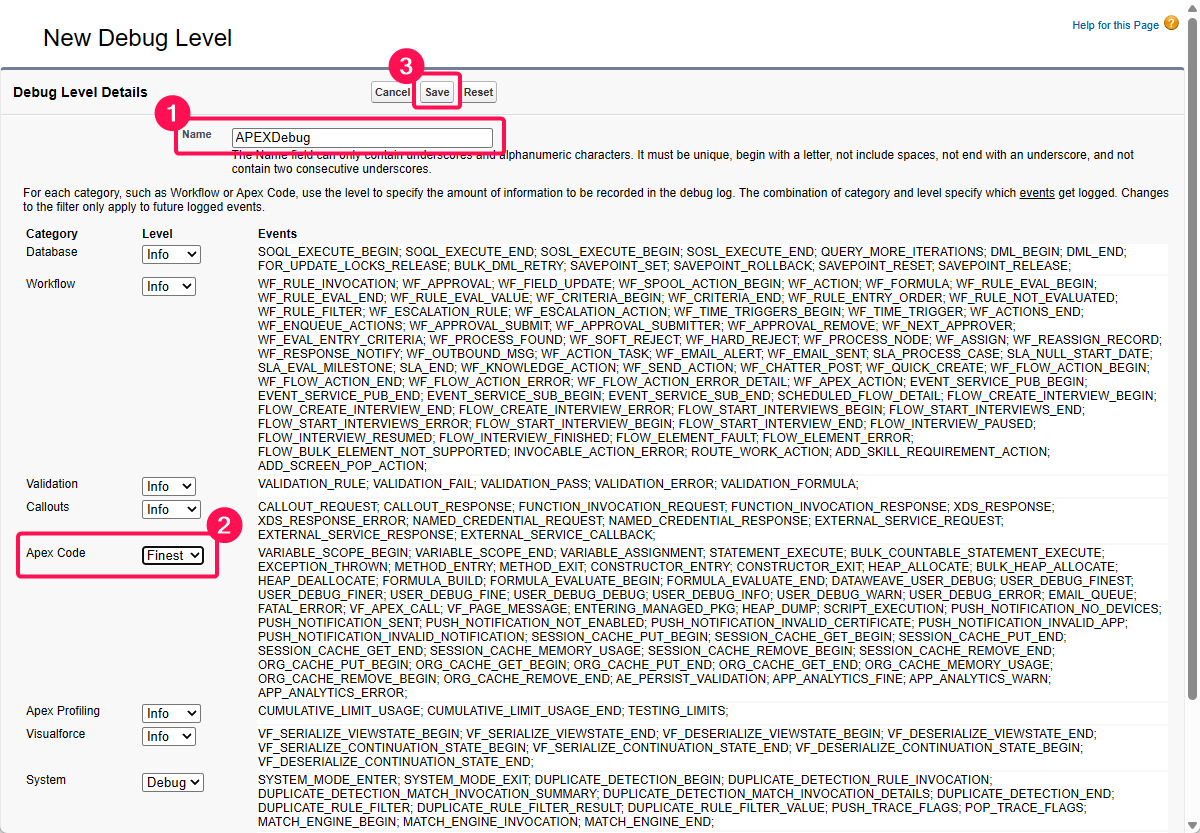
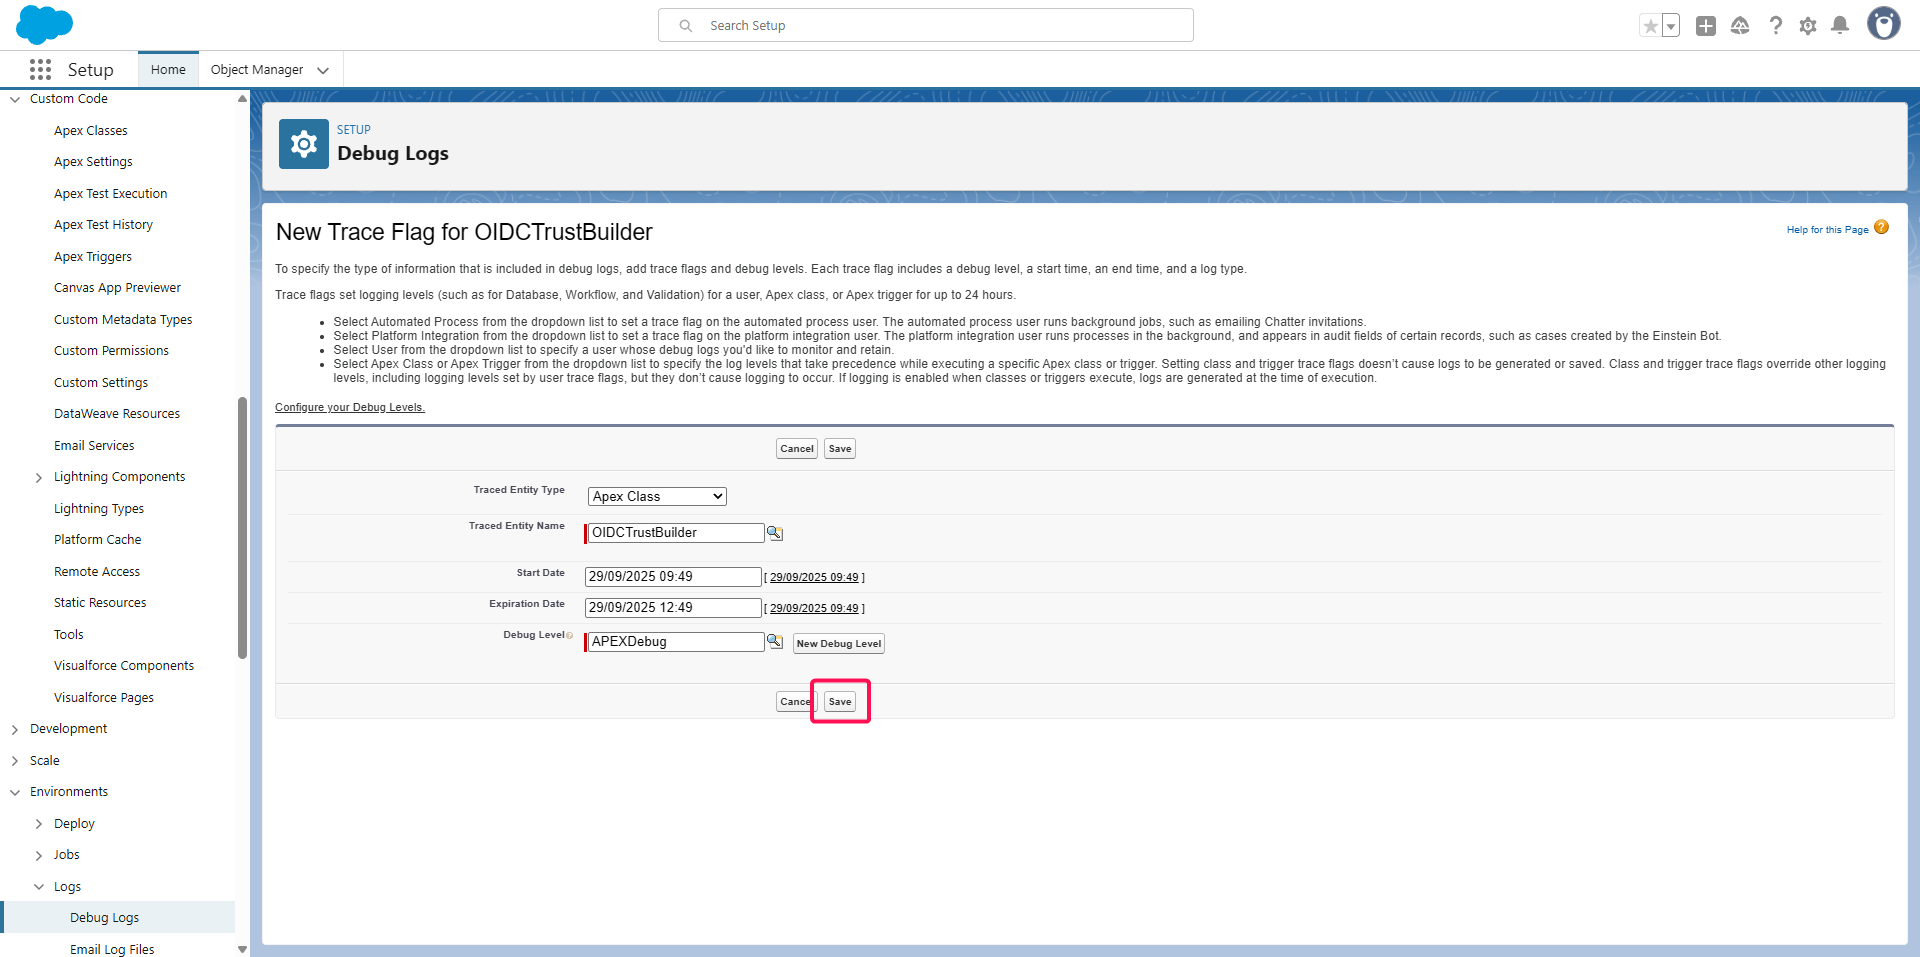
Click the Save button on the previous window
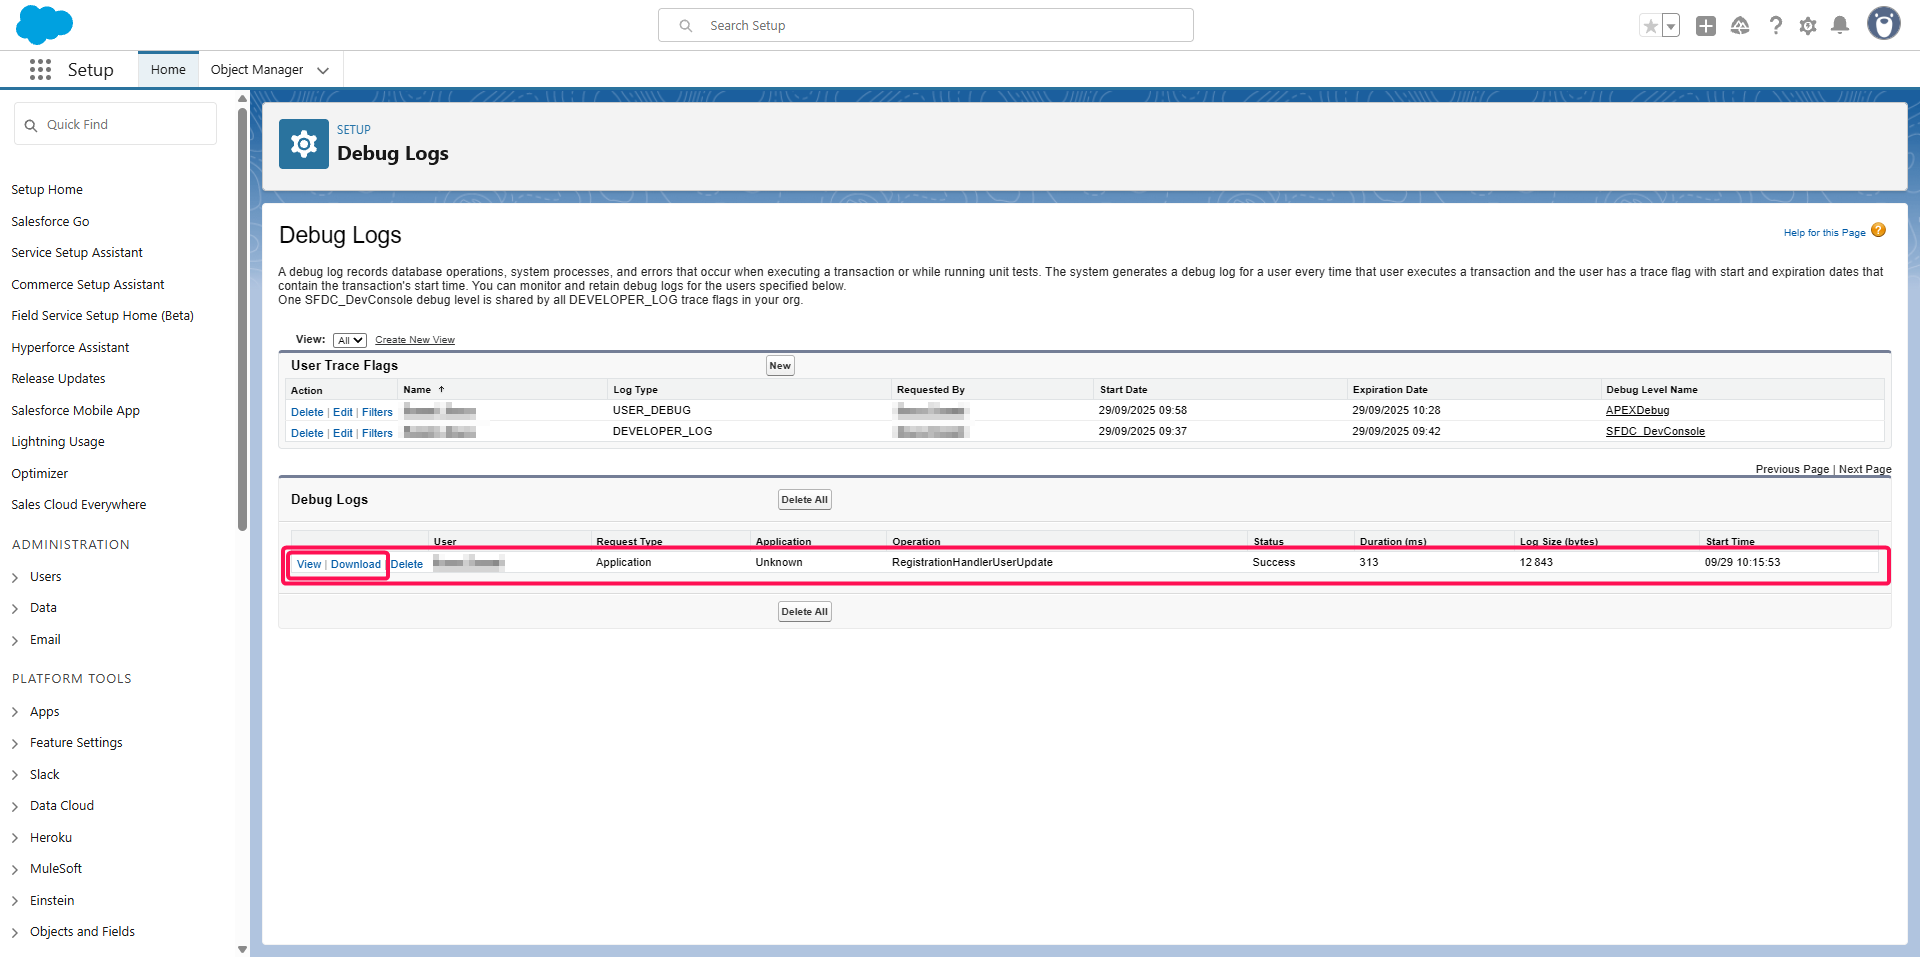
Head up to the Environment > Logs > Debug Logs menu,
Click the New button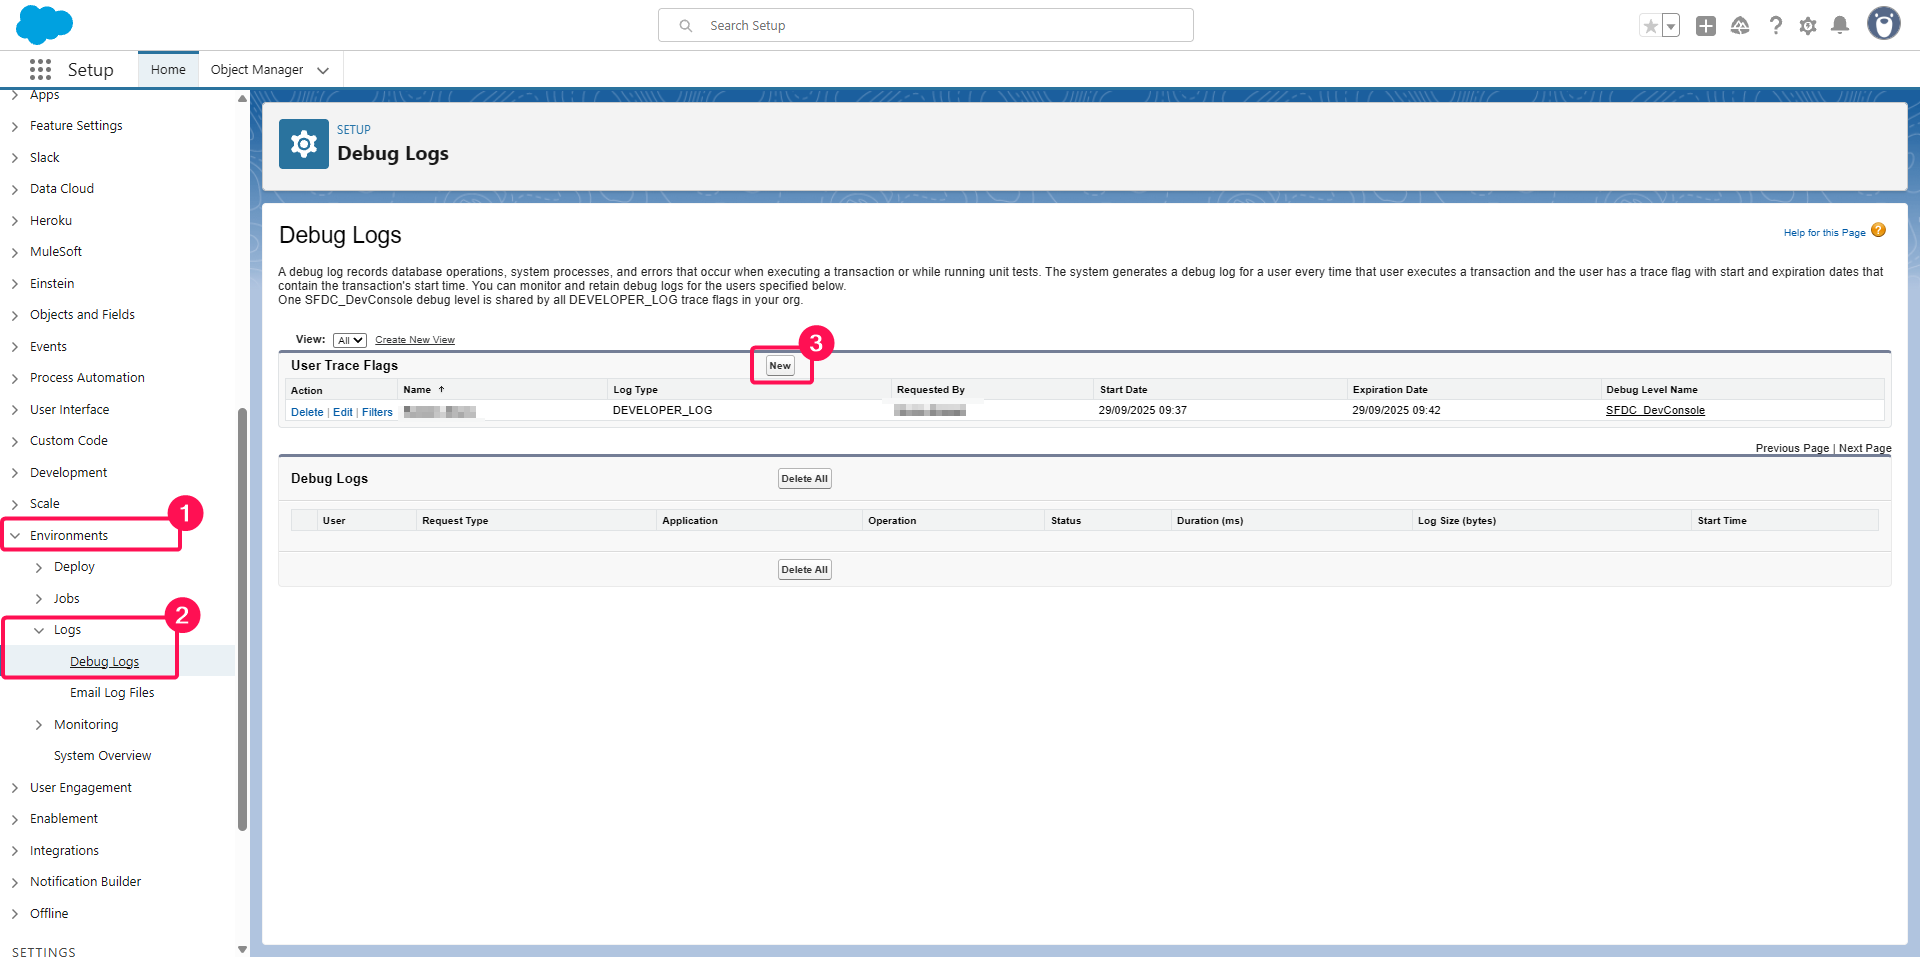
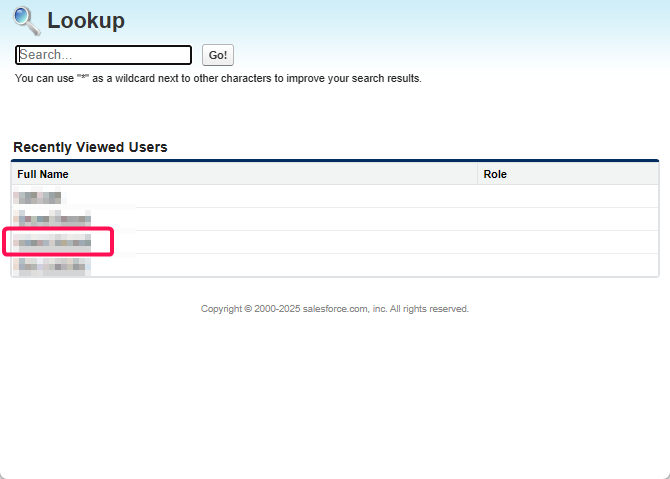
Click on the search button on Traced Entity Name

Select the user you use on Salesforce OIDC Identity Provider, point 9
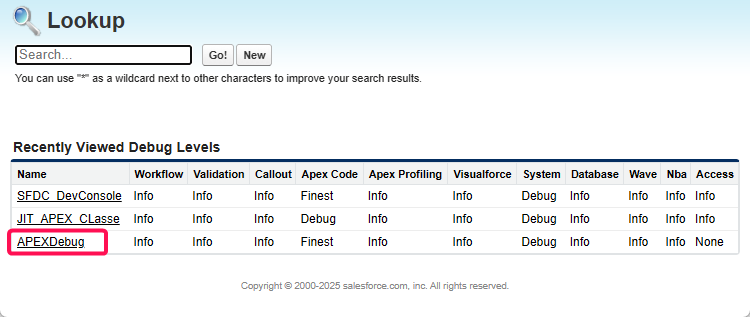
Click on the search button on Debug Level
Select the debug level you created above
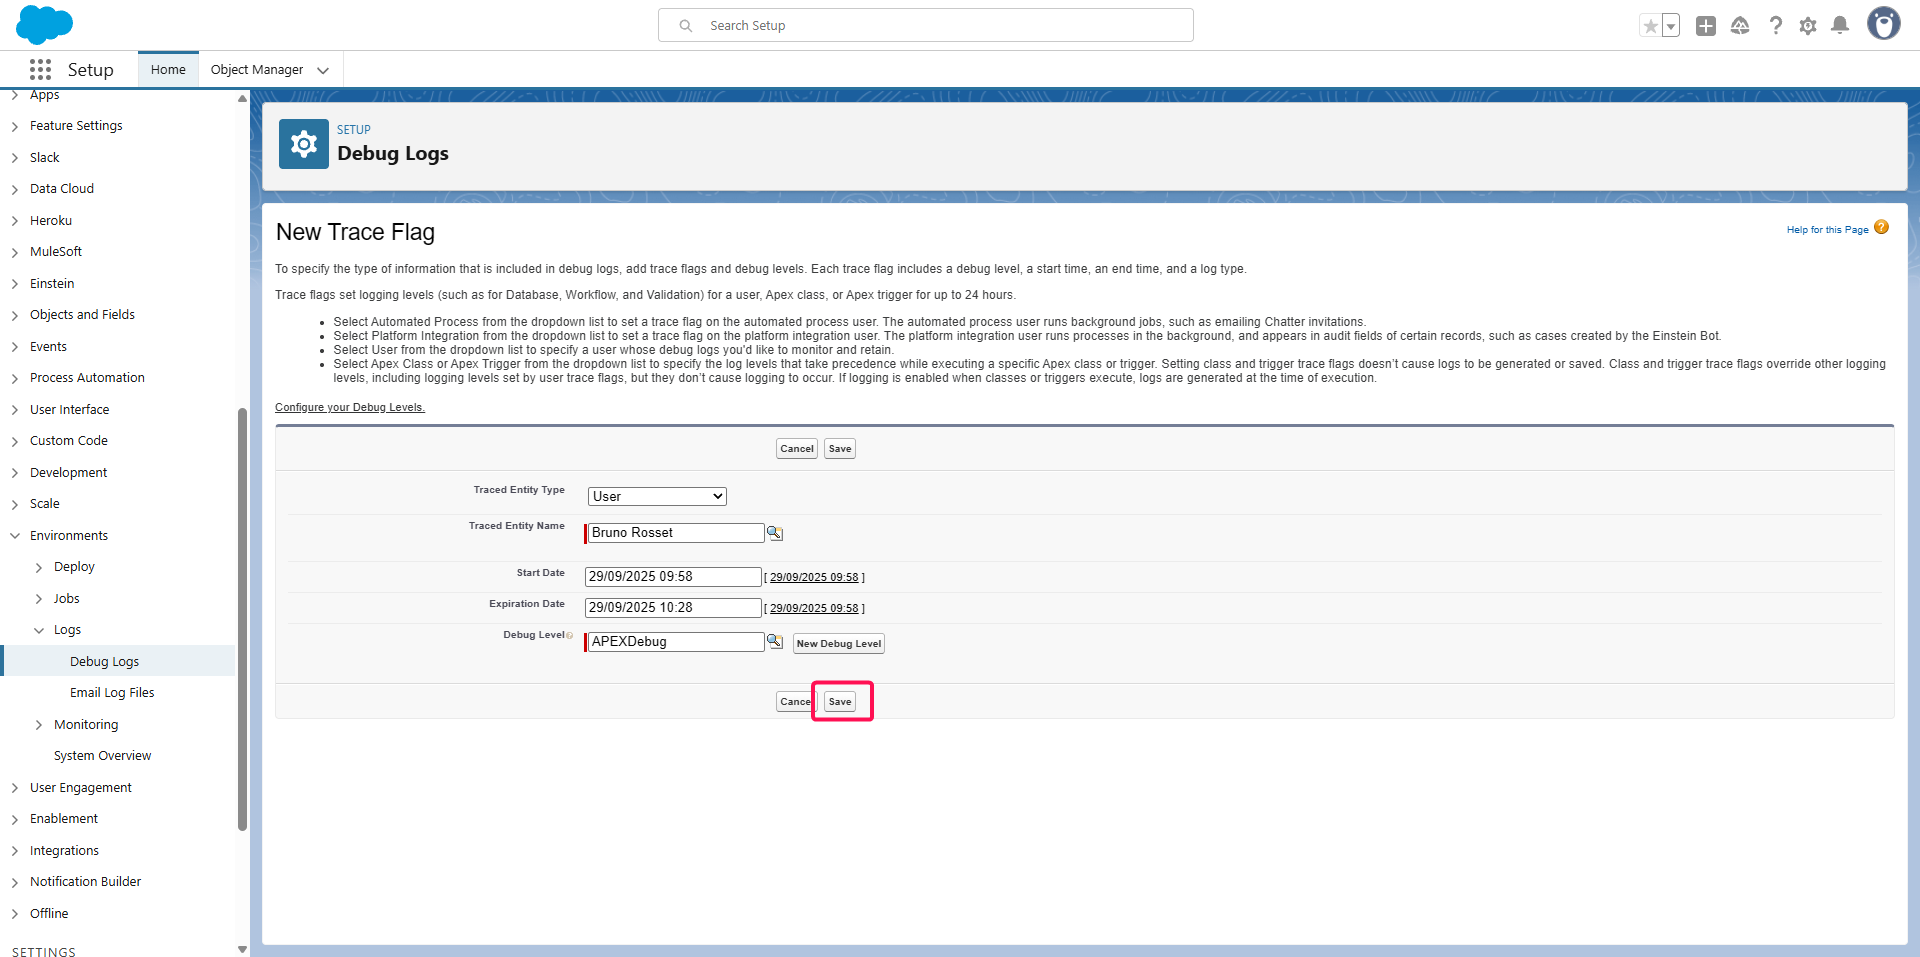
Click on the Save button
Test a user authentication and come back to the Environment > Logs > Debug Logs menu,
Refresh the page,
You should get a new line with the debug logs corresponding to the try
You can view/download the logs