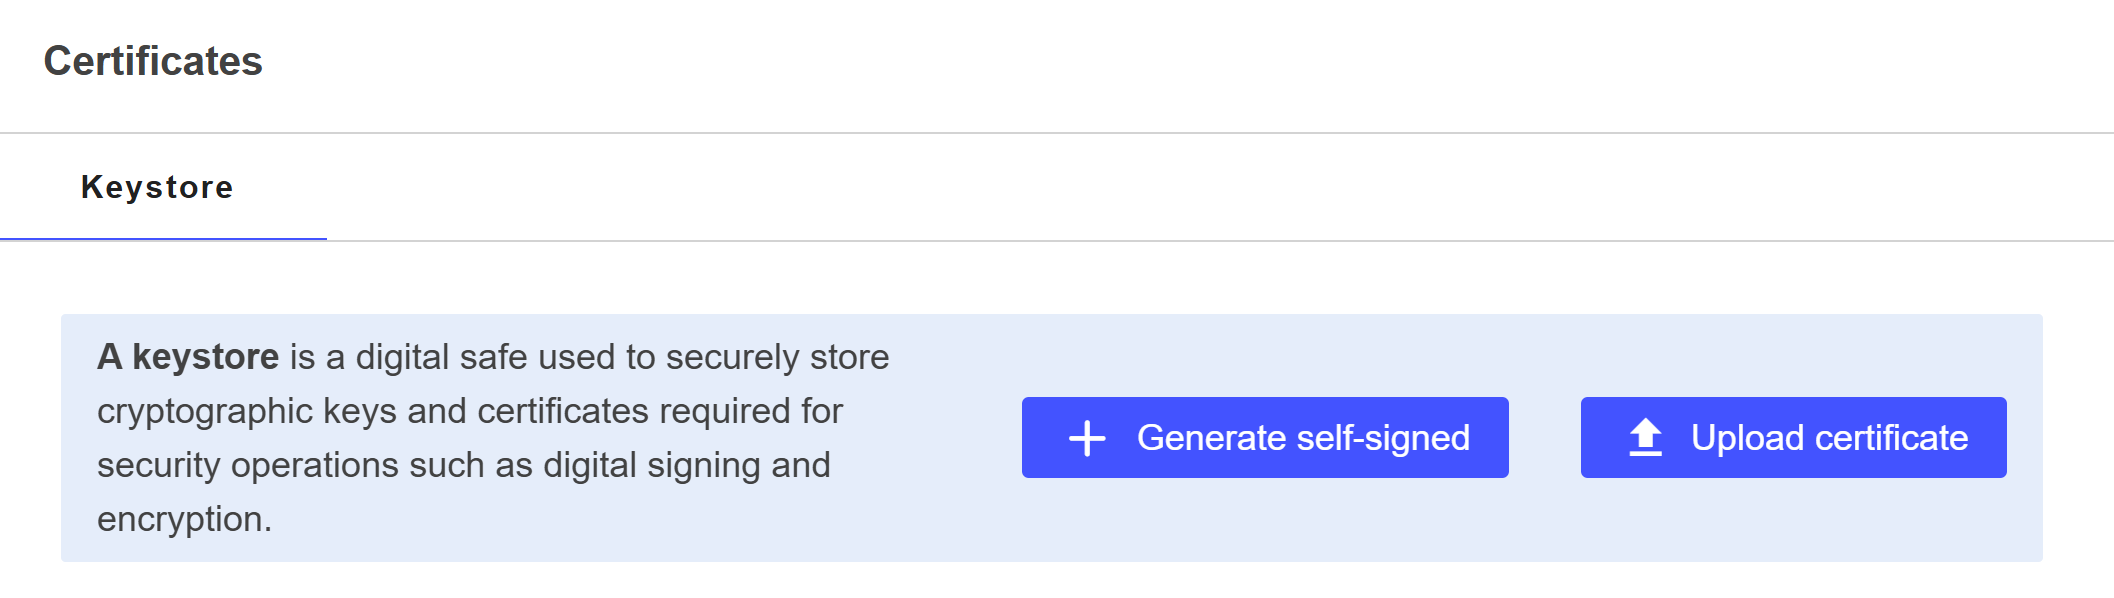
Certificates
Certificates secure communications and data exchanges within the TrustBuilder platform. They are used to digitally sign, encrypt and verify the authenticity of tokens and messages exchanged between TrustBuilder and external systems.
TrustBuilder support both self-signed certificates (which can be generated directly in the Admin portal) and externally issued certificates (which can be uploaded). All certificates are securely stored in the Keystore.
Auto-generated certificates
TrustBuilder automatically creates a self-signed certificate when you configure a new application that requires cryptographic operations, such as token signing.
Generate a self-signed certificate
To generate a self-signed certificate:
Go to Settings > Certificates.
Click on + Generate self-signed.
Click on Start.
Select a Certificate type:
Signature → used to sign tokens (JWT, SAML assertions) so they can be verified by receiving parties.
Encryption → used to encrypt data or messages sent to other systems (e.g., SAML encrypted assertions).
Enter an alias for the certificate.
This is a friendly name that helps you identify the certificate.Select an algorithm:
RSA 2048, 3072, or 4096 bits → widely compatible and commonly used.
RSA 2048 is generally sufficient for most use cases.EC (Elliptic Curve) 256, 384, or 521 bits → offers strong security with smaller key sizes and better performance.
Use EC if you need modern cryptography and your external systems support it.
Click on Generate.
The Subject DN (Distinguished Name) and certificate extensions are automatically filled in by TrustBuilder. These define the certificate’s identity and capabilities.
The self-signed certificate was successfully generated and can be used in your application configuration. You can copy it and export it in PEM or CRT format.
Upload a certificate from an external source
Ensure that the certificates and keys you import are securely managed and only accessible to authorized users to maintain the security of your application.
To upload a certificate or a private key:
Go to Settings > Certificates.
Click on Upload certificate.
Click on Start.
Enter an alias for the certificate or key.
This is a friendly name to help you identify the certificate or key later.
Provide the certificate. Choose one of the following options:
Upload a
.PEMfile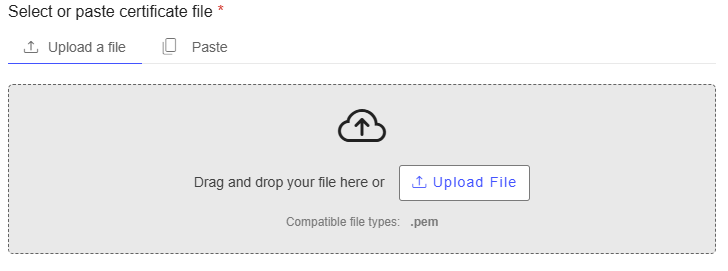
Paste the content of your certificate or key, including the headers:
- for a certificate-----BEGIN CERTIFICATE----- (certificate content) -----END CERTIFICATE-----
- for a private key-----BEGIN KEY----- (key content) -----END KEY-----.Enter a password (if required)
- If your file contains a private key that is encrypted, enter the password.
- Leave blank if no password is needed.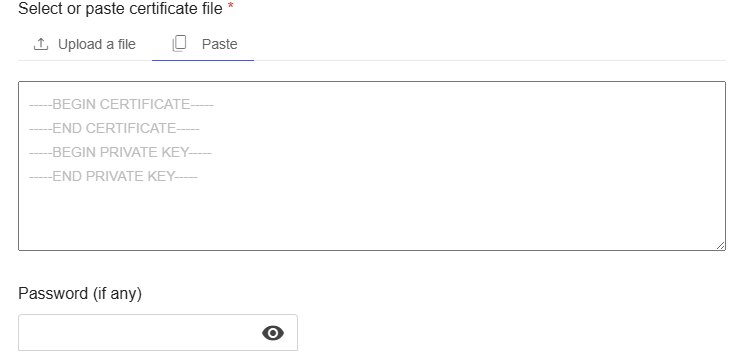
Click on Upload.
The certificate or key was successfully uploaded and can be used in your application configuration.
Manage existing certificates
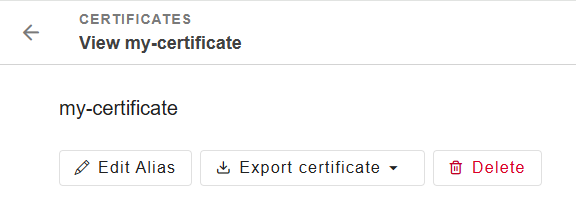
View certificate details
To view the details of a certificate:
Go to Settings > Certificates.
Click on a certificate from the list.
You will see the certificate details:
General | |
Status | The current state of the certificate.
|
Issuer | The entity that issued the certificate. Displayed as a Distinguished Name (DN) including:
|
Valid from | The validity start date and time of the certificate. |
Valid to | The expiration date and time of the certificate. ⚠️ Once expired, the certificate should not be trusted or used. |
Used in | Specifies where the certificate is used within the tenant. It is mainly Applications. |
Details | |
Version | The X.509 standard version of the certificate. Version 3 is the most commonly used, supporting extensions and more metadata. |
Serial Number | A unique identifier for the certificate. |
Subject DN | The entity the certificate is issued to. Displayed as a Distinguished Name (DN) including:
|
Signature algorithm | Specifies the cryptographic algorithm used to sign the certificate. |
Signature value | The digital signature generated by the issuer. |
Certificate | The certificate content in Base64 format (PEM-encoded) |
Edit a certificate alias
To edit the alias of a certificate:
Go to Settings > Certificates.
Click on a certificate from the list.
Click on Edit Alias.
Enter an alias.
Click Save.
Delete a certificate
Deleting a certificate is irreversible and may impact any systems or applications relying on this certificate for secure communication.
To delete a certificate:
Go to Settings > Certificates.
Click on a certificate from the list.
Click on Delete.
Click on Yes, delete to confirm the action.
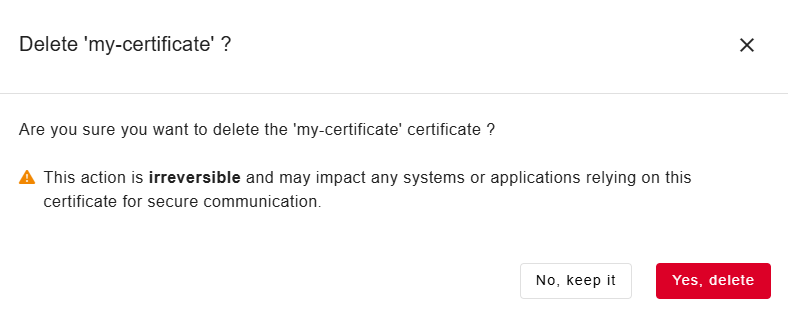
The certificate is successfully deleted.
You can’t delete a certificate used by at least one application.